Gust- post #1

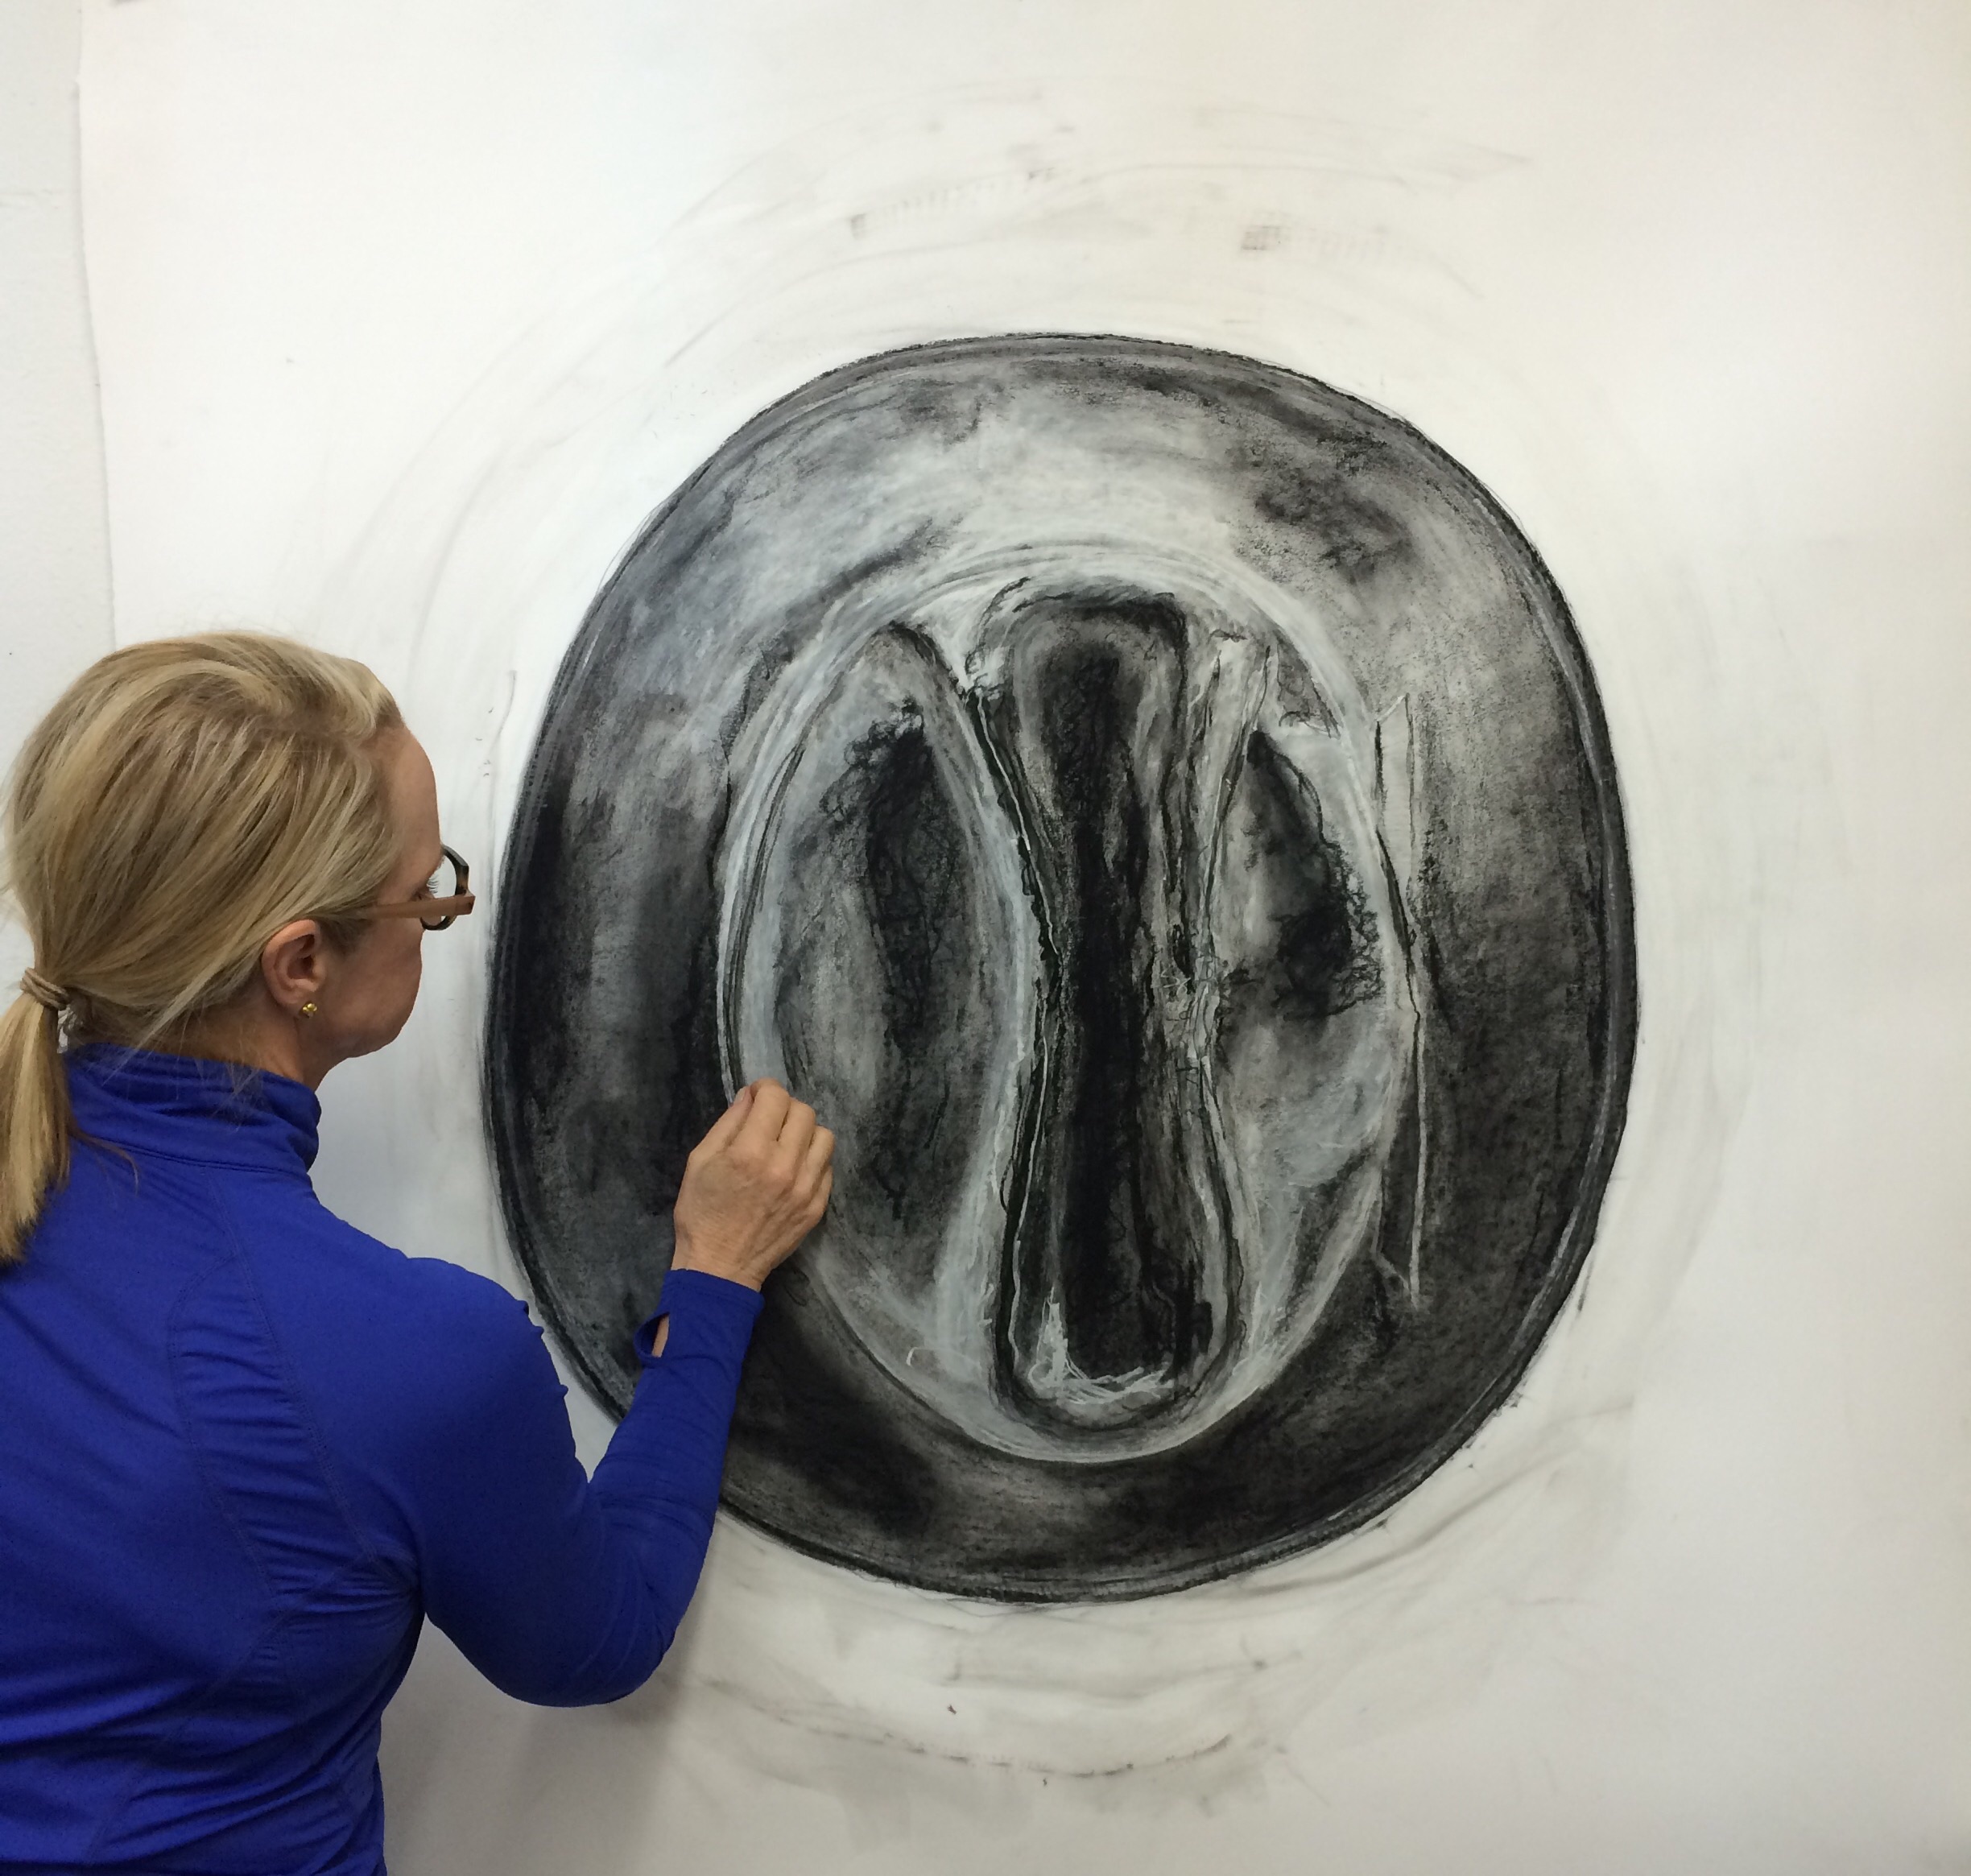
In 2013  I had an idea for a sculpture composed of a series of bronzes hats caught in a gust of wind. As the hat blows, and tumbles it changes shape. I could visualize the cool abstract shapes the wind could force the hat into. I have a lot of experience with wind as I grew up in the west Texas town of El Paso and spent my early years on a Cotton farm in Dell City, Texas. I am all too familiar with the power the wind can have.  

The last piece of the series in wax. The last piece is completely  flattened. This last piece may end up flat against a wall. 

The last piece of the series in wax. The last piece is completely  flattened. This last piece may end up flat against a wall. 

Here is the piece sprued up. I have attached the system that will create the cavity the bronze travels through to get into the sculpture.  

image.jpg
Blind vents in place  

Blind vents in place  

Above I have attached the blind vents that will allow the gasses to exit when the bronzes is poured.  


Below I have added the return vents. When the bronze fill the piece the gases will exit the piece through the cavities created by these last two cents.  

Return vents added

Return vents added

To see how this piece develops  subscribe to the blog at the end of the last post on my website blog. Cindeeklement.com

Drawing experiment post #2 the abstraction

Step #2 draw a few abstracts of the same object that I drew a rendering of.


Rendering of hat  

"Heritage rendering" 48" X  50" 

"Heritage rendering" 

48" X  50" 

The first abstraction  

"heritage - simple abstract"30" X 22" inkI also did a "scream" parady (not for public view), very goofy. 

"heritage - simple abstract"

30" X 22" 

ink

I also did a "scream" parady (not for public view), very goofy. 


I ended up drawing 16 plus abstractions of hats. I decided to change to the second hat in my sculpture series "Gust".  Some of these drawings are temporarily on exhibit at Glassell near the drawing class.

Glassell near drawing room. 

Glassell near drawing room. 

I will post a few of these separately.  It took me about 12 hats until I loosened  enough to get something I liked. Looking back at these drawings in  order you can see the gradual changes I made in strokes and materials. When I compare the first with the last  I realize why abstract art is so interesting. 

To receive the post in an email you can sign up at trend of the blog on my website cindeeklement.com

From wax to a bronze sculpture I

It will take several post to cover this topic. 

Wax sculpture (still thinking of names but for now I am liking sweet serendipity).  

Wax sculpture (still thinking of names but for now I am liking sweet serendipity).  

 Step 1- I will make a ceramic shell of the wax sculpture. Then I will burn the wax out of the shell and pour in the bronze.  But first I have to add a system  of wax channels to the piece in order to have a way to get the bronze into the ceramic shell.  I made a wax cup and attached a 1" wax sprue to the bottom of the cup. The sprue is used to attach the cup to the sculpture. The cup will be the opening the bronze is poured into. I  inserted a hanger into the cup to use to hold the piece while building the ceramic shell.   Now that I have a channel to get the bronze in the sculpture I need  channels to get the gases out. If you don't get the gases out you will have air pockets and the bronze will not fill the piece. Since the bronze will push the gases through the piece I will attach sprues at the bottom and attach them to the top of the cup. I attached small sprues to tiny areas like fingers to make sure gases do not block the bronze from filling the shell. 

image.jpg

This piece is ready to start dipping and building up the shell. The Glassell foundry is having growing pains and it will be a few weeks until I can start dipping this piece. You can sign up at the end of  the blog to get emails if you want to make sure you do not miss any steps of this blog post.

Drawing experiment


Drawing assignment - experiment with rendering and then abstraction.  Step one  - draw a rendering of a common object. Not my favorite thing but I have decided to embrace new ideas even when I am not fond of them.  

I drew  a black and white MONUMENTAL rendering  of one of my bronze hats "heritage".  I drew it from a photo Curtis took of the piece  while it was on exhibit at Kinder Morgan last 2014.

Photo of "heritage" on exhibit at Kinder Morgan

Photo of "heritage" on exhibit at Kinder Morgan


In my drawing I decided to exaggerate the shadows - as the photo is very well lit and there are few shadows.  I do not really enjoy rendering and it was all I could do to not draw it in a more spontaneous style. I guess experiments should make you feel uncomfortable............................. 

Sadly I fudged from a realistic rendering- just could not make the beast in me  just - render.  

A day after I drew the hat I took a long look at the drawing   -   I think it already looks abstracted probably because the hat is about 3' tall and the exaggerated contrast is harsh.  I have maybe failed the 1st step of the experiment. 

image.jpg

The class instructor Brian Portman very subtly suggested I add a touch of color. My experience with Brian's suggestions is that he is knows what he is talking about. I decided to add a touch of walnut oil. I think it was the perfect add.  Brian is not only a gifted artist but a great instructor. 

 "rendering of heritage"    With the walnut oil

 "rendering of heritage"    With the walnut oil

 Step two will be in an upcoming post. You can sign up to receive post in your email at the very end of the blog. 

Headstand post #7 more armature

I have had problems with gravity making the legs sag. Now that I know how I am going to arrange them they can not change. In order to insure they don't sag I am going to add sprues supported by dowels between the extended parts of each piece.  

image.jpg
Me reinforcing the armature at the new temporary foundry/sculpture studio at Glassell. I love this place and the people. 

Me reinforcing the armature at the new temporary foundry/sculpture studio at Glassell. I love this place and the people. 

Headstand sculpture post #6

Thursday I decided on a composition of the three pieces that I like. I apologize for the horrible picture  I was working at Glassell and there was not a great place to take a picture of the composition. 

Composition of three pieces together.  

Composition of three pieces together.  

Headstand sculpture post #5 -third piece

image.jpg


I finally made progress on the third character. When completed the sculpture will be a composition of 3 young children attempting to balance on their heads. I am hoping to be able to capture how the energy and balance of each child effects the others. I took many years of ballet and gymnastics when I was younger and I found it interesting to see one person loose balance  and then everyone loose their balance  without anyone touching. The force or the energy between objects that you can't see is what I am hoping to capture with these playful pieces. 


I I will post the day to day progress on my website blog. At the end of the blog there is a place to sign up for the email.  

Headstand sculpture post #4 -second piece.

I started this project this August and was sidetracked, however today I made some progress on the second headstand. When completed the sculpture will be a composition of 3 young children attempting to balance on their heads. I am hoping to be able to capture how the energy and balance of each child effects the others. I took many years of ballet and gymnastics when I was younger and I found it interesting to see one person loose balance  and then everyone loose their balance  without anyone touching. The force or the energy between objects that you can't see is what I am hoping to capture with these playful pieces. 

I love little girls with pigtails.  

I love little girls with pigtails.  

I will continue to post the progress of this sculpture on my website blog under headstand sculpture. At the end of the blog you can sign up for the email.  

Headstand sculpture post #6- solution to sculptures falling

I have had problems with these headstand sculptures falling. I have to work on each piece separately and also with them as a unit tweeking  them here and there. And sometimes they fall breaking arms, and necks. It is very irritating. Today I figured out a way to work on them individually and as a group and still be able to move them around. I stuck tooth picks in their heads and glued them firmly with hot sticky glue. 

image.jpg

Then I took a styrofoam ice chest and stick the toothpicks into the styrofoam. This allows me to work with the positioning of the three pieces.  


Ice chest

Ice chest

Now I can play with the placement of the three headstands. Below are a few trials but none that I like. 

image.jpg
image.jpg
image.jpg

I will continue to post the progress of this project. To receive the post by email go to the very end of my website blog.  

Headstand sculpture post #3 -1 first piece.

I started this project this August and was sidetracked, however today I made a lot of progress. When completed the sculpture will be a composition of 3 young children attempting to balance on their heads. I am hoping to be able to capture how the energy and balance of each child effects the others. I took many years of ballet and gymnastics when I was younger and I found it interesting to see one person loose balance  and then everyone loose their balance  without anyone touching. The force or the energy between objects that you can't see is what I am hoping to capture with these playful pieces. 

The first of three pieces  of a new sculpture in wax. To be cast in bronze. 

The first of three pieces  of a new sculpture in wax. To be cast in bronze. 

This will probably be the center headstand kid. Can you tell how he is trying to steady himself over his head by separating his legs?