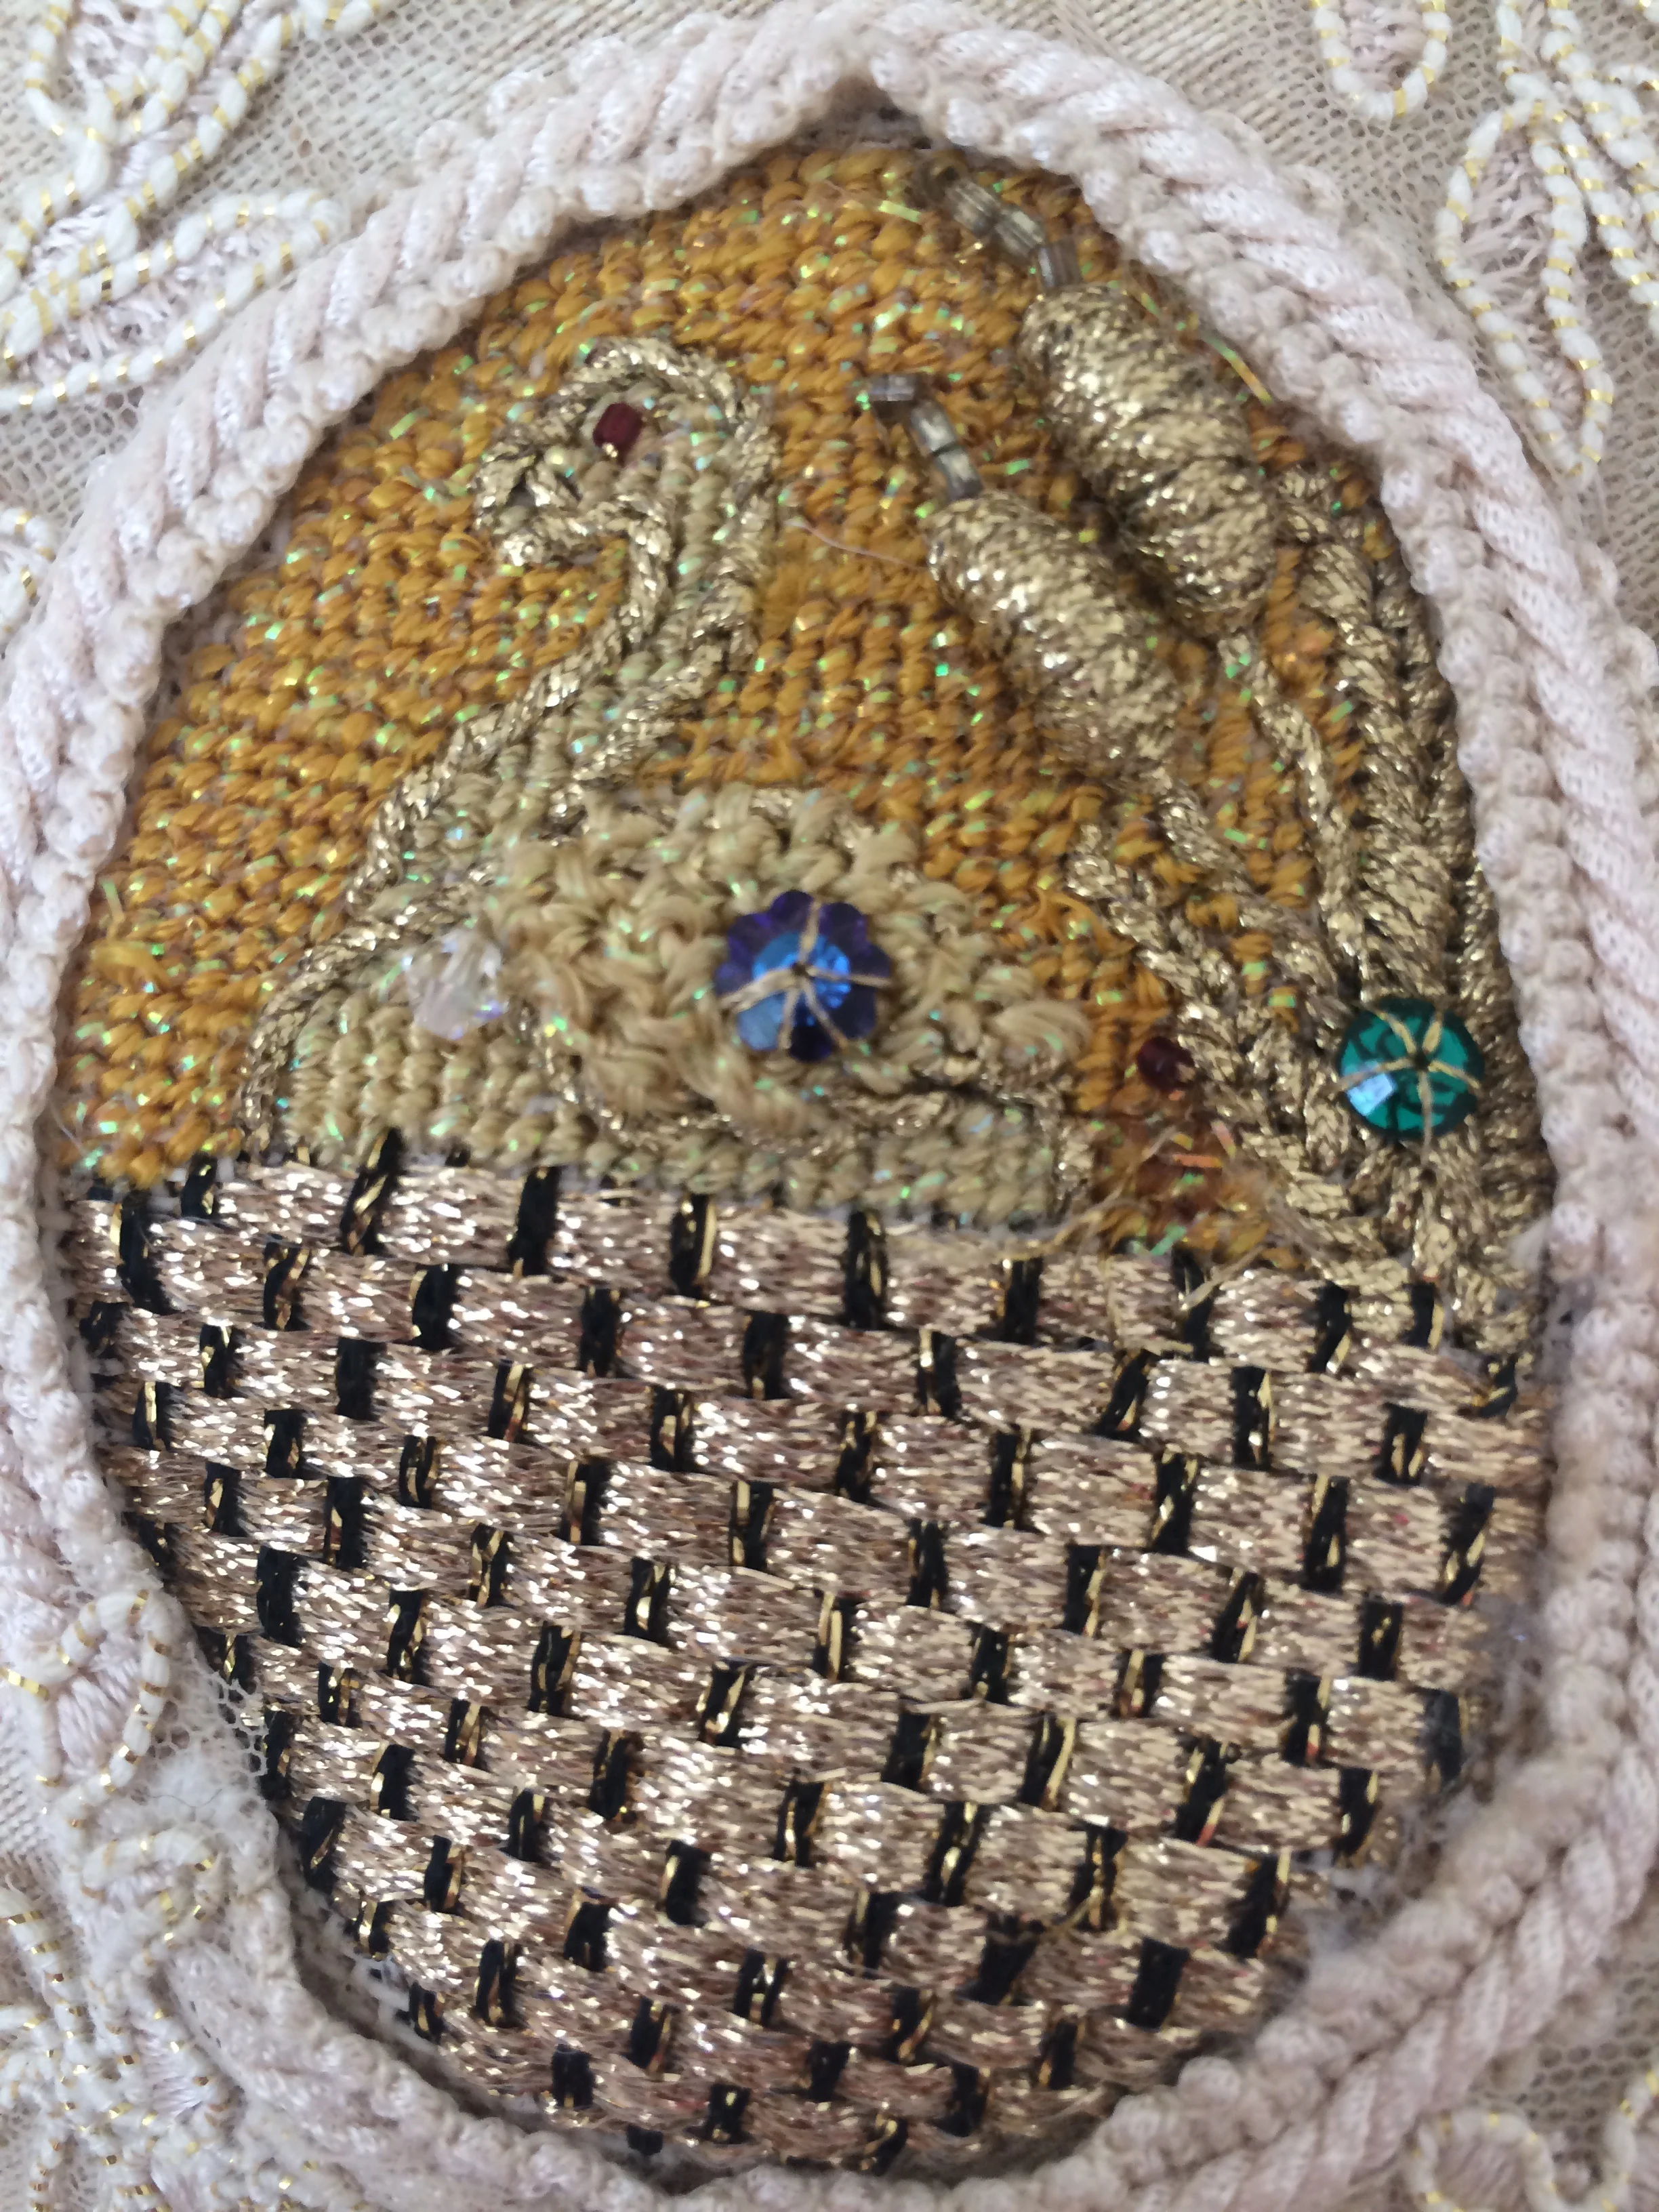
Detail
Wondering what will be my next burnout.
Your Custom Text Here

Detail
Wondering what will be my next burnout.
Doing a head count- I mean hat count.
I should finish by spring 2018. I will have 12 plus in the series.

Artist talk at TXRX labs.
When the complete series is Installed they will blow off walls, pedistals, the ground, maybe even the cieling.😑

These just need the patina.

After five years the patina is really starting to look nice. The wear and tear from the elements is highlighting the textures and lines of the piece perfectly.

End of seat


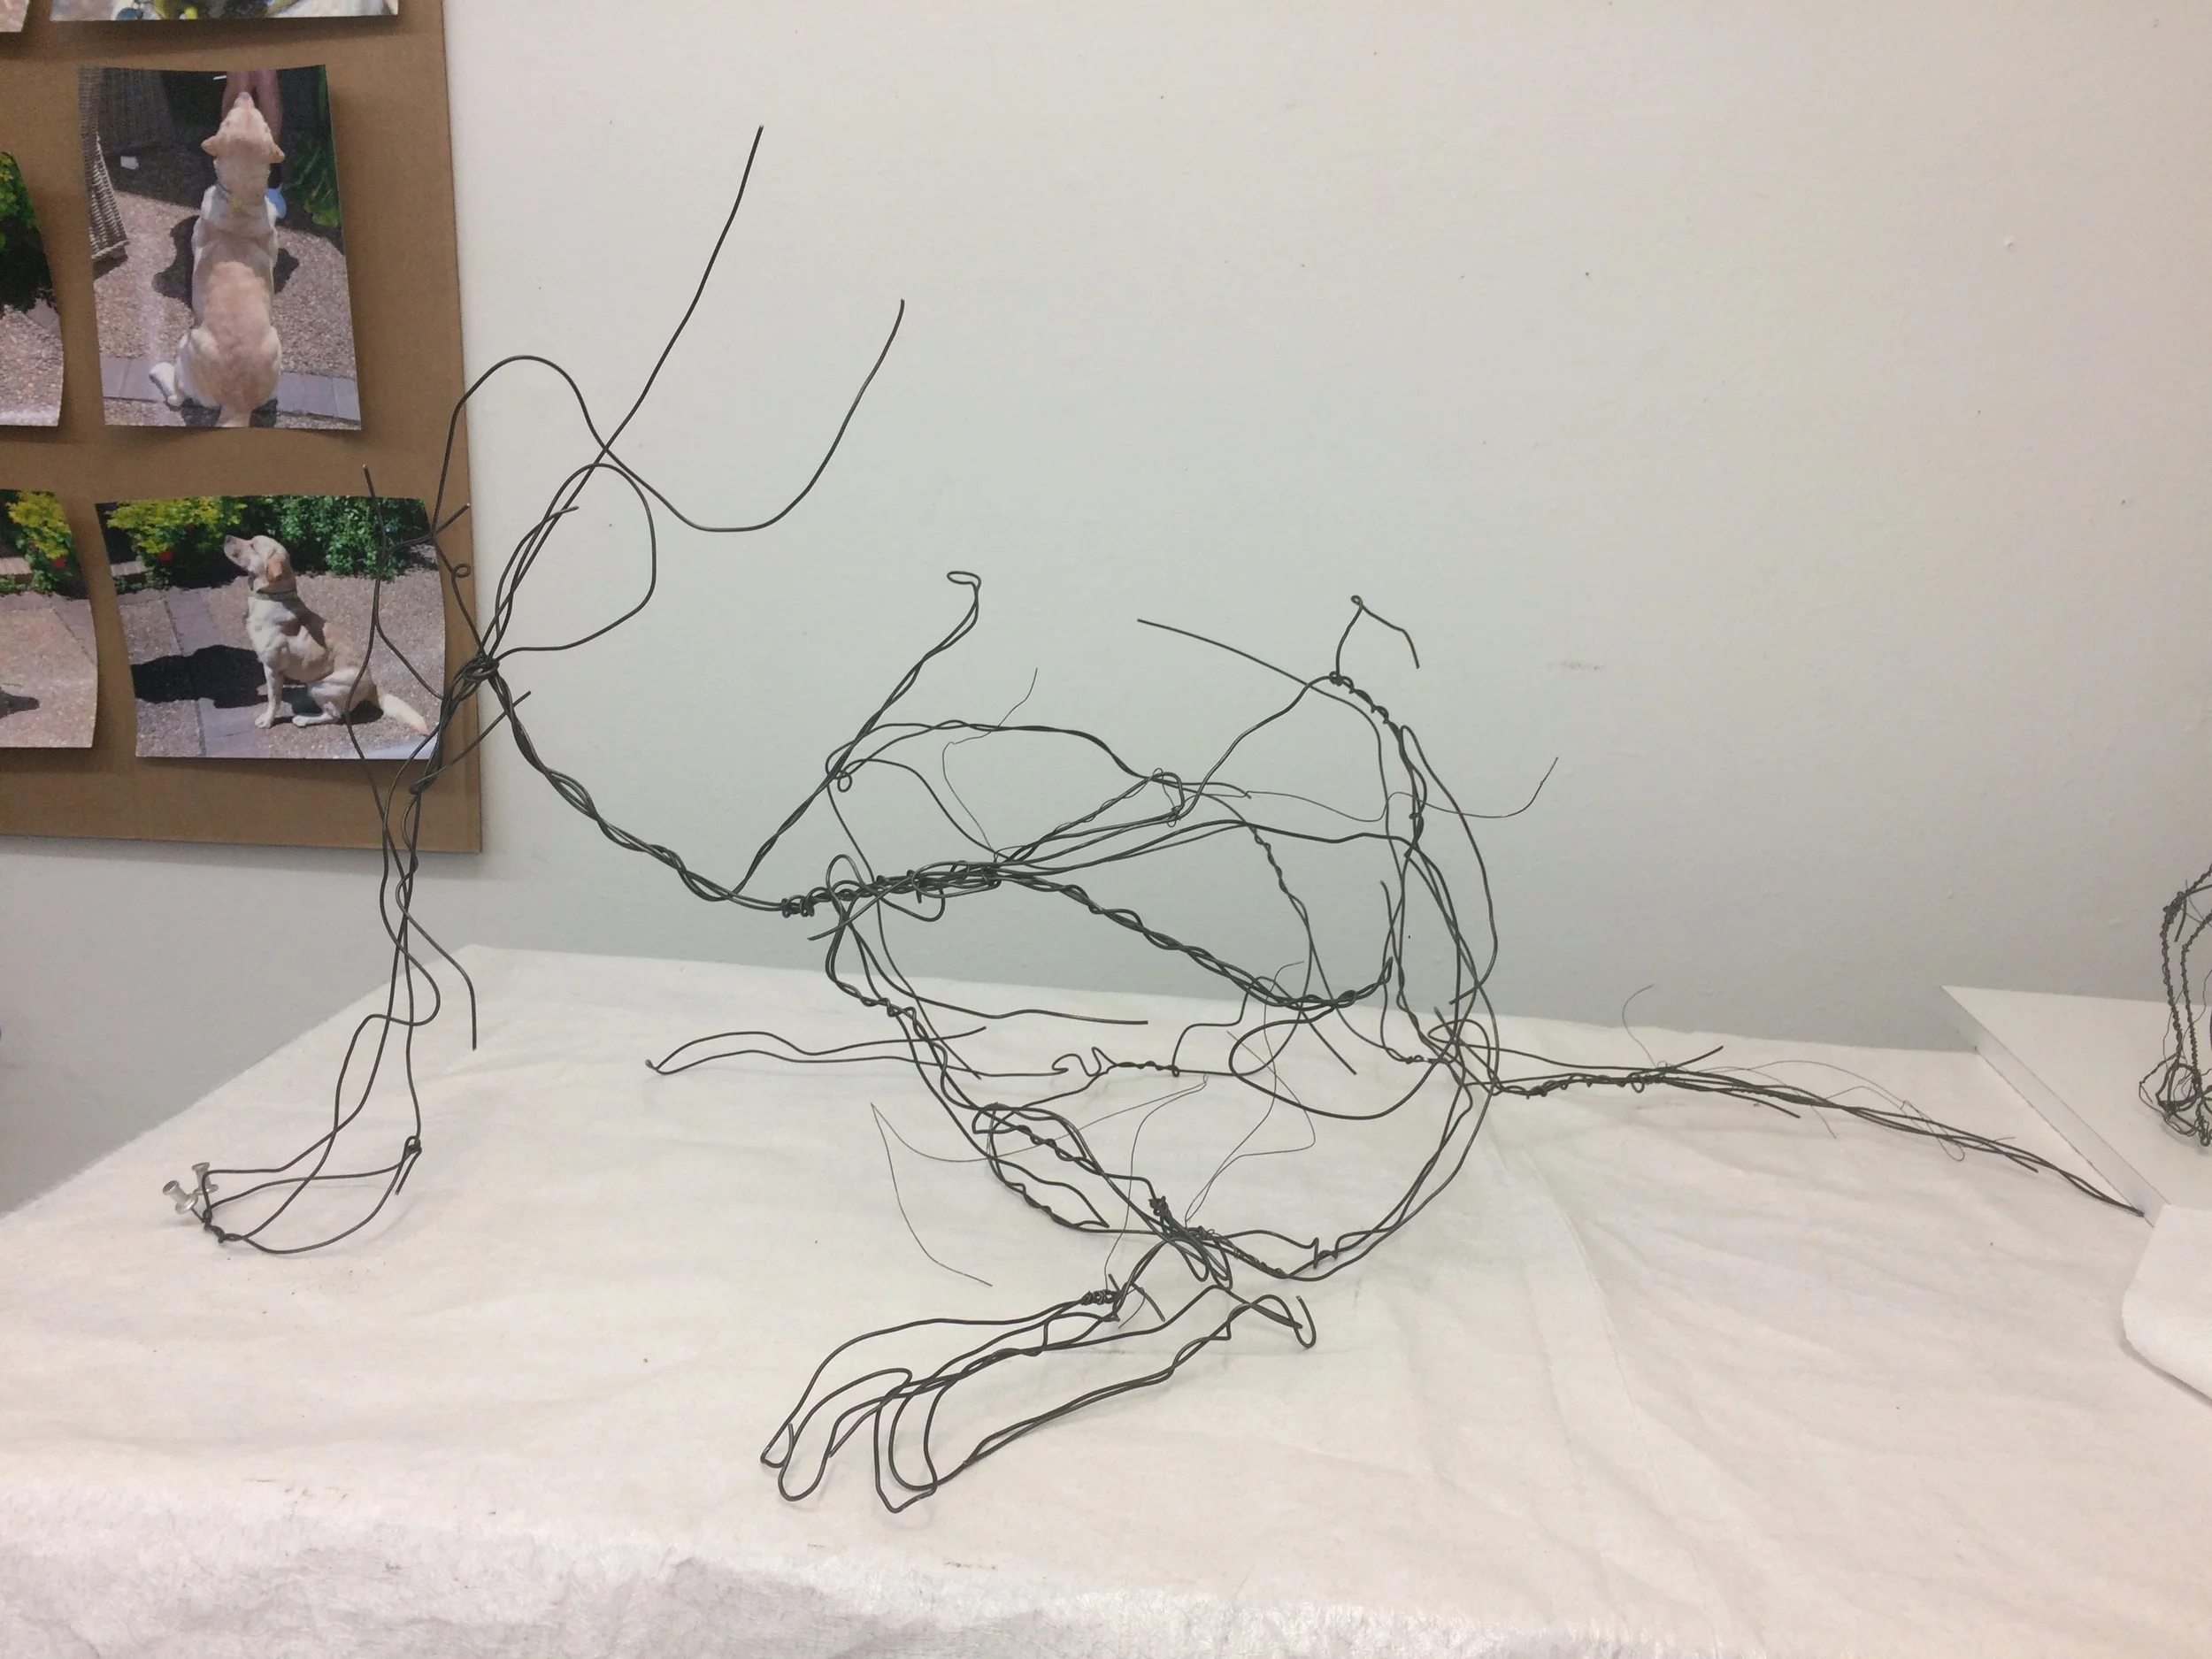
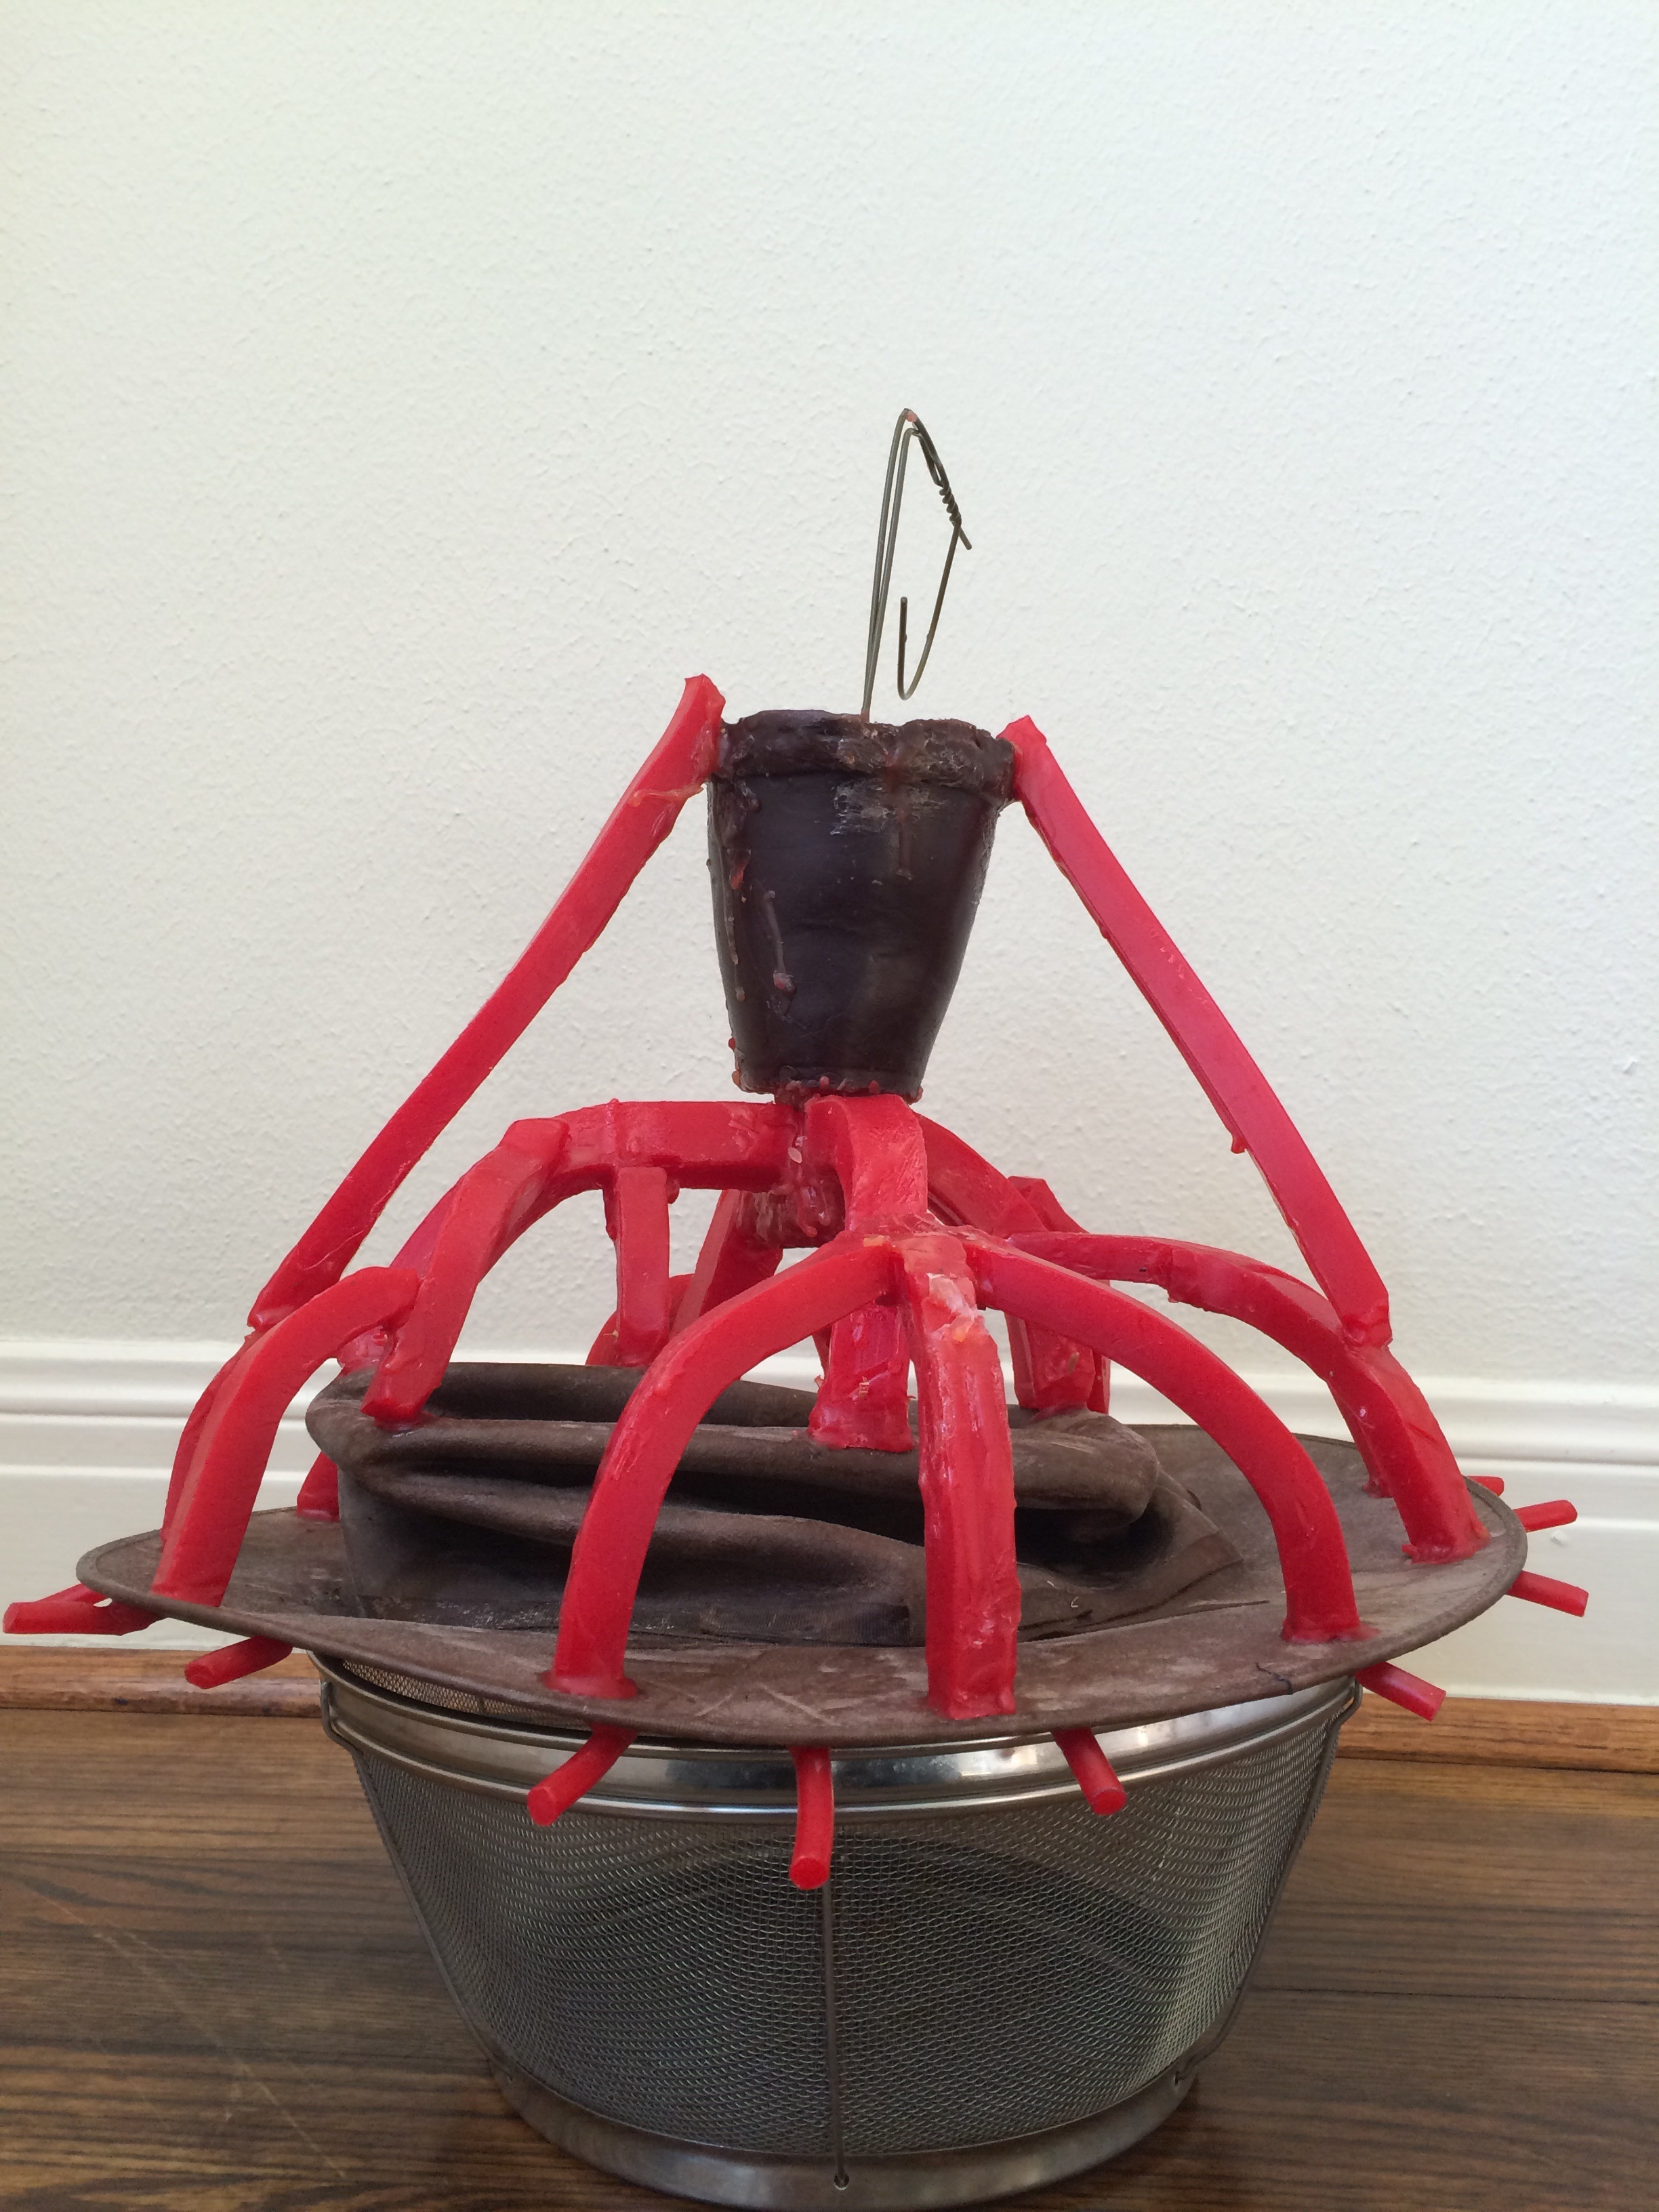
I am starting my third wire sculpture.
This piece will capture that hyper focused - on the edge look a retrieve gets when waiting for their ball to be thrown. You can make them sit before you throw their ball, however it is all they can do not to start running at the first flench of your throw.
Starting a piece is the hardest part. I am listening to Dave Brubeck as I set up my work space. I have all sizes of pliars and gauges of wire set out.

shake shake shake -wire sculptures I and II in the background in the foreground are my pliars, wire cutters and assortments of wire.
Here I go-

The first line (wire). A hip
Day 2 Working at TXRX labs/Glassell mfah

The photos in the background I am using for inspiration are of our two year old Labrador Tobi. She is a beast physically. I am working from the tail up. Usually I start from the nose down. This piece when on display will face a wall. That is why I am starting from the tail.
A front leg and a full back leg and a part back leg on the right.
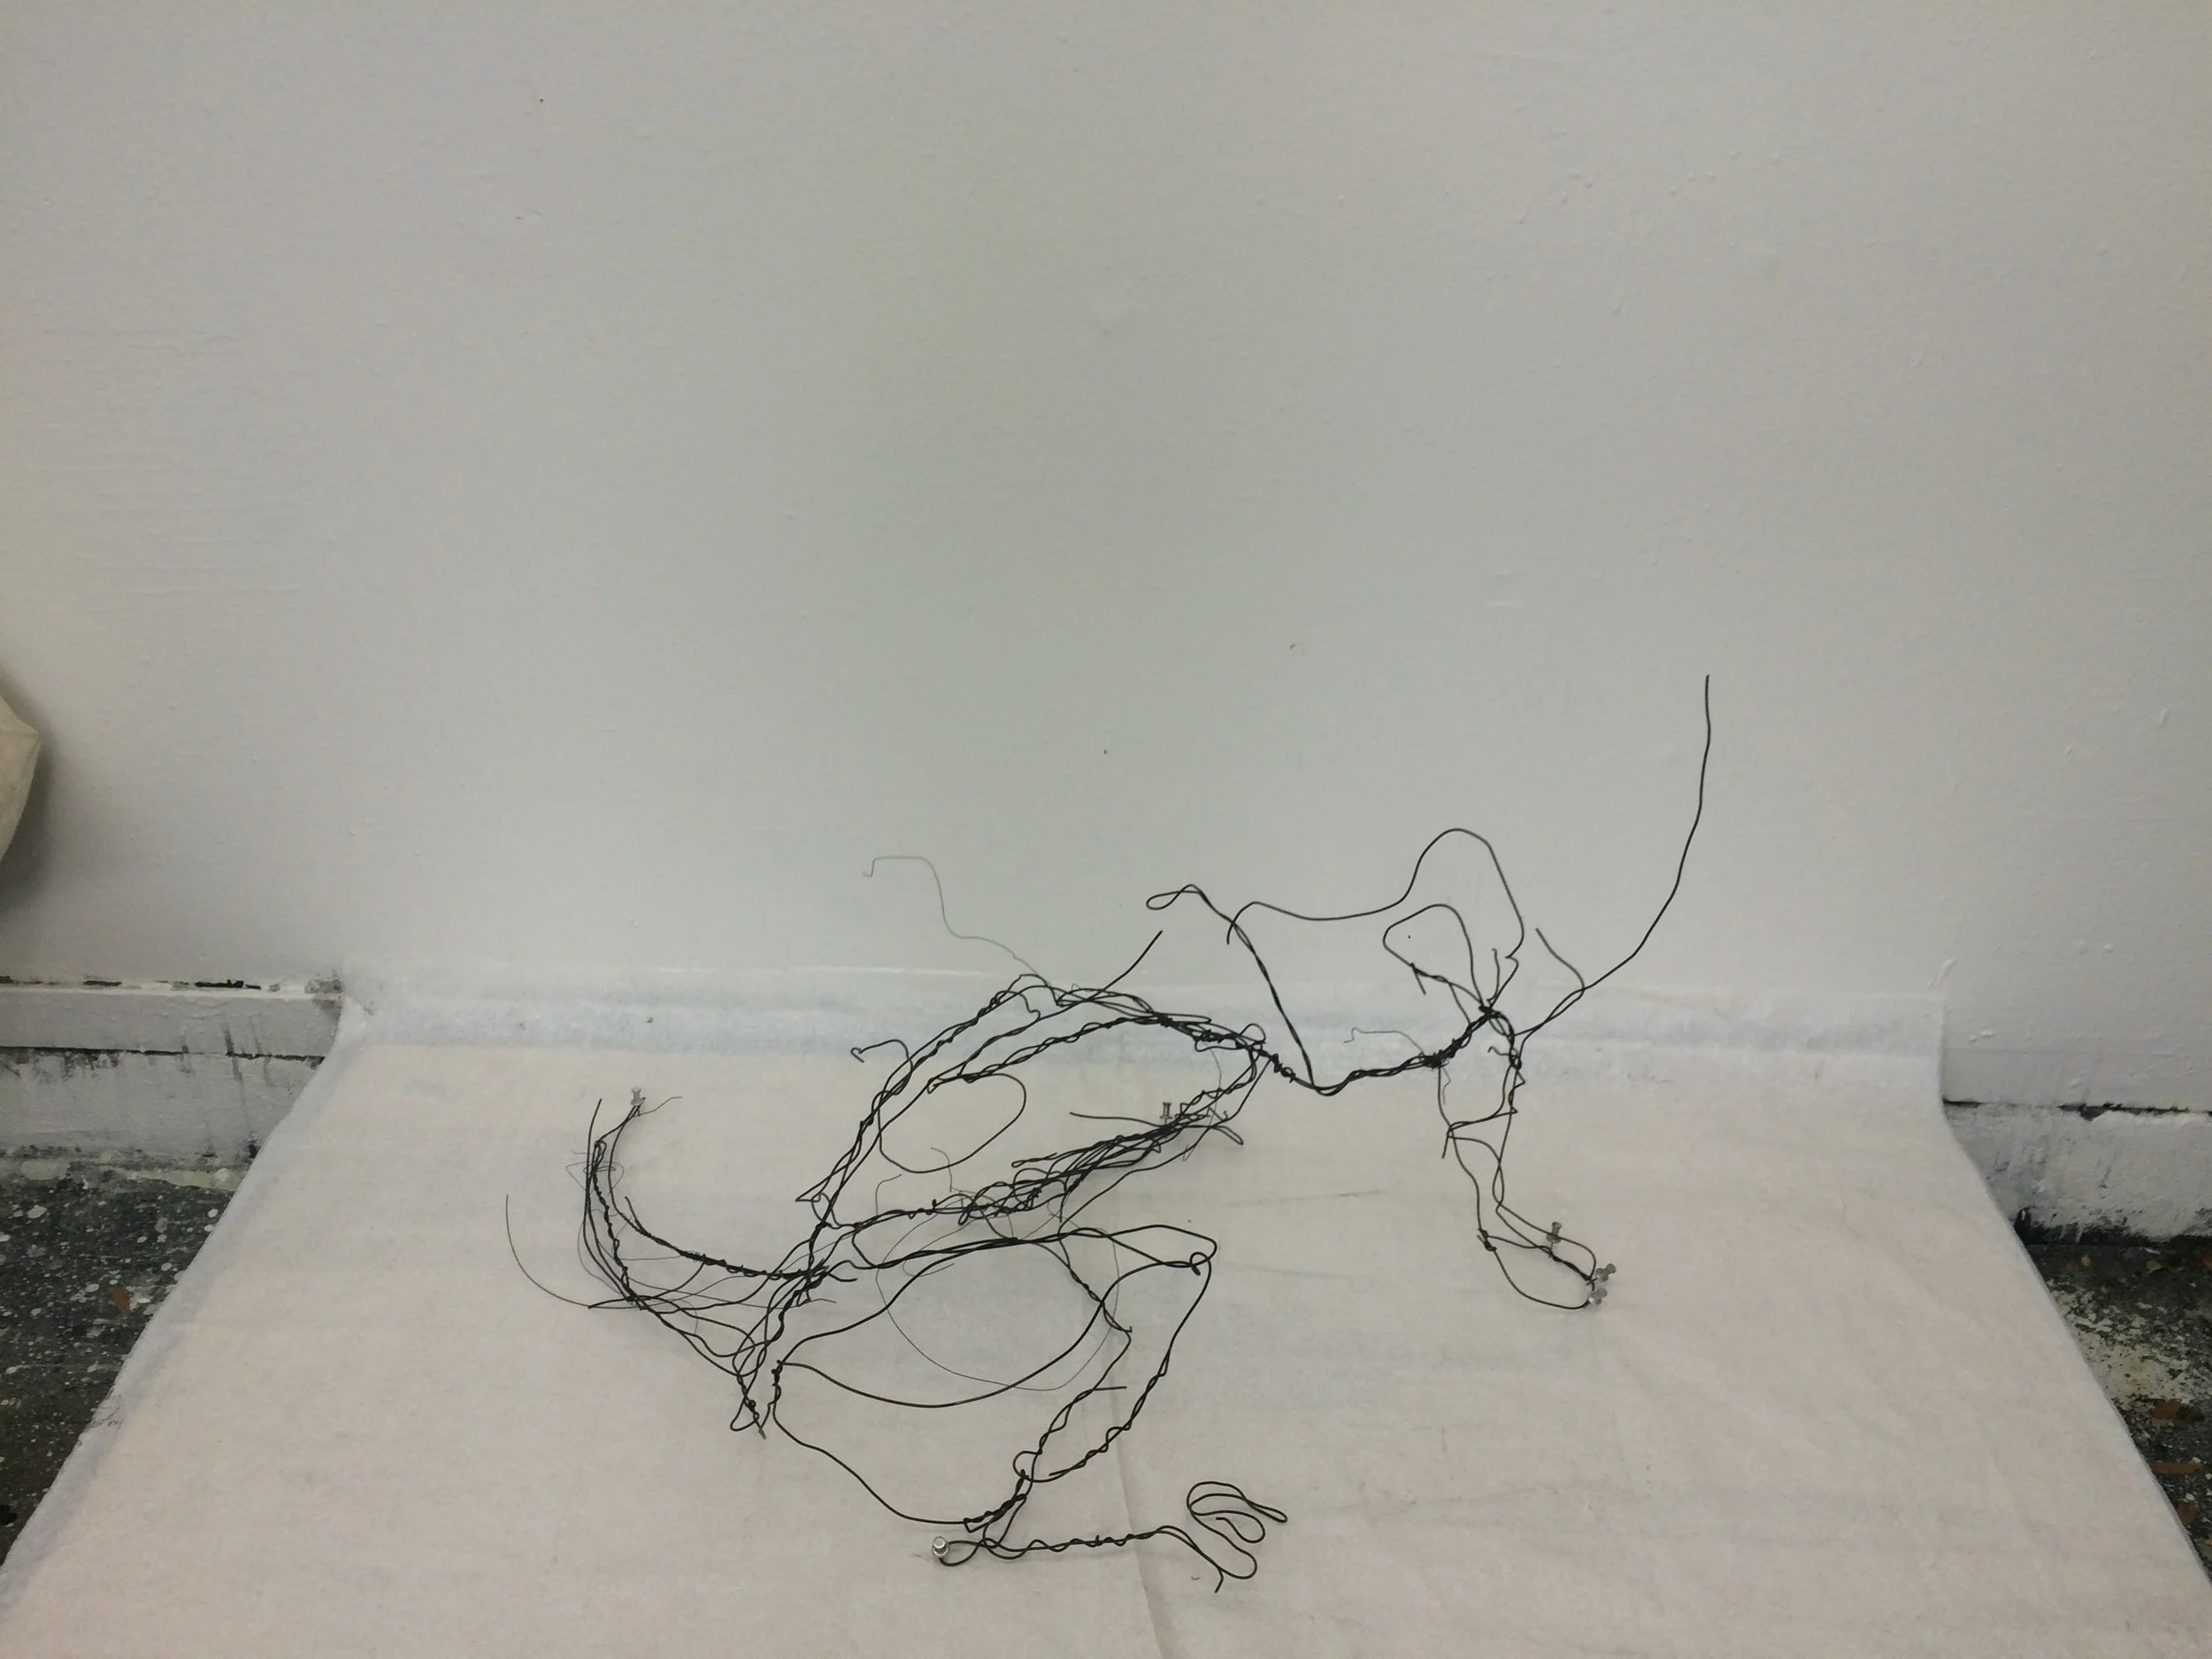
The hips are in place. I still have the back, stomach, ribs, chest, neck.......
Looks a little frogish.

The back left paw is ready to push off the instant the ball is thrown.

Reinforced the knee

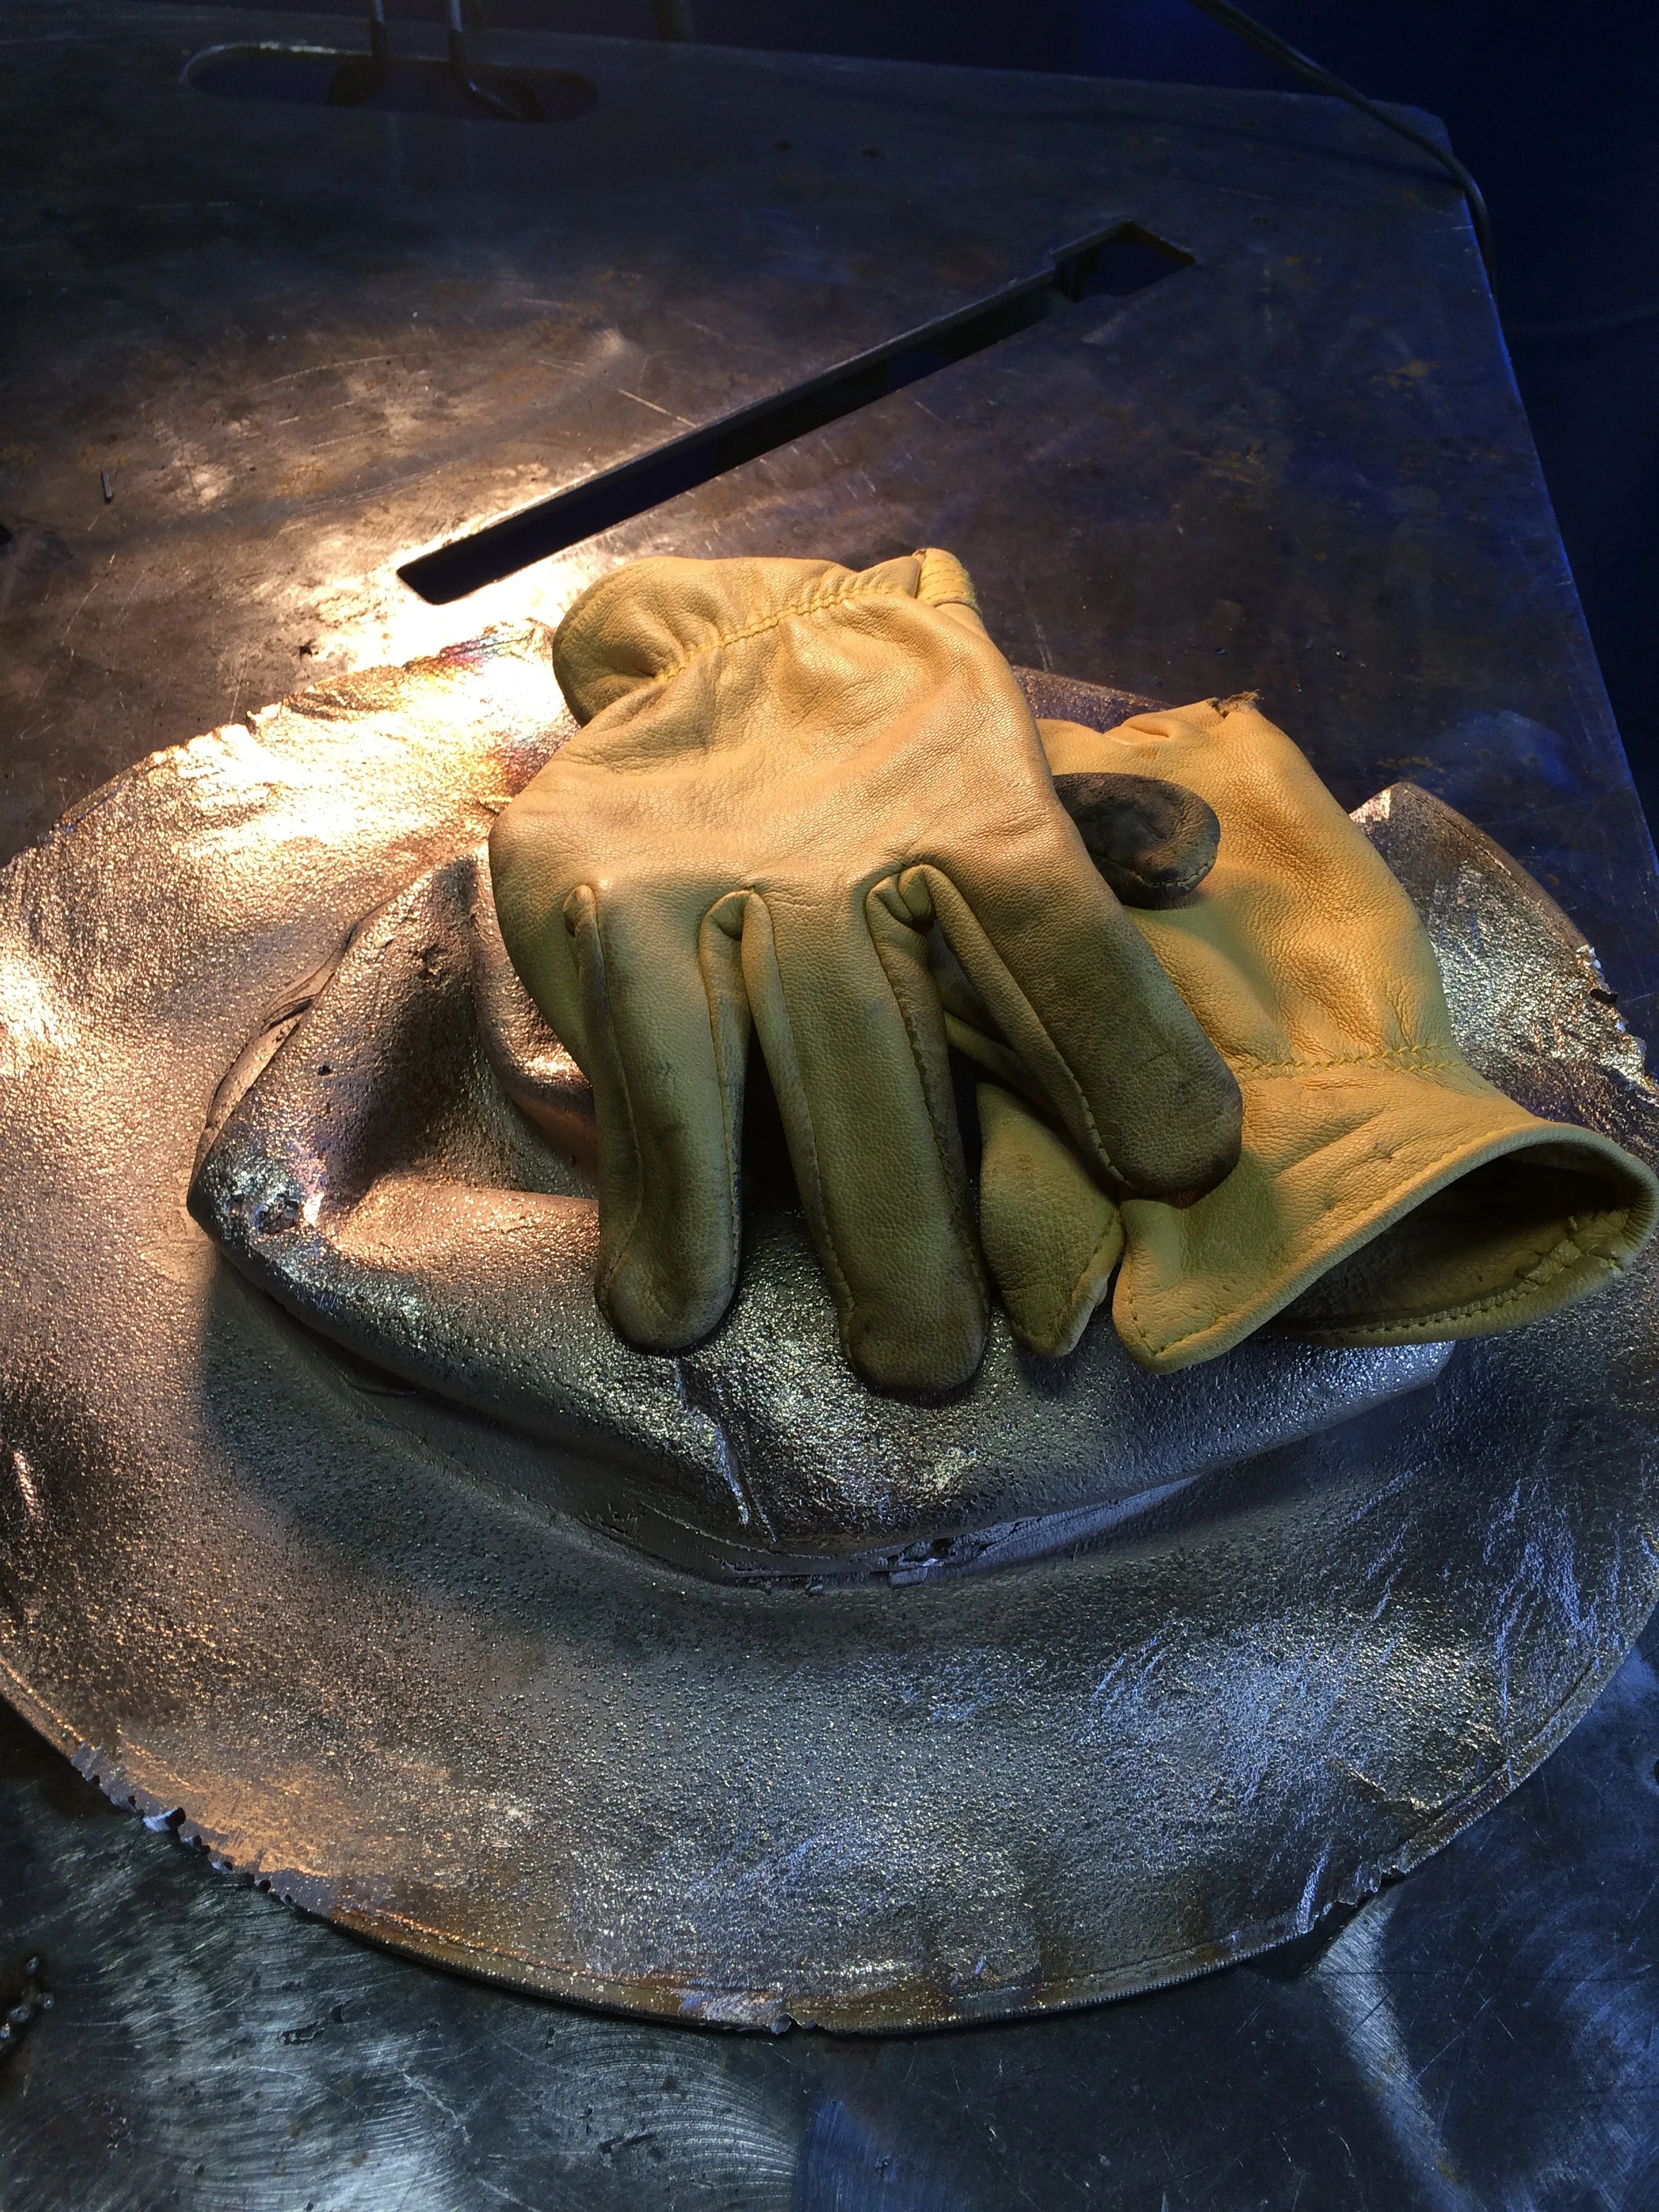
The wire is coated in an oil to keep it from rusting - very messy so I wear gloves.

Added the face profile . I am not happy with the lower half yet.

Nose in place. I have not added the back yet so the lower half looks like a frog still.

Hmmmmm somebody need to thin out. English labs are short and broad but not this broad. I will fix it tomorrow.

See that ball? The ears and eyes tomorrow- after I fix the giant head.
It rained all day and I feel so lucky to have a dry house.

shake shake shake - Sit!
I have to figure the ball situation out.
I will make a bronze ball and patina it bright yellow.


His limbs are ready to bolt.
Perfecting the texture on the last piece in the series. I will either call it Louisiana or the end. (This the last of the series but I still have many more to make I just jumped ahead to this one.)


This tear is one of my favorite features of this piece. The line starts out as a dainty gap on the edge and emerges as a crease from wear and tear from the wind. In the end the same line is made by the two pieces over lapping and then parting. Kind of like a good friendship- connected until eventually having to part but still some how trying to stay connected.
Today I took a look at what I need to accomplish by this time next year.

A lot of work to do.

I
I was working my "Gust" series this week. And I just l o v e it when pieces name themselves.
I started this piece in the fall but was not able to pour it until this spring.
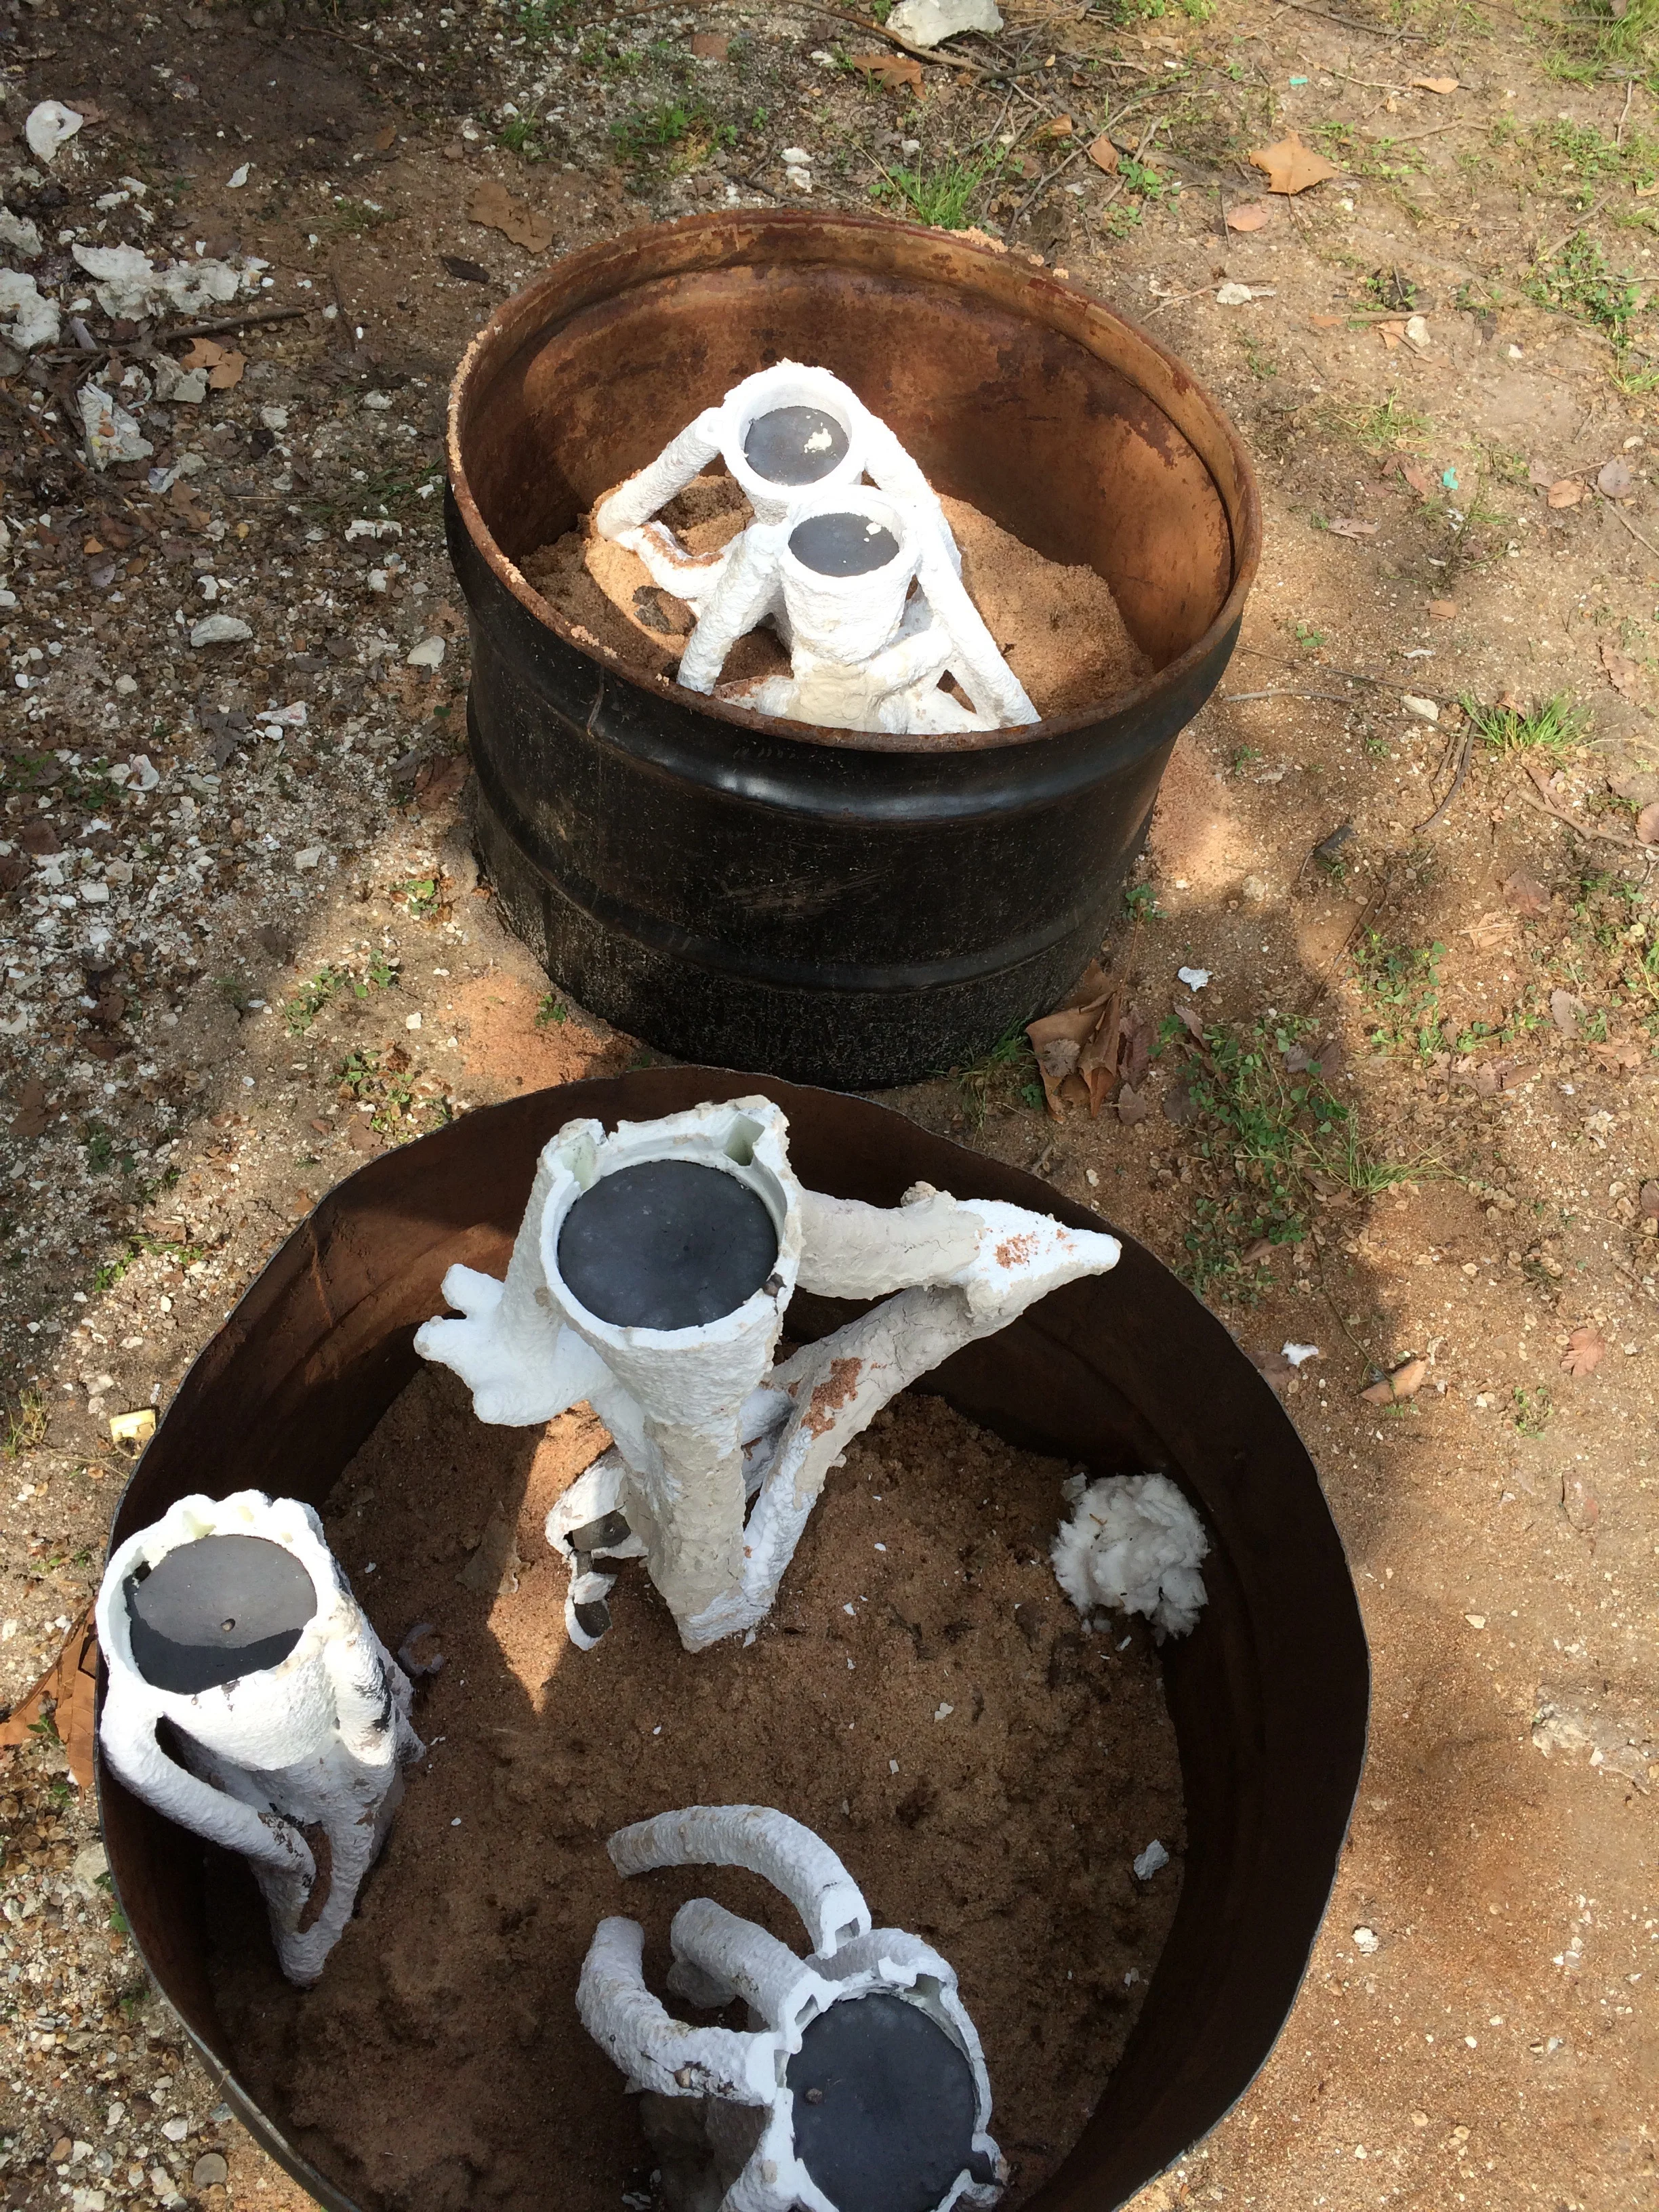
Sprued up and ready to dip.

In the slurry room fall 2015. It was poured spring 2016.
Sprues and cup are cut off.

Two weird shapes did not pour.

Sprues are completely removed and now it is ready for repairing the texture. This step is called chasing.

I have decided to make this look like a tear. I cut a piece off another hat and will grind it and weld it to look like it is almost completely torn off.

Working on texture and the tear.

I am liking it but - will let it simmer for a few days.
It might need a crease where it would fold over as it tumbled.
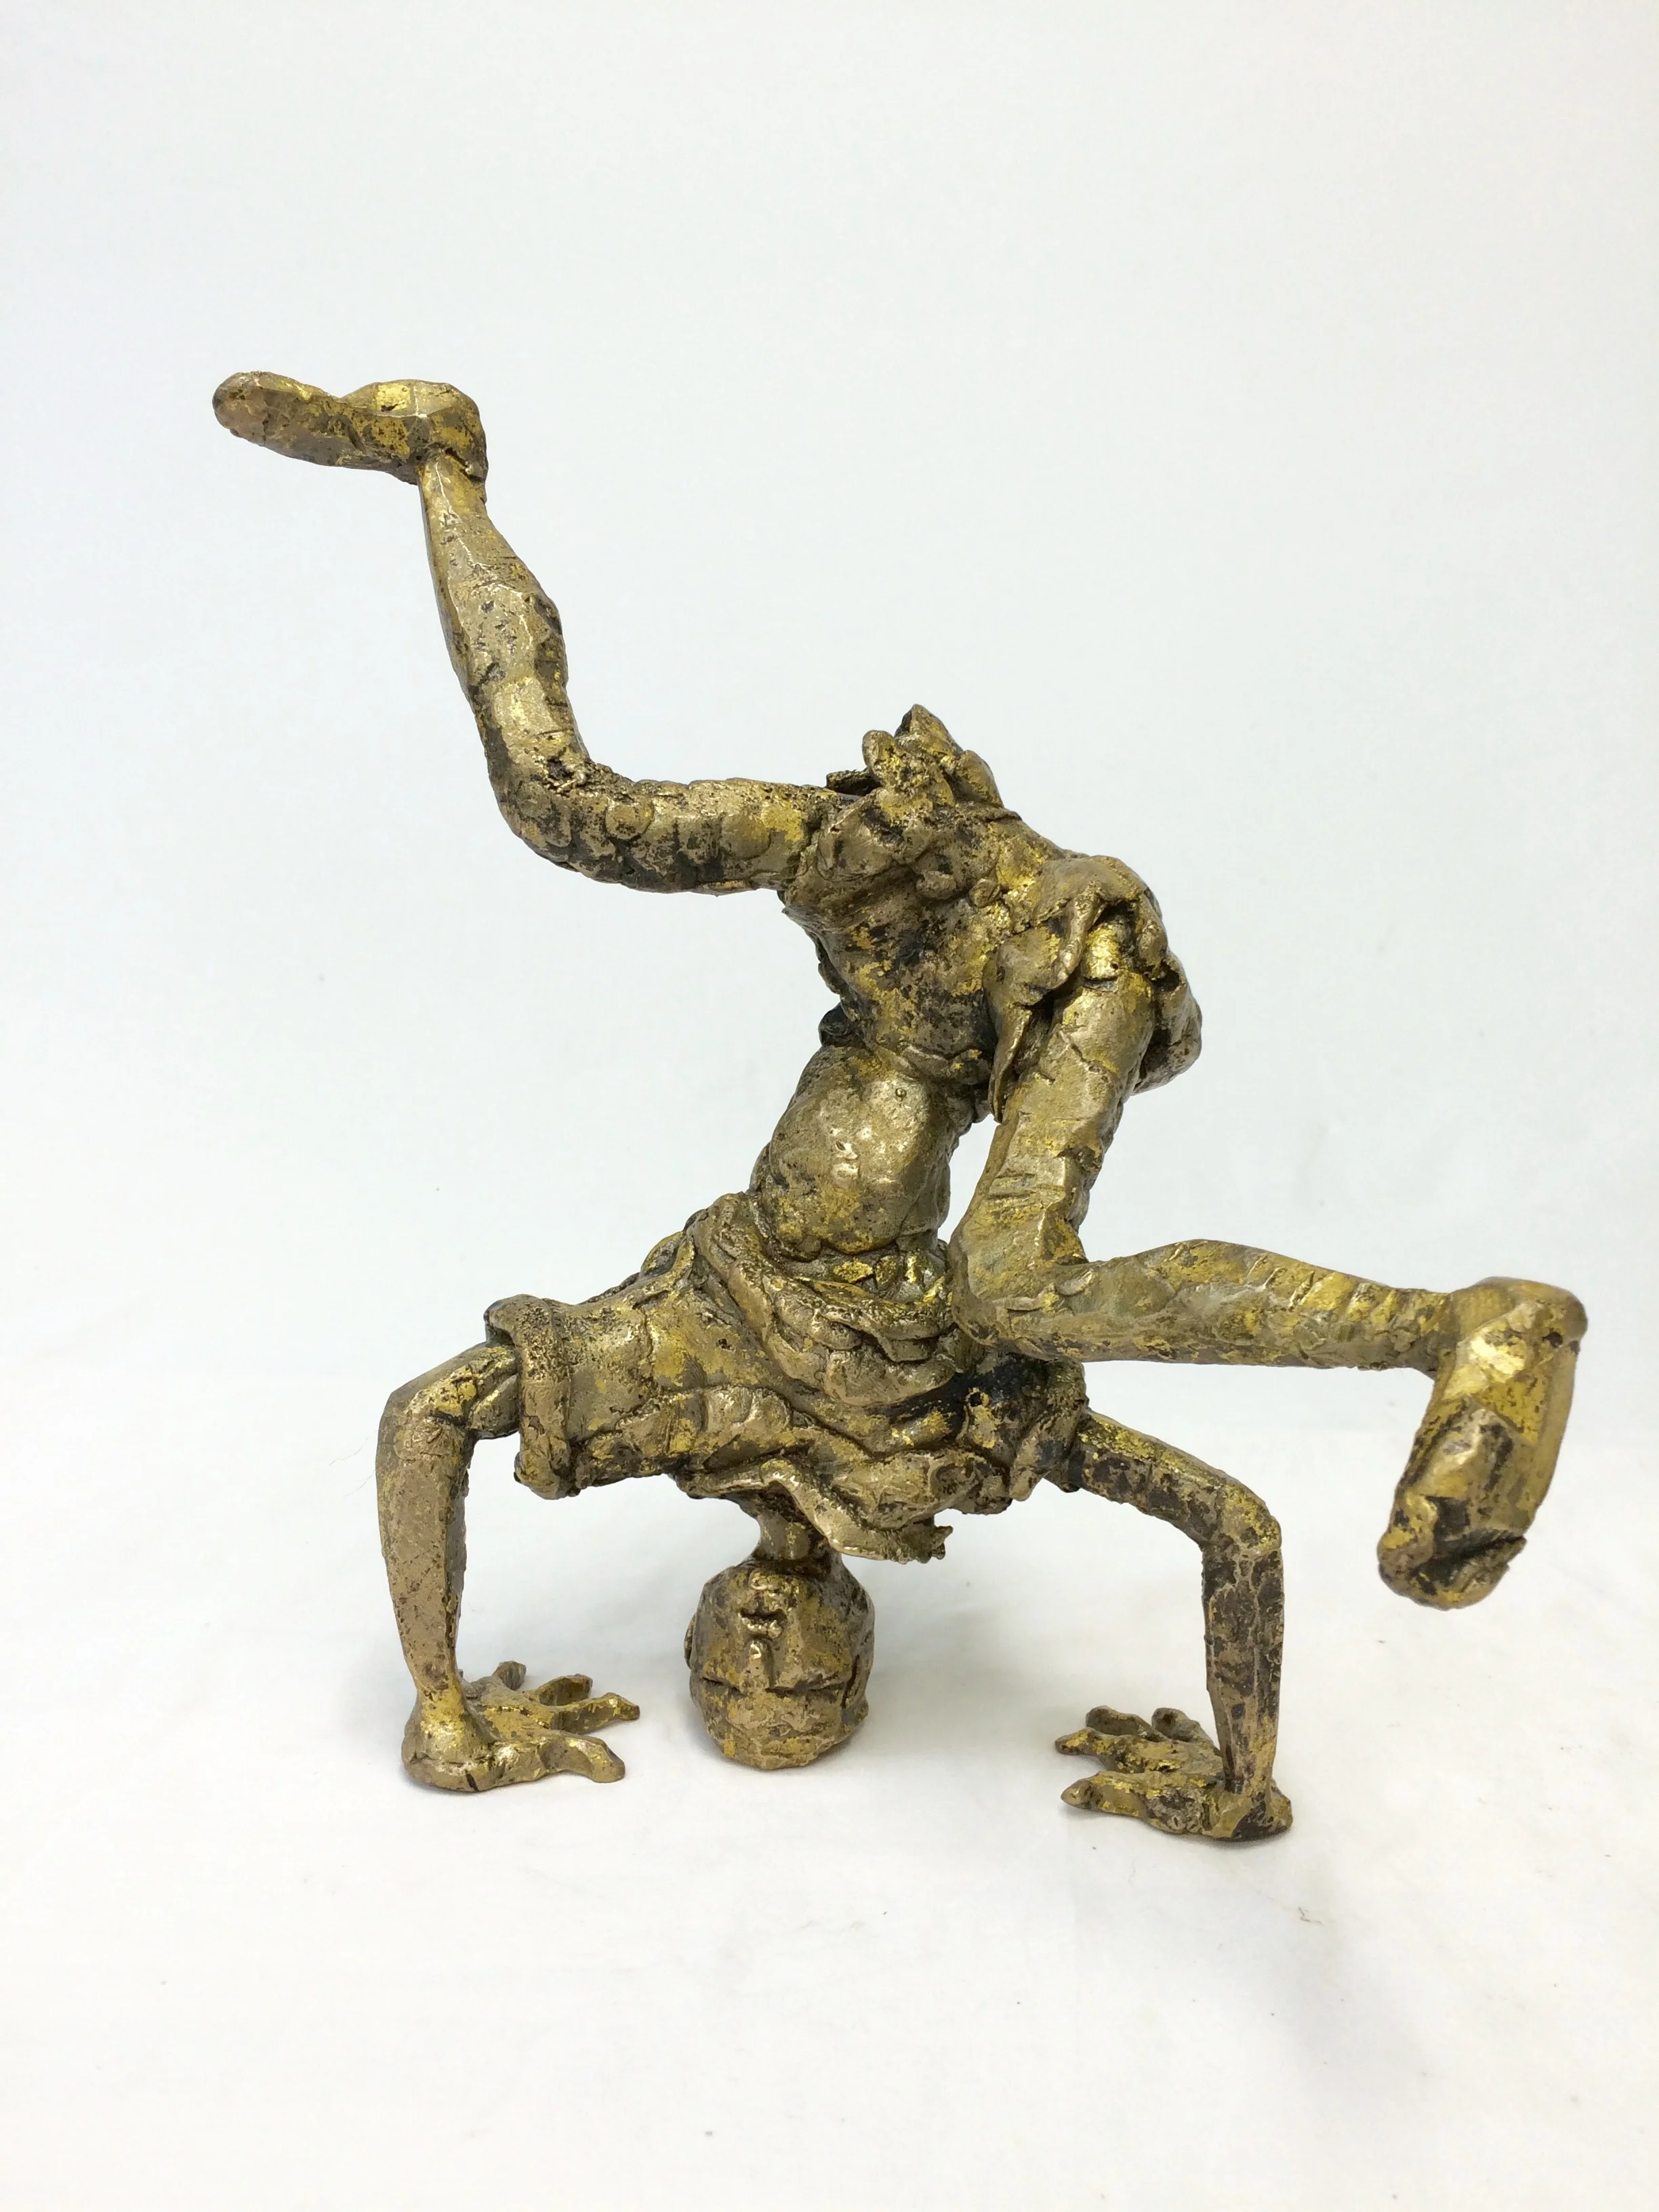
For my one and only mini me- I love this piece and made my daughter Sage the first casting from the mold. The katinka katinka na na na is her name for the figure. The finish is liver of sulfur topped with an antiqued silver leaf.


Pony tail
Starting the third piece of the series I felt that the fact that the pieces are children, and the innocence of the moment was well established with the first two pieces. The pony tail piece of the series has the most tension. I used sharper lines and angles in the arms and legs pulling in opposite directions to create the tension. The graceful line created by the curve in her back balances the angles and the relaxes the tension.

Piggy tails
On this piece I used the same gangly legs, over sized feet, and relaxed tummy to emphasize the child like innocence of the moment. The piggy tail hair style and more symmetrical balance helps calm the total energy of the three pieces in the series. I am really fond of piggy tails.
The first piece and the design desicions.
The first piece of the series.
I wanted this piece to have characteristics that would unmistakably identify it as a joyful, carefree young child. In order to achieve the youthful appearance I gave him awkward over sized feet and clothes. The clothes are loosely draped over the thin gangly physique. The rounded relaxed tummy and feet (as opposed tightened muscles and pointed toes) emphasizes the child's focus on balance as well as the lack of self consciousness or self criticism. In addition the child like joyful innocence is emphasized by the assymmetrical balance of the child's weight. The weight supported by the head and hands is off center so that the legs and hips provide the counter balance.
I started this project this August 2015. The first layer- My husband grew up in Muenster Texas - hence 3 little Muensters. Curtis and his little sisters we're caught on film in the early 60's trying to balance on their heads on the family sofa. The film has since been transferred to a DVD. Watching the DVD for the first time made us all laugh and inspired the initial concept of a sculpture of children standing on their heads.

Screen shot from a klement family home movie.
The second layer- I took many years of ballet and gymnastics when I was younger and I found it interesting to see one person loose balance and then everyone loose their balance without anyone touching. The force or the energy between objects that you can't see is what I wanted to capture.


The third layer- keeping the style loose and expressive utilizing expressive lines not only in the shape of the piece but in the texture of the surface.
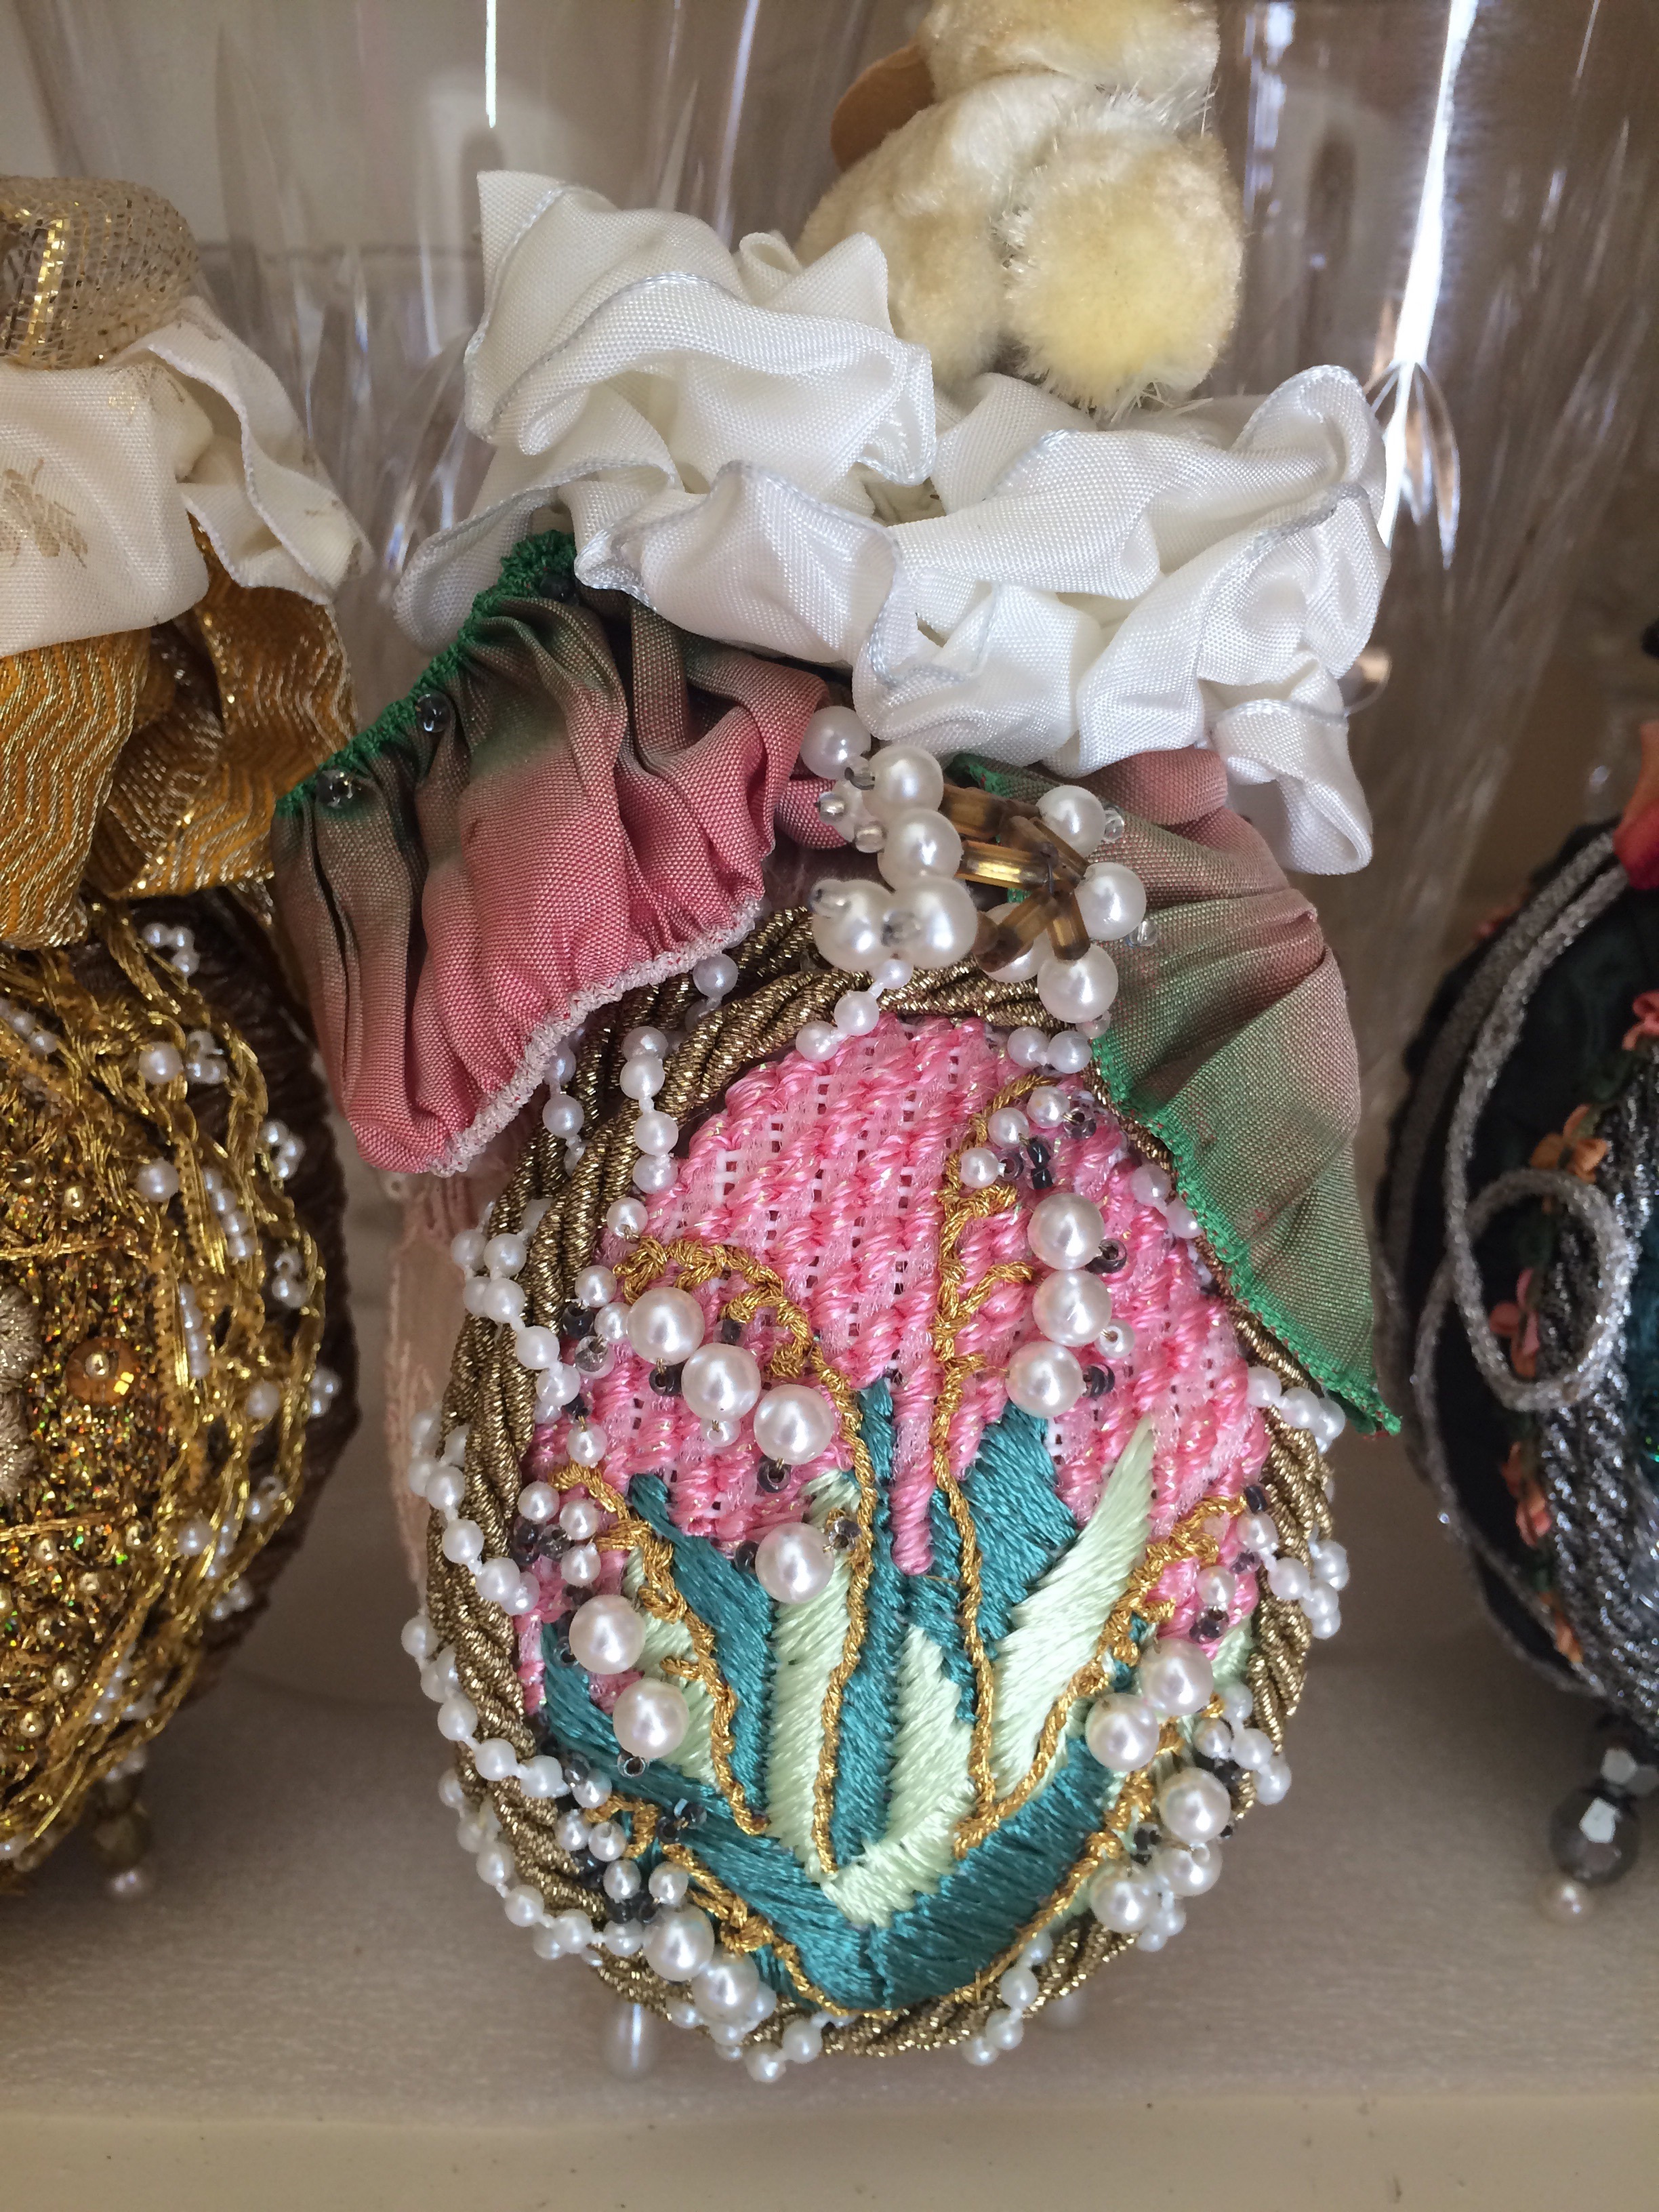
While I was raising my kids and sitting in carpool lines, waiting at soccer practices I used to stitch, stitch, stitch. It was a great way to direct my creative juices and be the mom I wanted to be.
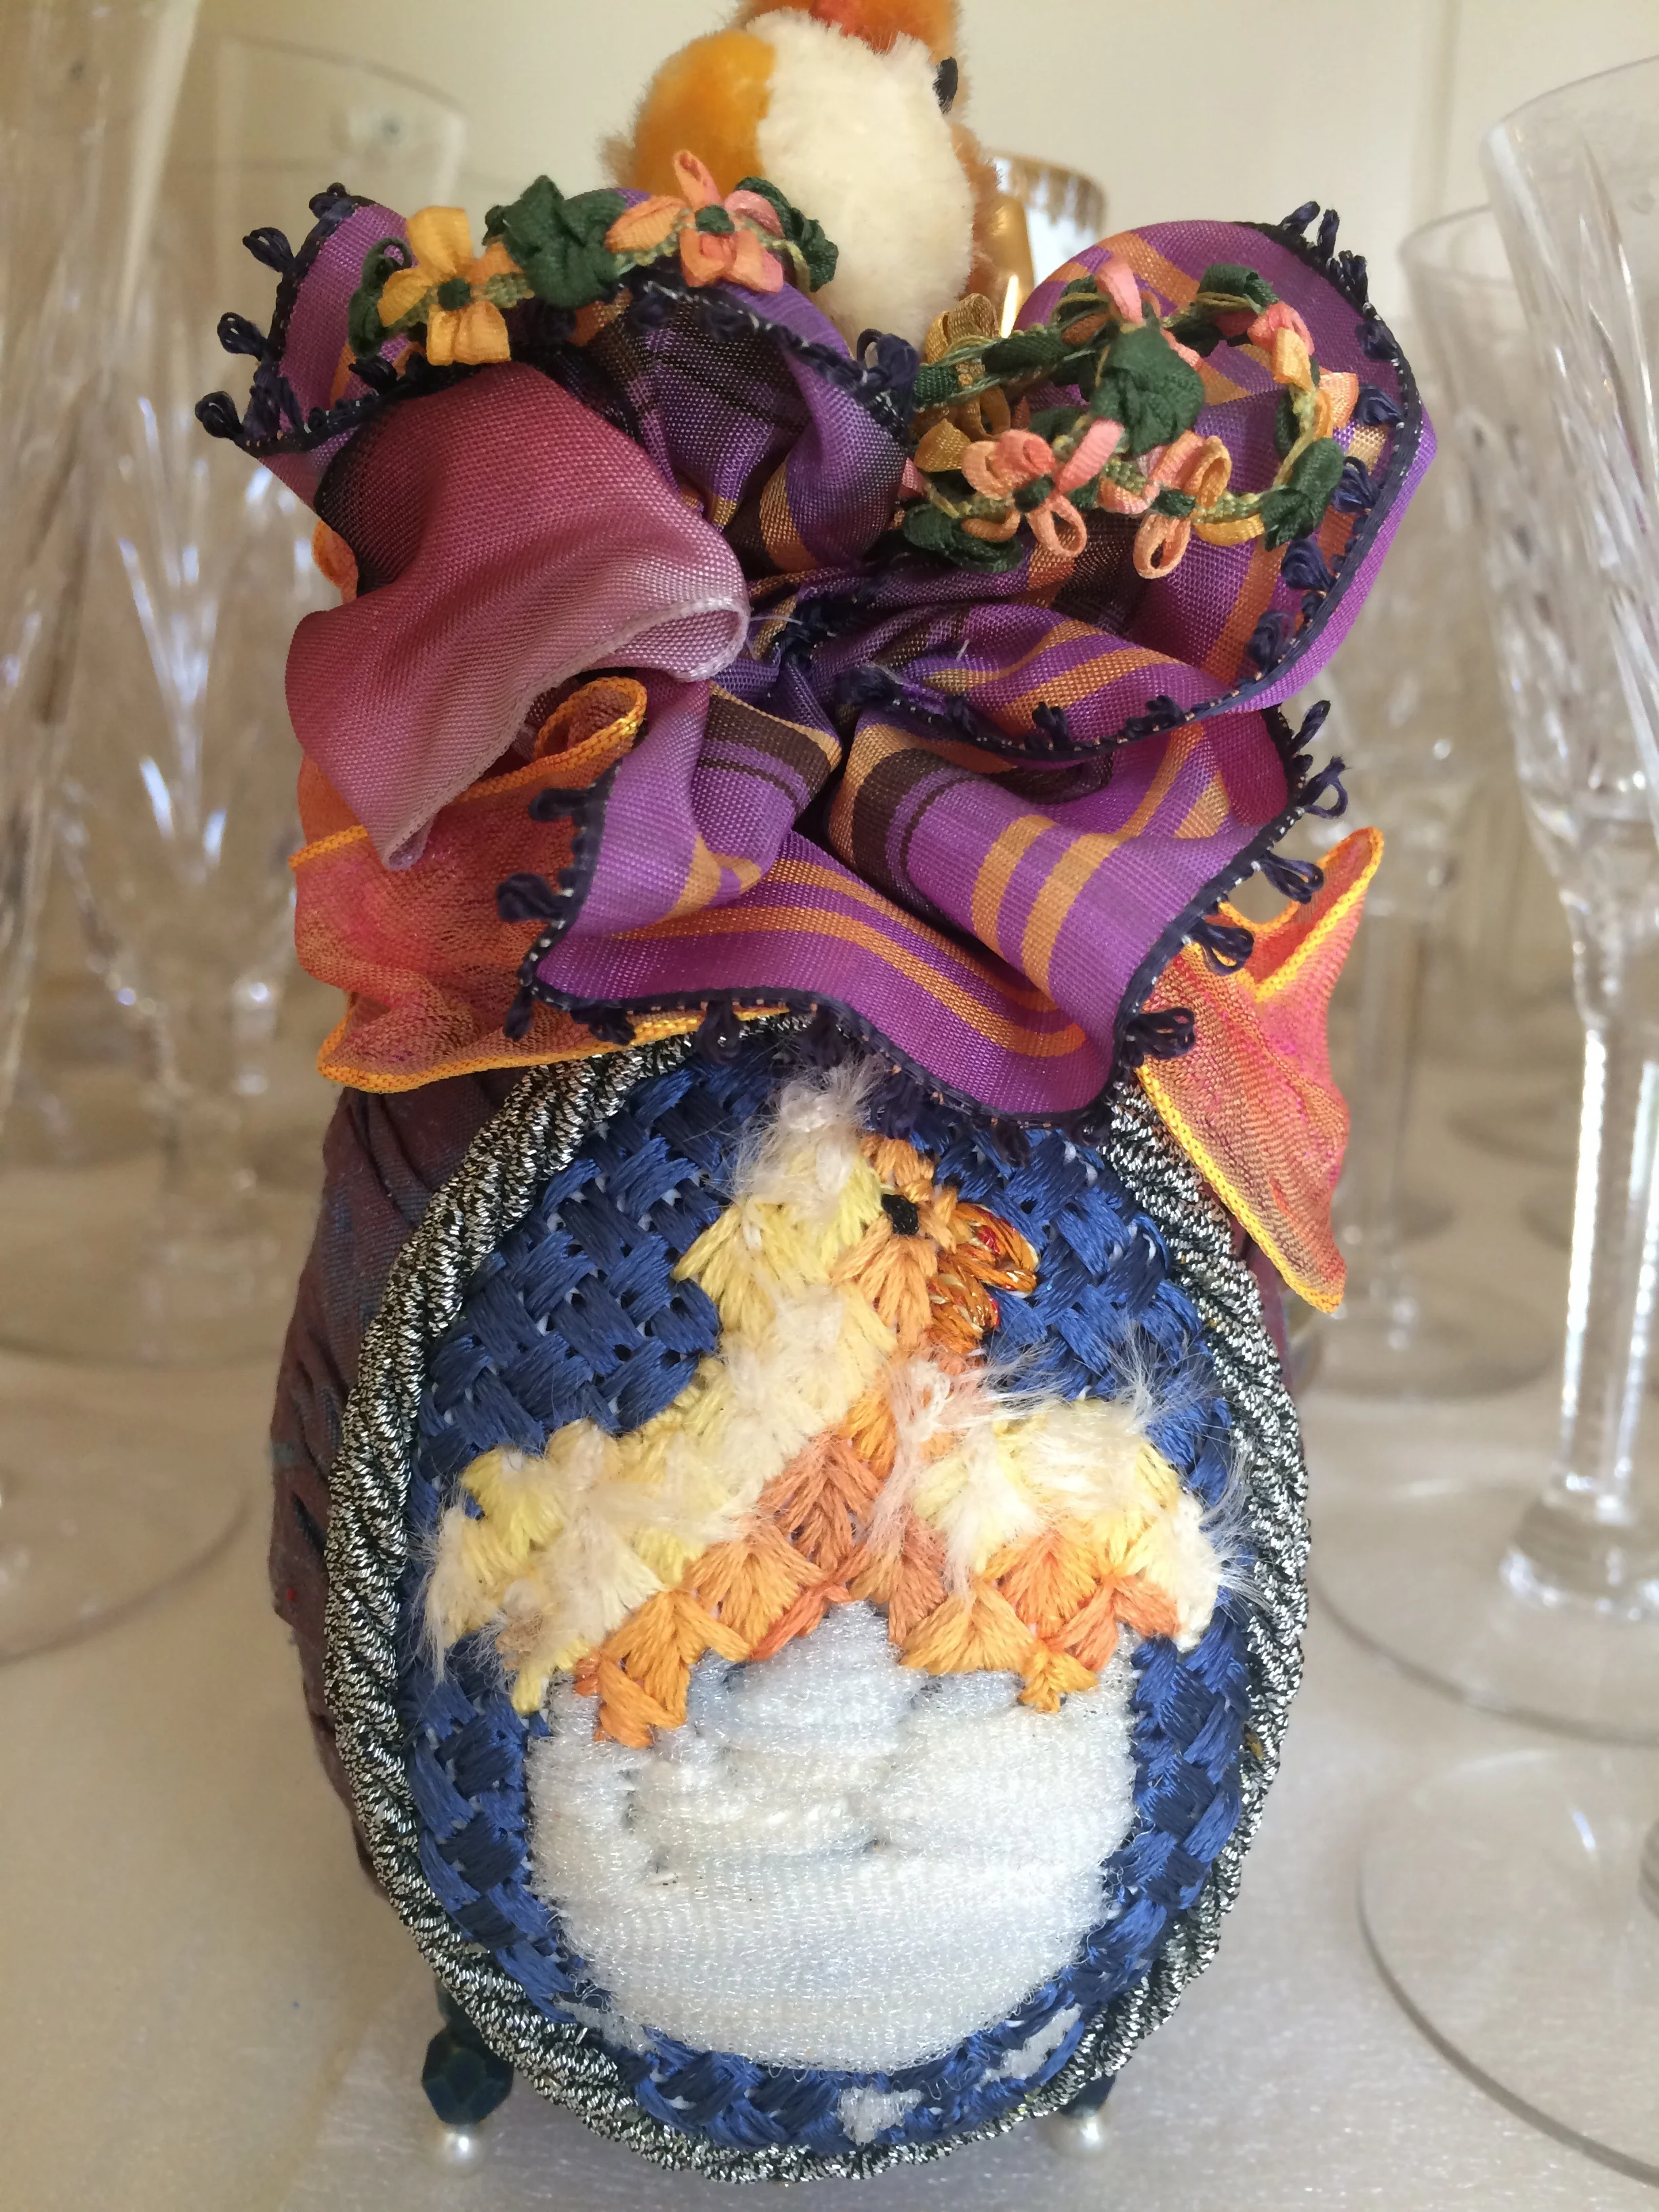
There is a vintagebaby chick on top


Pansy egg
There is a vintage baby rabbit on top. I found him in a flea market.


Sweet bumblebee in center also a flea market treasure.
Swan and cat tails.
The last three are in a pillow.
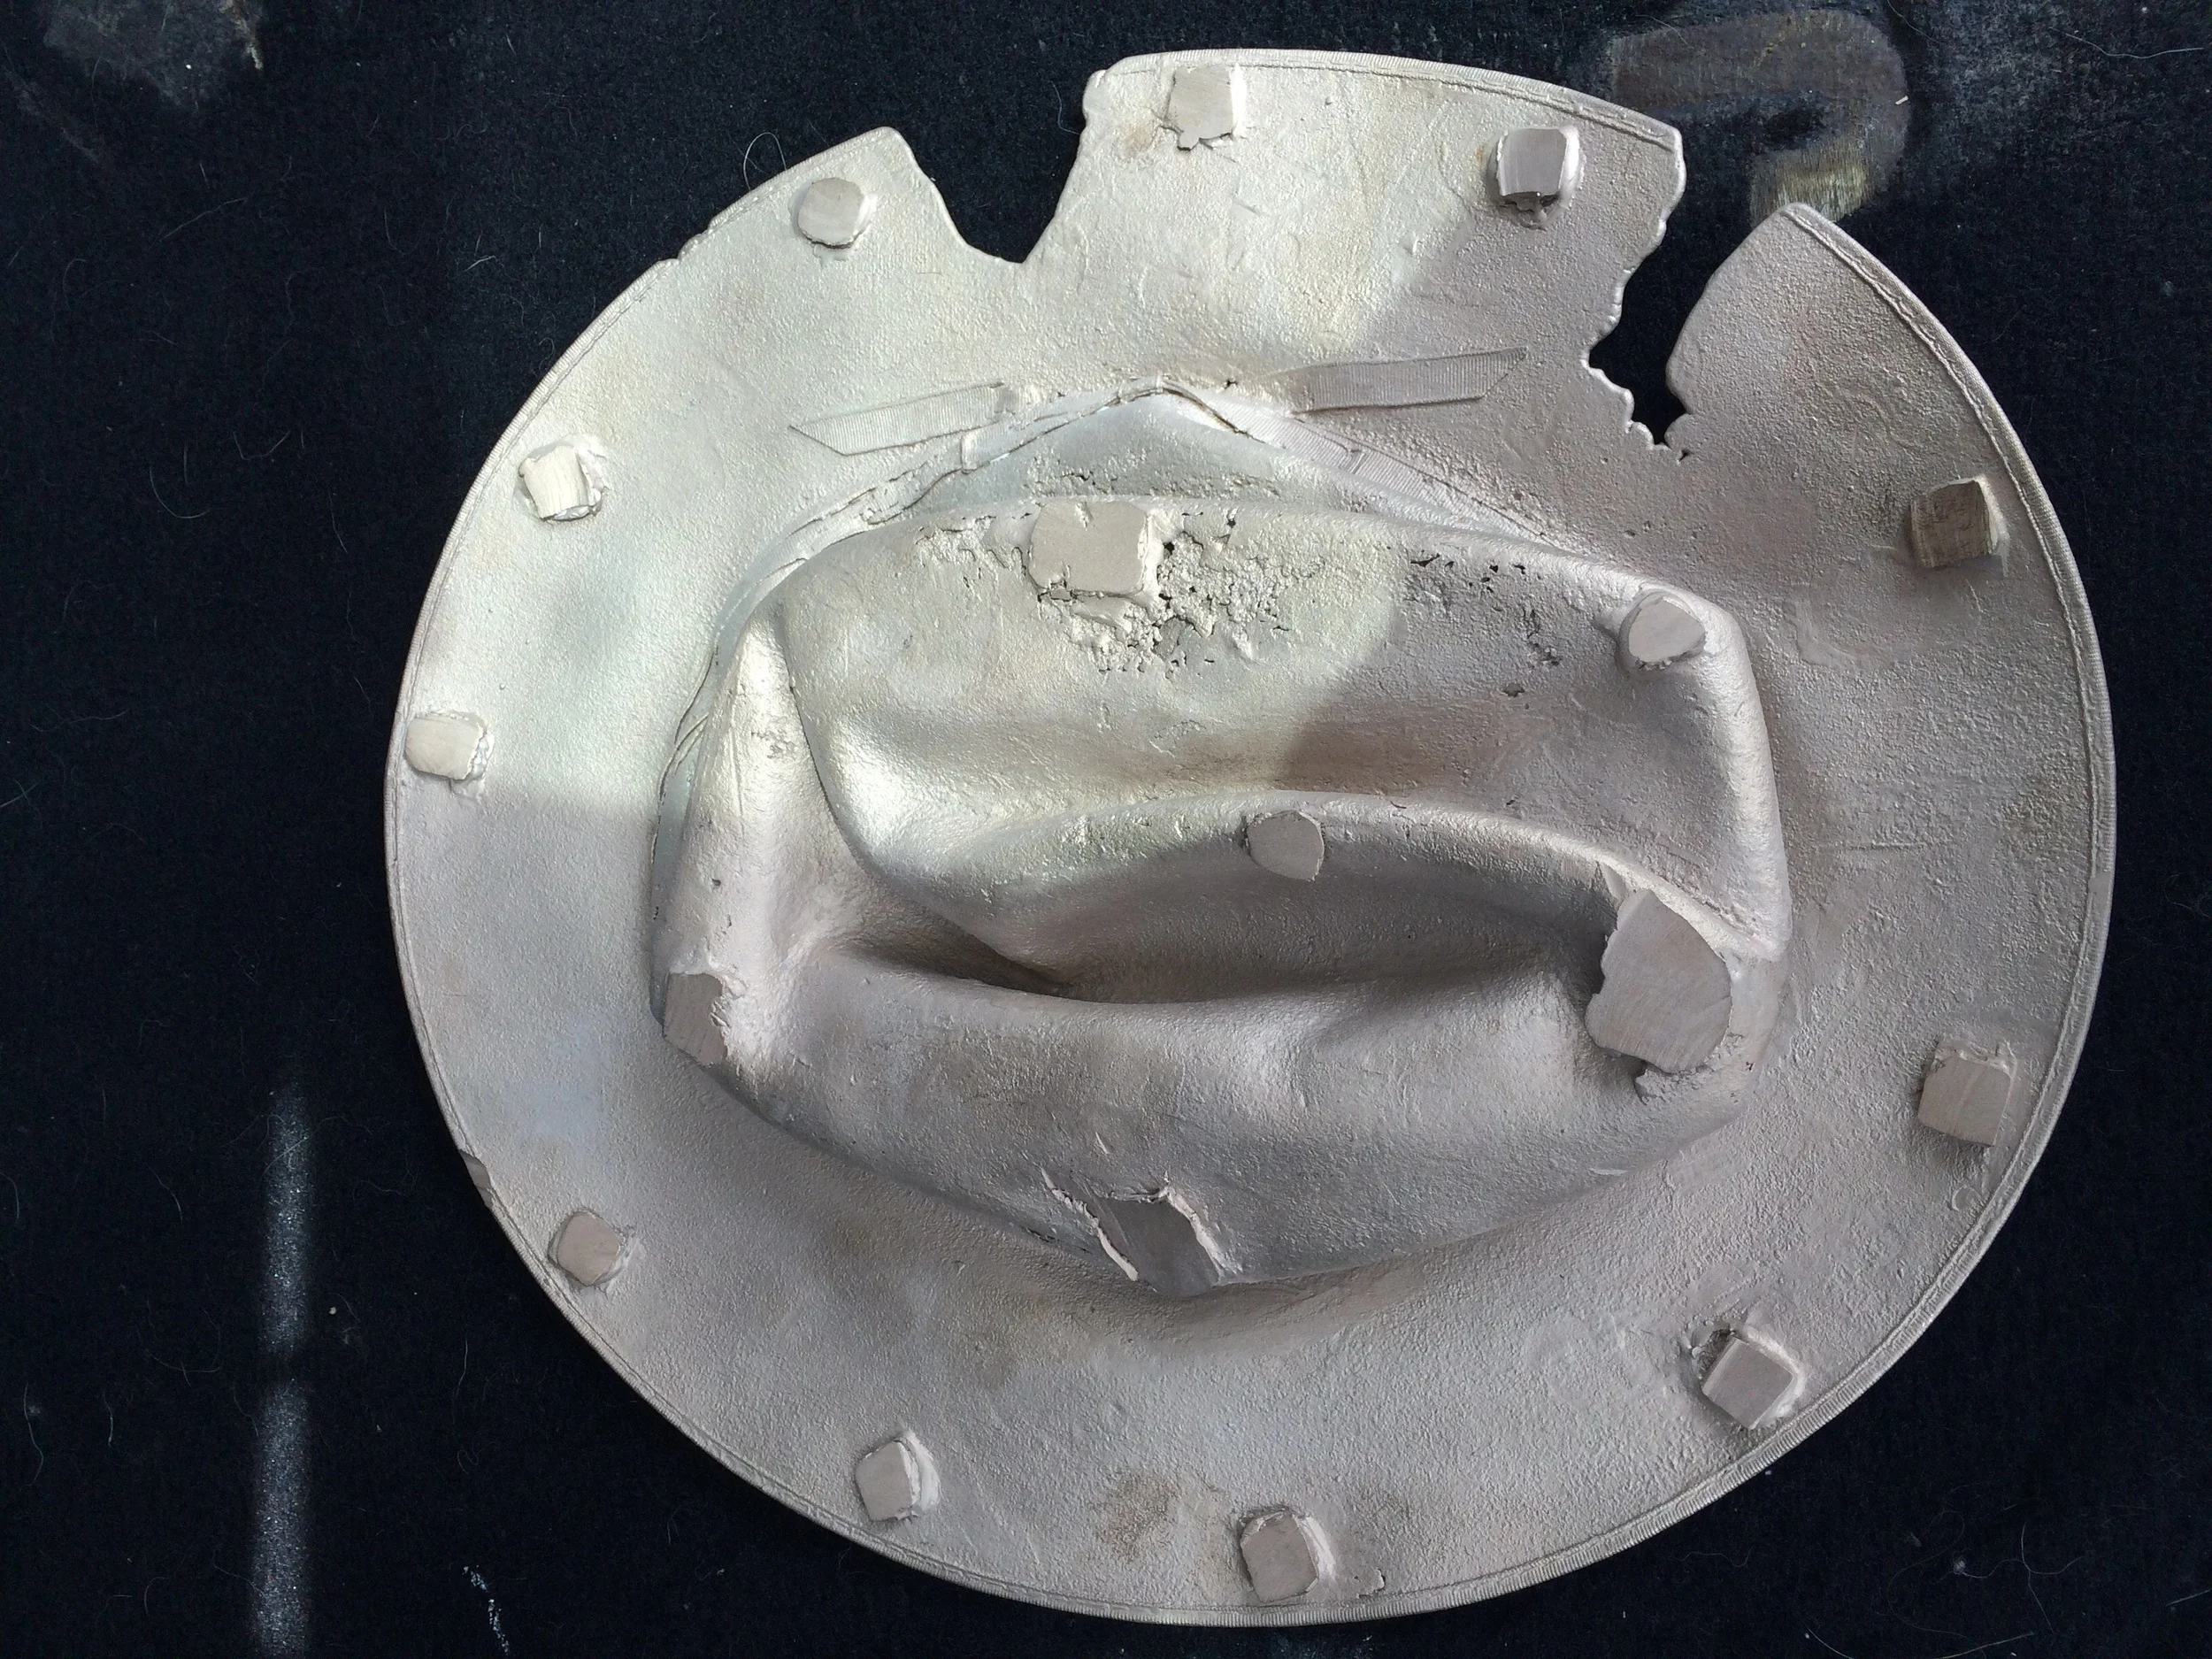
The hats are degated. That means all the channels used to get the bronze into the piece have been removed. All the shell has been broken off and the pieces have been sandblasted.

Top side or outside.
Two small places did not fill with bronze on the above piece. I have scrapes of a previous piece that I am going to use to patch this piece. I am excited to try to patch it. My plan is to make the patch look like natural tears. It will be a challenge and I am looking forward to seeing if I have the welding and chasing skills.

inside of piece.

Part of my series of bronze hat series "gust". where it is in the series I will not know until I finish.


Two hats in the series together.
The next step is to do the chasing. Chasing is grinding down the stubs from the gates and recreating the texture so that you can not see a trace of the gates. It is a skill that takes practice.


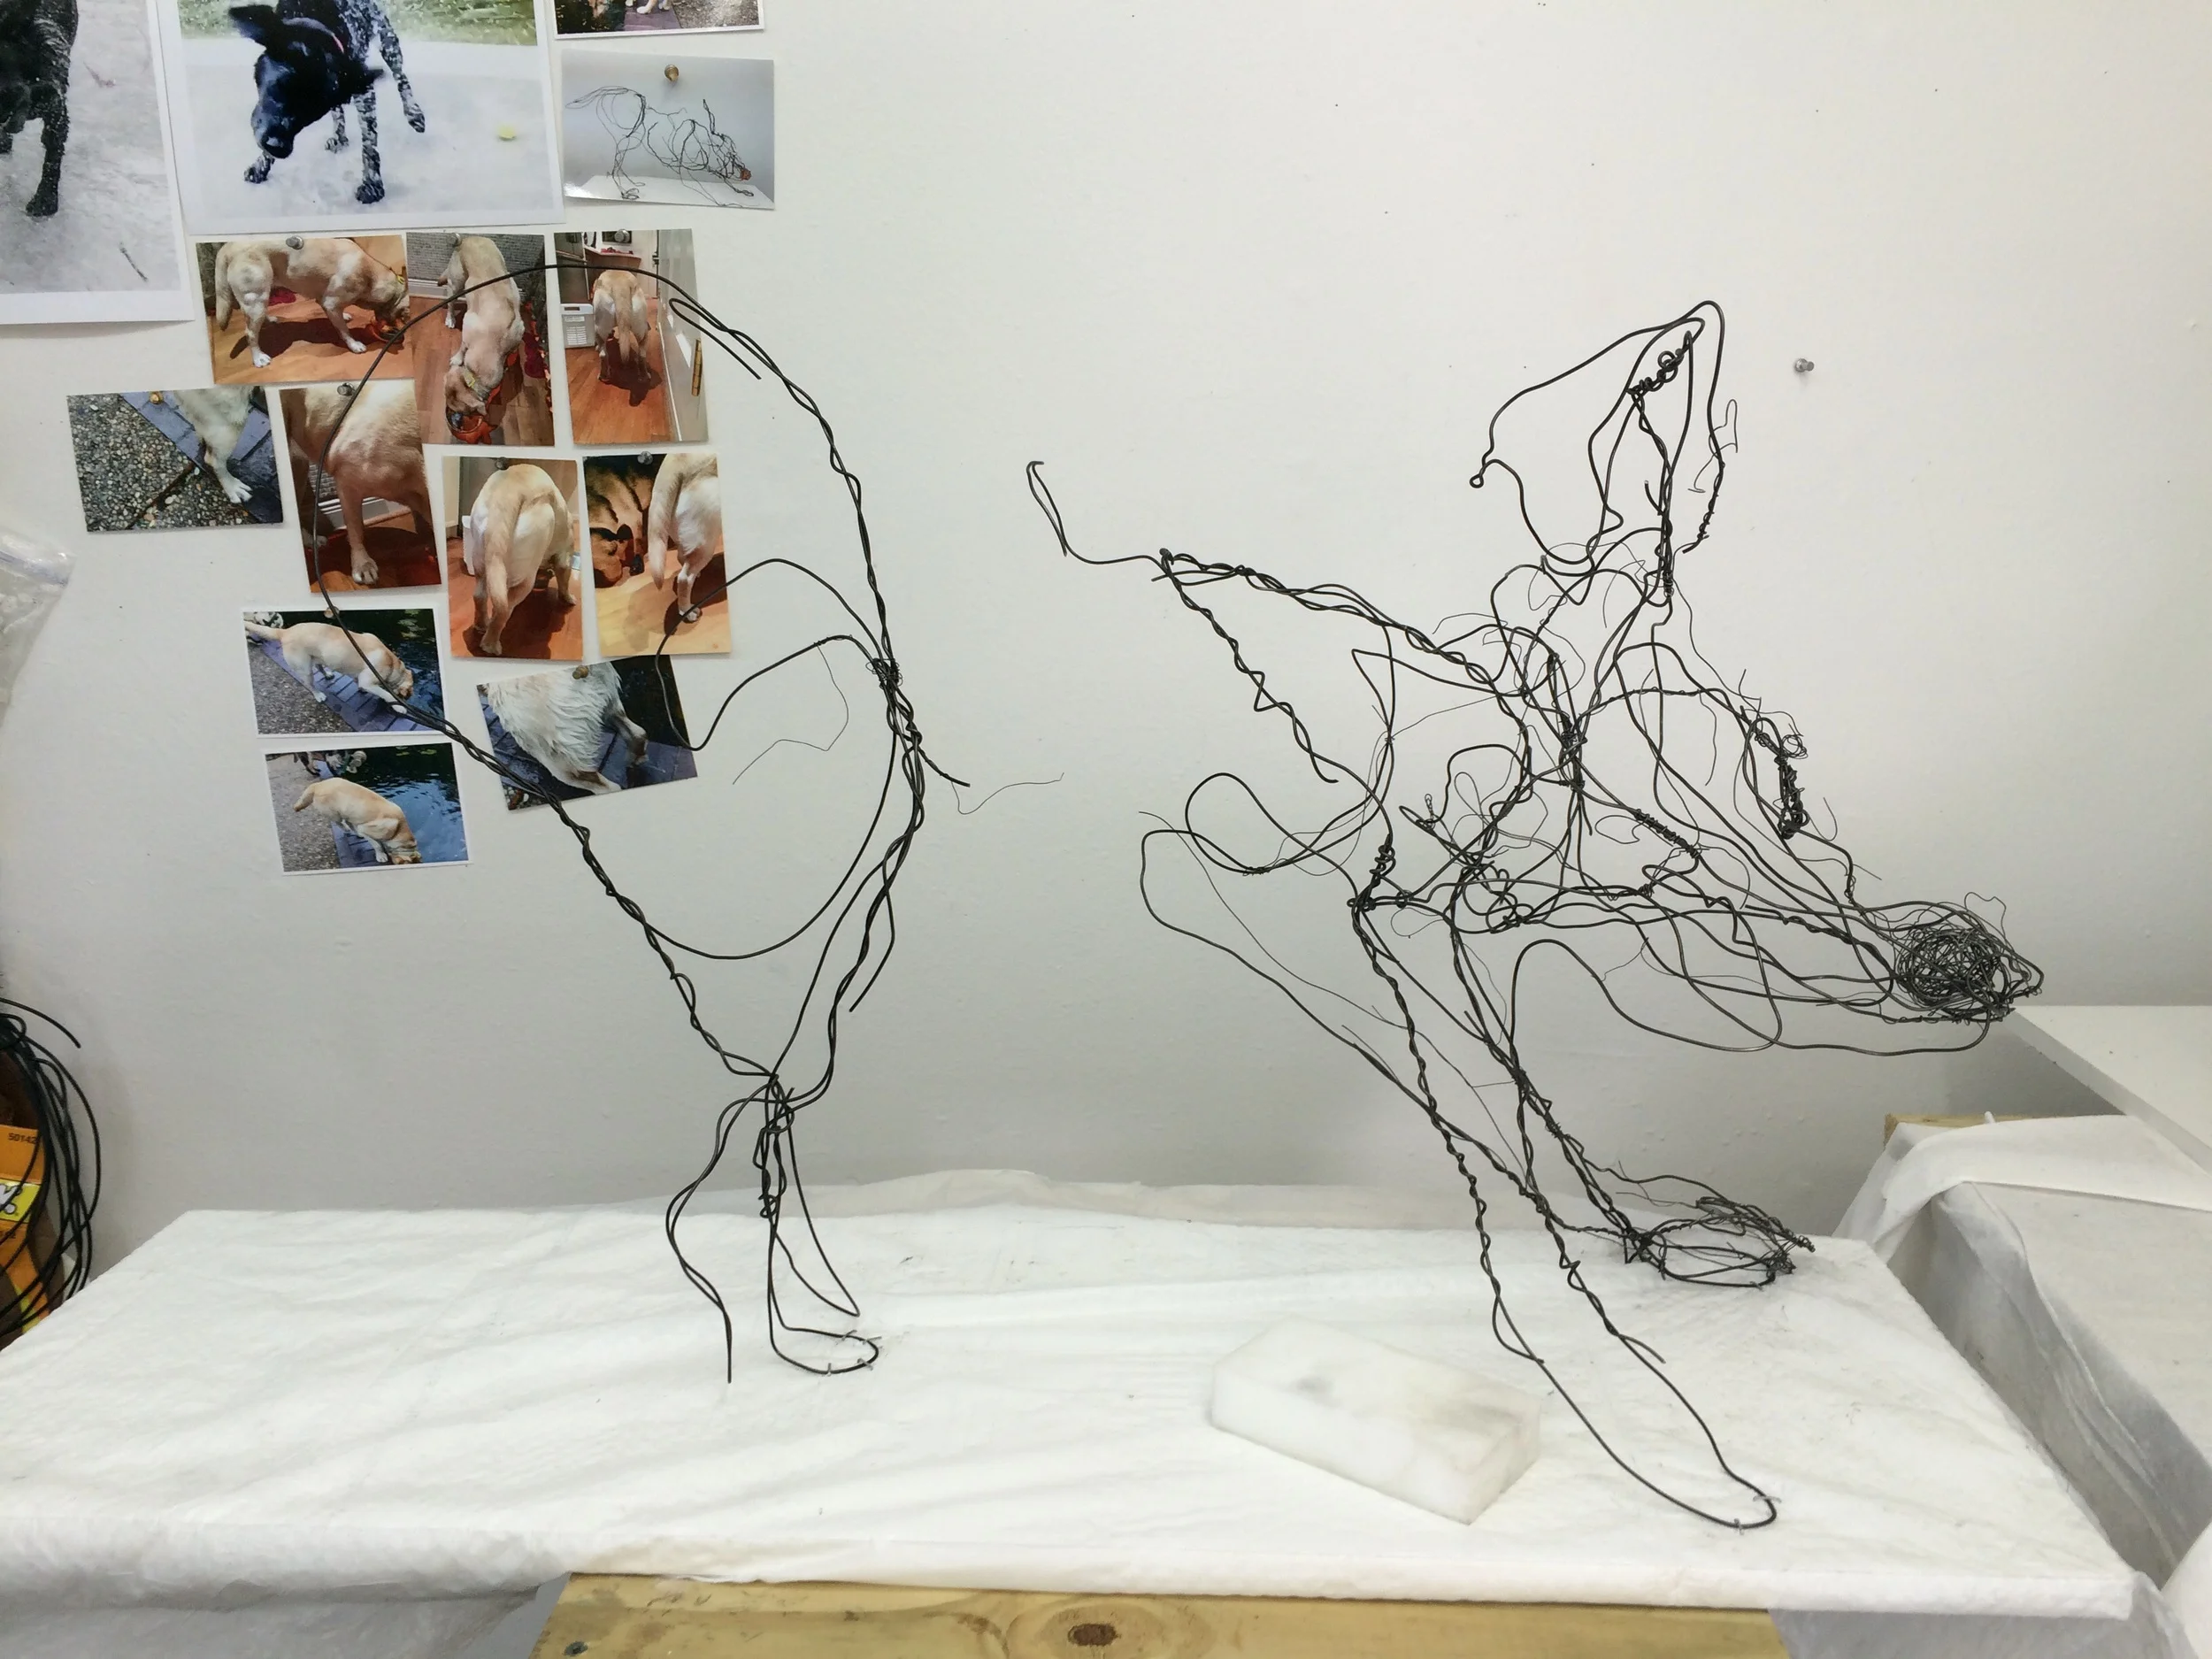
Day 1
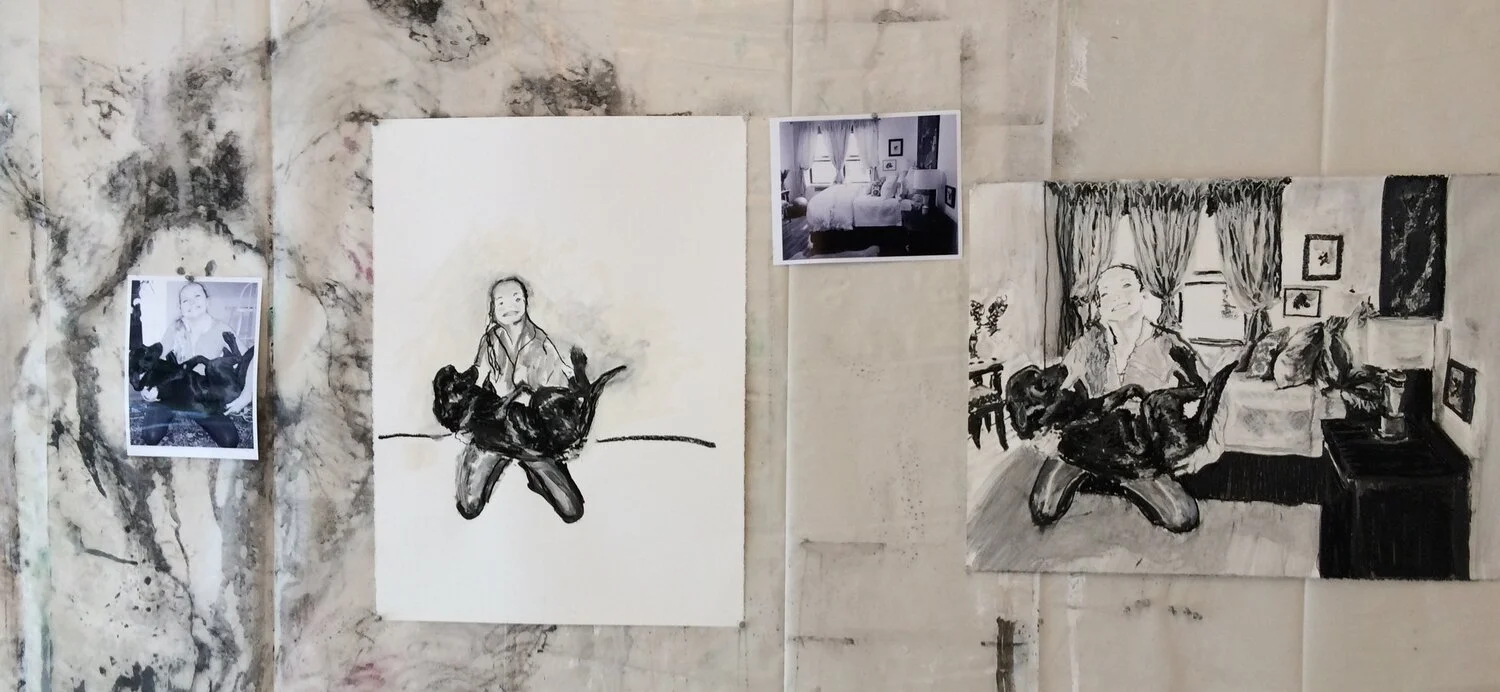
In the background you can see the photos of screen shots I am using as inspiration for both pieces. The top photo in the background is the finished piece. The lower one is the piece I am starting.
I was drawn to this screen shot because it shows how dogs can move in two different directions at one time. Her head is twisted right as her hind end is twisted left. Her back weight is completely on her right leg and her left foot is lifted off the ground.

The photo I used for inspiration seen in the background in many of the photos.

End of day 2

Right side view day 2

The left side. The first piece in the series is in the background.
Building up the back right leg. It is planted in the middle of her body. Her right foot will be off the ground as she vigorously shakes her coat dry.
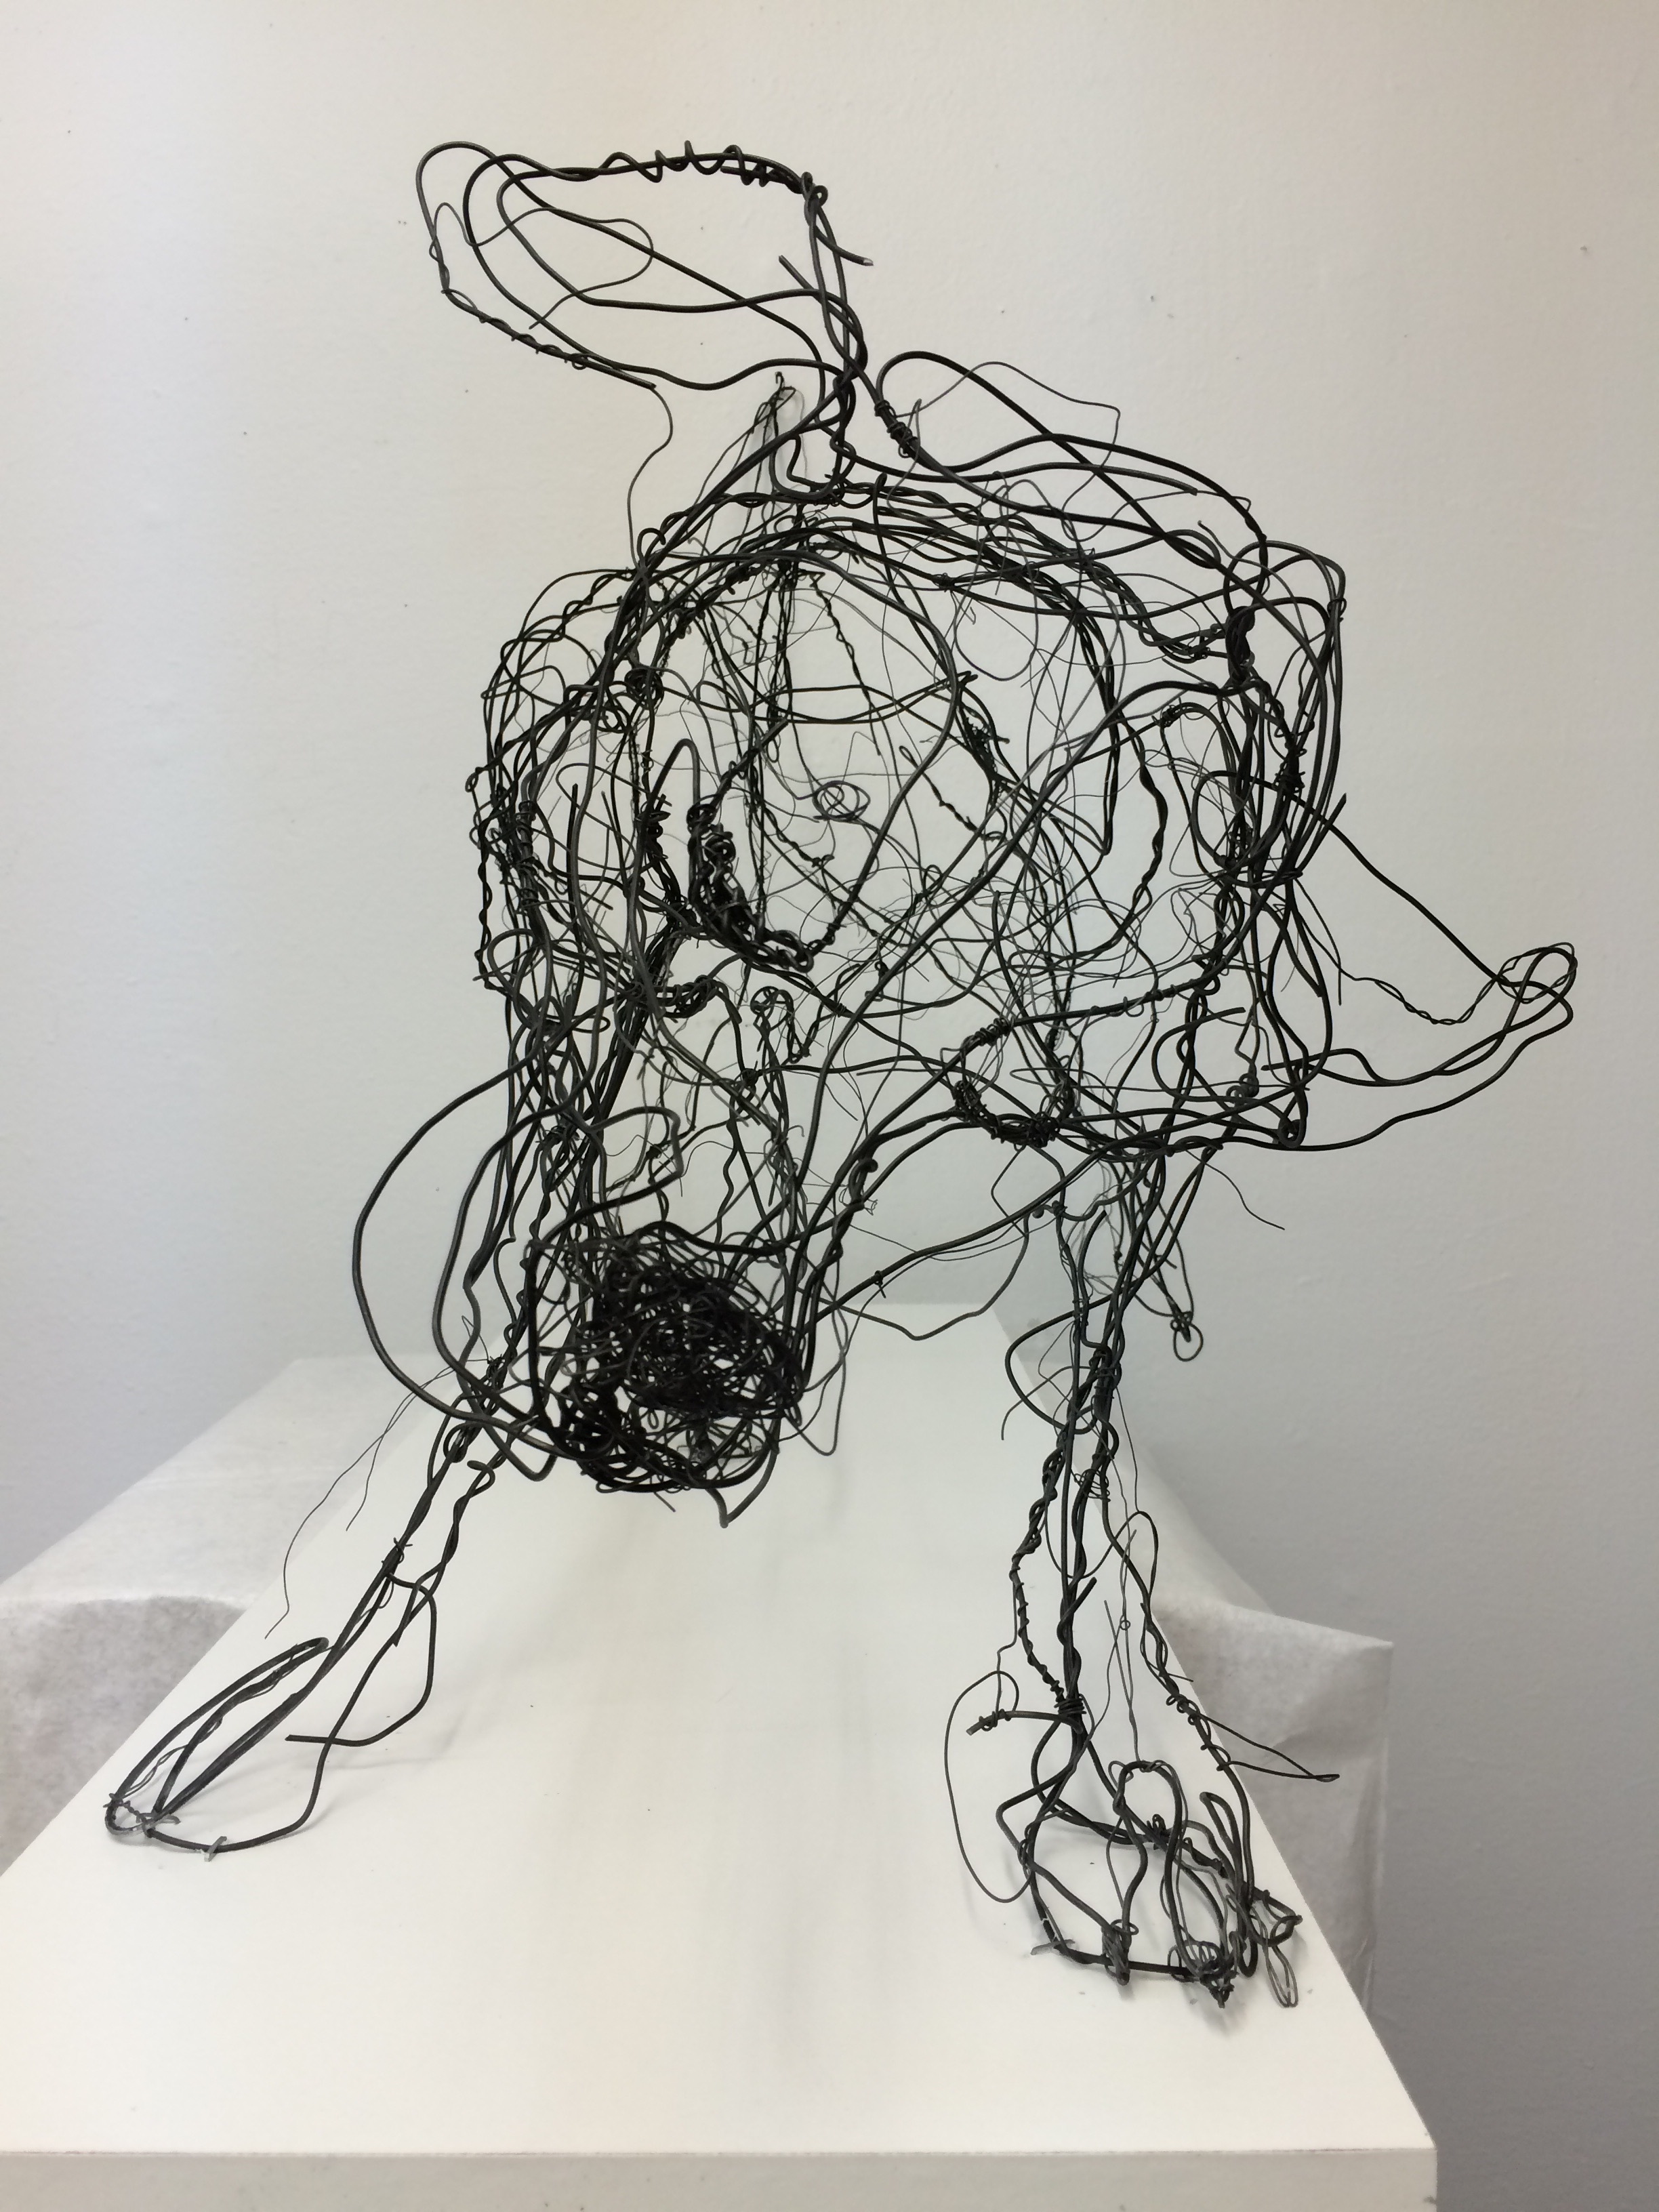
Front view. Almost finished.

All but the water spraying off her coat.

She is finished. I added the water spraying from her coat as she shakes. See the back left foot lifted off the ground.

1 down 1 to go.
During the dipping process the hand and Sprue broke. I was able to repair it. It poured fine but the hand is a little katywonk. A finger also broke but that I can fix by welding a small piece to the break.

117 lbs. of bronze covered in ceramic shell that needs to be removed.

The tools

The easiest way to go about it is to turn the piece on the cup and bang away.

Today's progress. I got off enough to know everything poured.

And then you need to clean up.

Interesting color on the hands of this piece. Something about the amount of air hitting the bronze as it was heated. I will have to ask David what caused it again.
I maybe "tired like I have been ironing all day", but I am very happy. Everything seems to have poured great. I will have a little repair work but nothing I can't manage. 😊 happy St. Patrick's day.
Thanks to David, Will, Carlos, Roland, Edie, Verena, Vanessa. And a great big thanks to TXRX.

One hat had a leak that David quickly stopped with spar set. Another hat had a leak we did not see on the very bottom. It probably will not affect the piece.

"gust" X 3
verena's birds (3) and my "lifting spirit" gifts (2) cooling down. The bronze looks charred - weird.

I like this leather get up a lot more when it isn't 80 outside. I love the blue on the golden brown.
Tomorrow morning we are pouring these pieces. It takes 117 lbs. of bronze.

3 from my "gust" series (one is left over from last semester), 2 "lifting spirits" 1 for my daughter and 1 is a gift.
I thought "lifting spirits" was finished then I decided to give her a little gold leaf. And today I am sealing it.
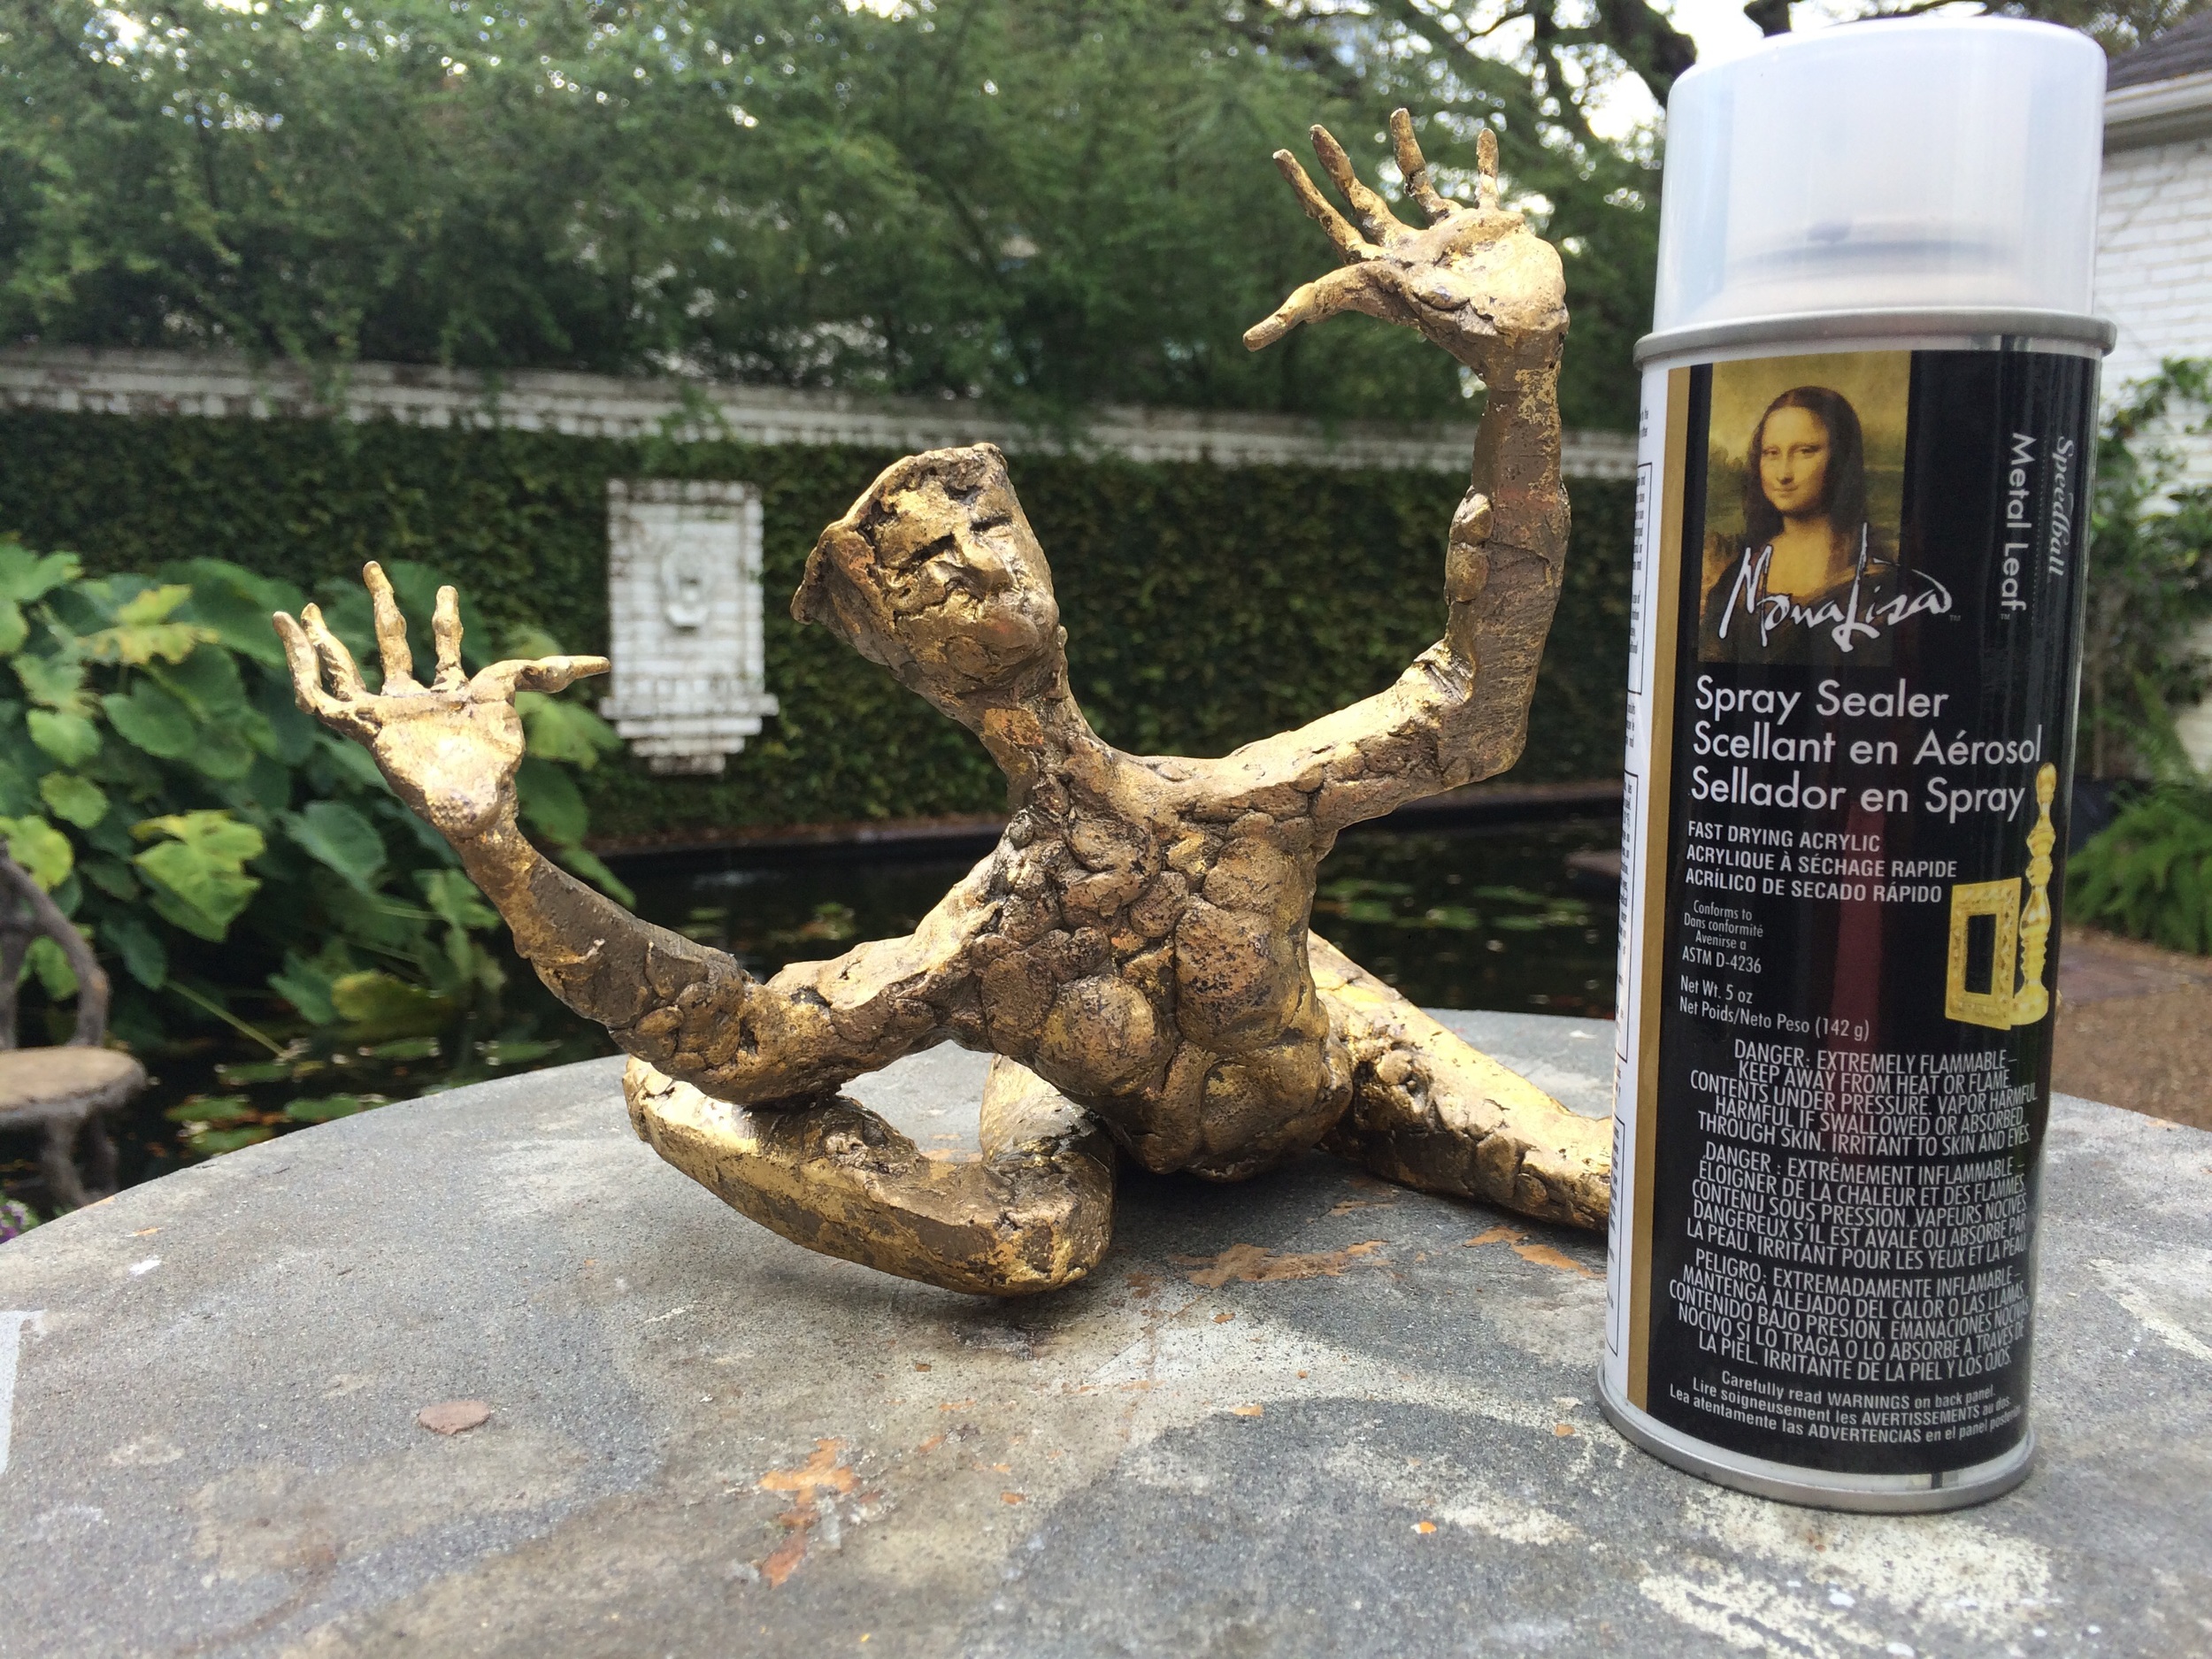
The seal changed the color just slightly darker (more intense) so I am now using bronze wool to tone it down. 😳


Texture makes bronze alive.