adding details
Detail to pant legs- water splashing off as he walks through the water.
Your Custom Text Here
adding details

Detail to pant legs- water splashing off as he walks through the water.
Creating tension

Right hoof

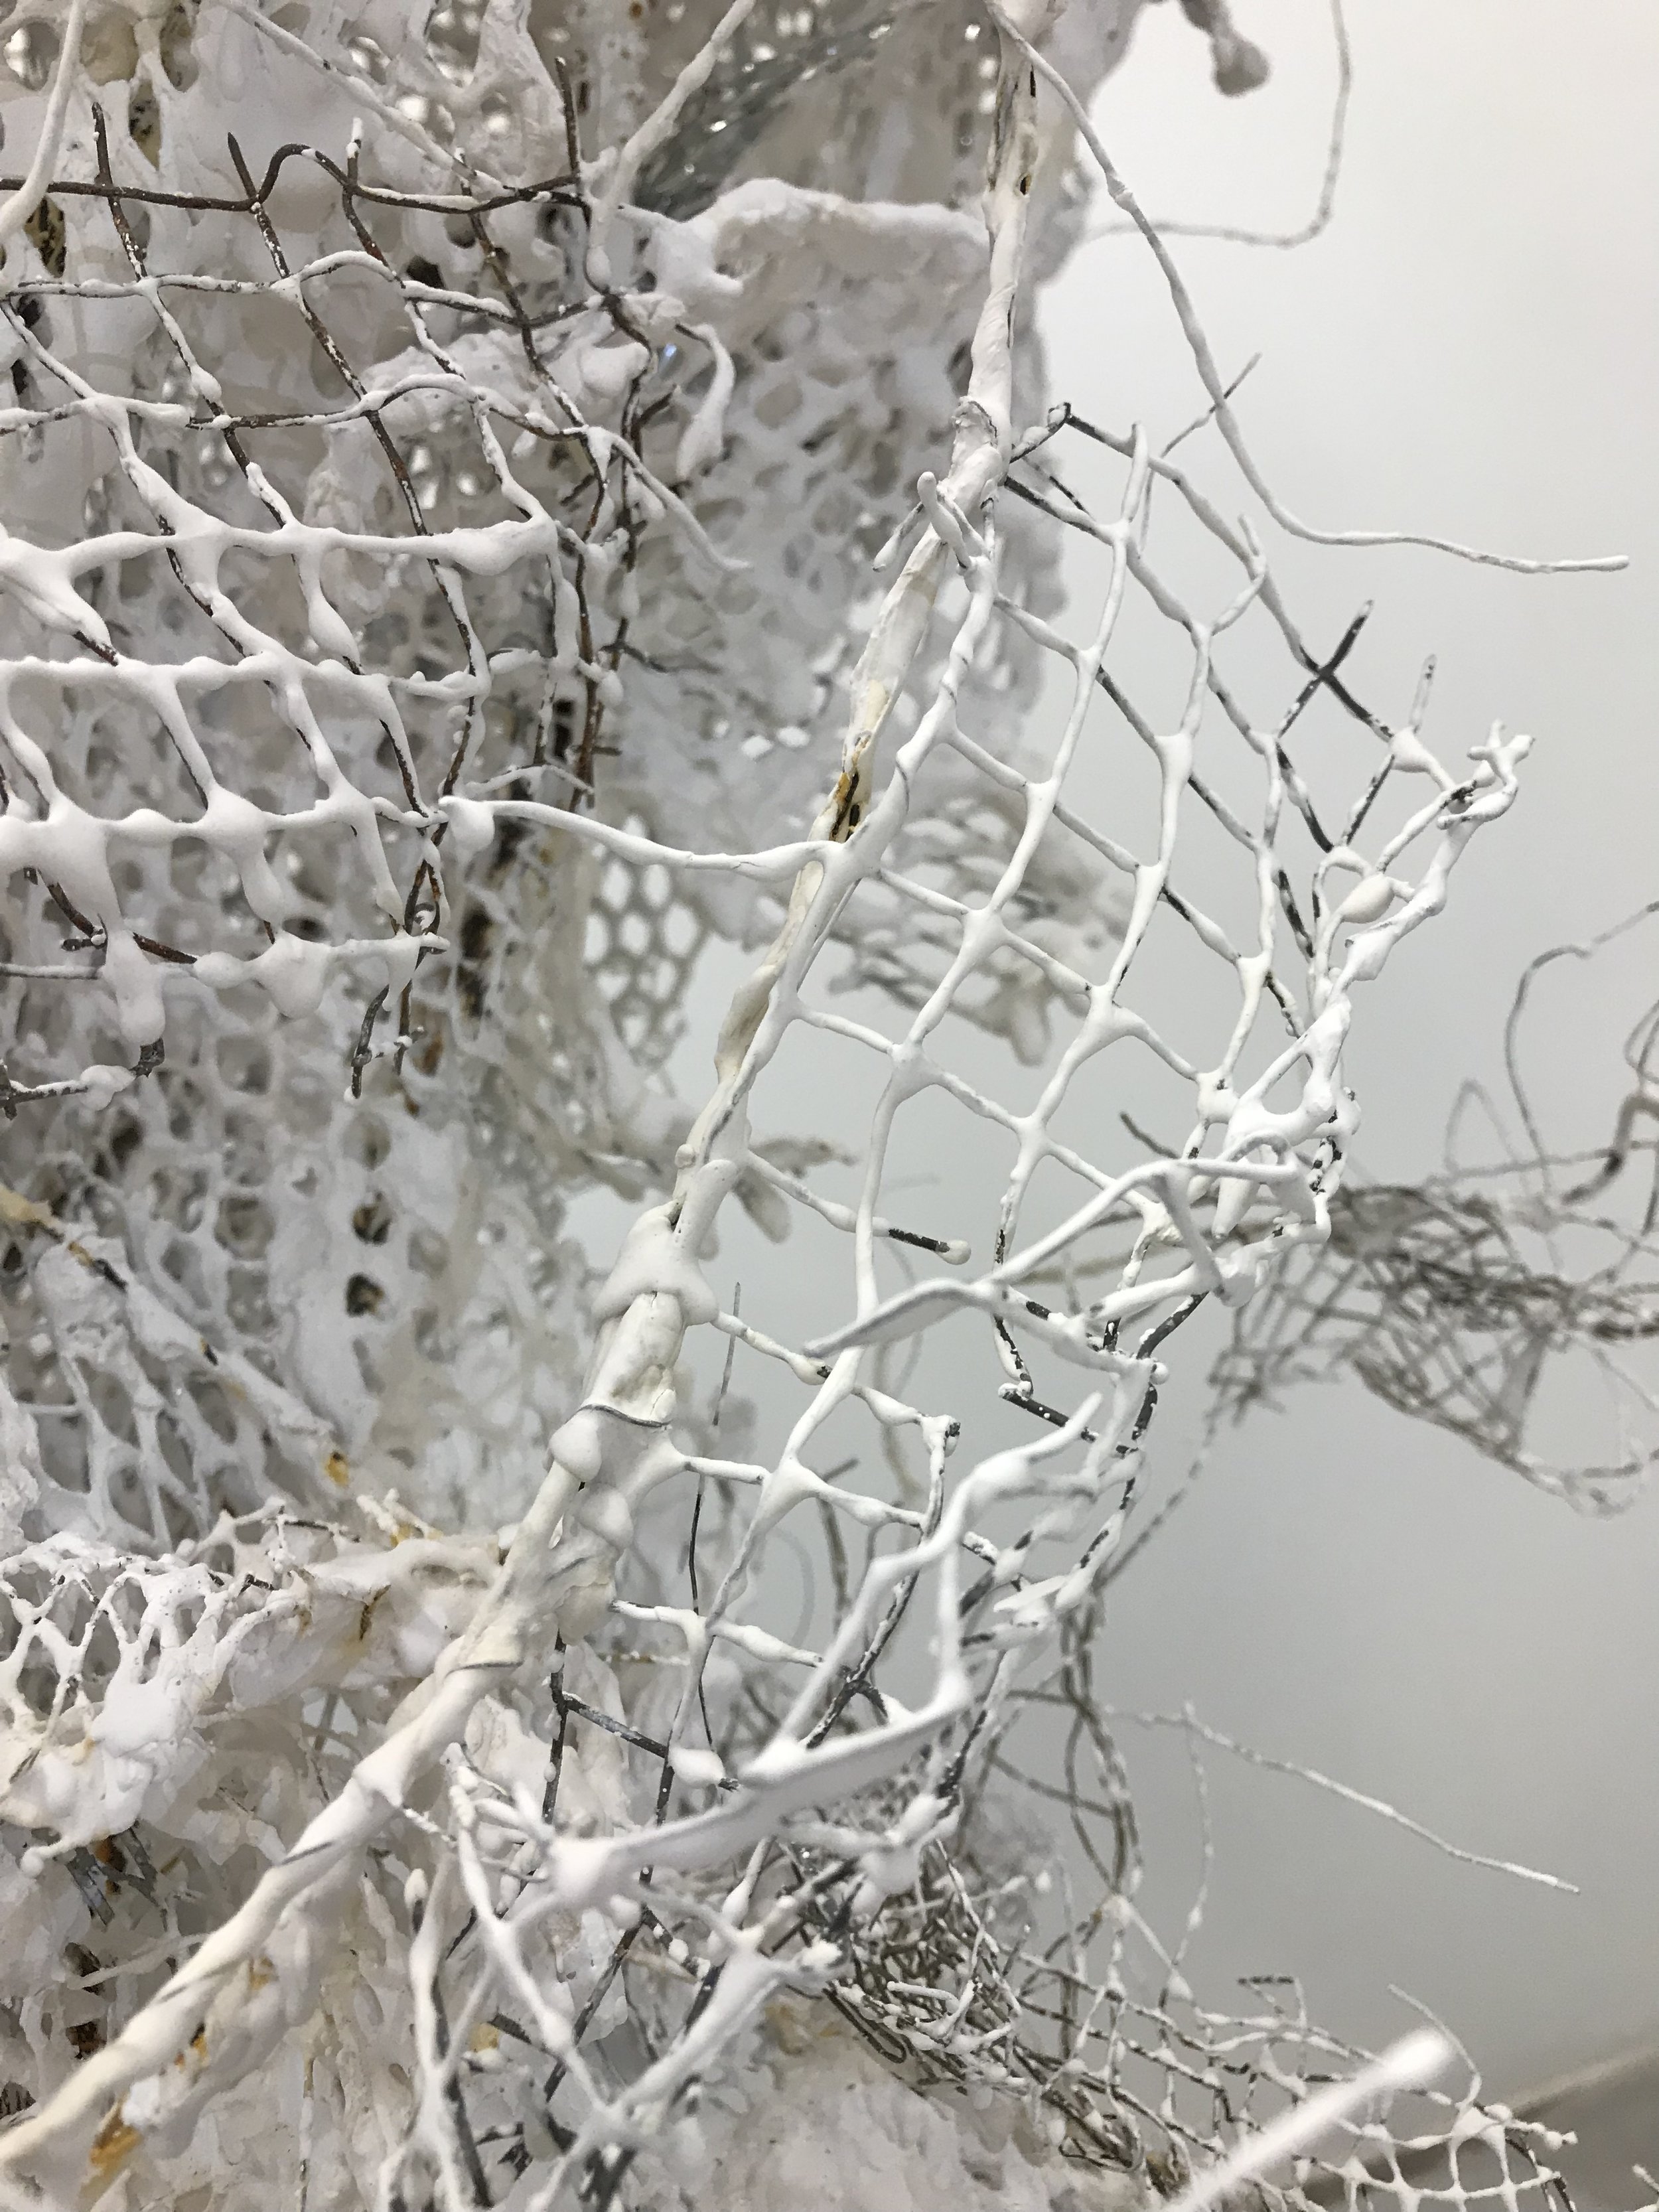
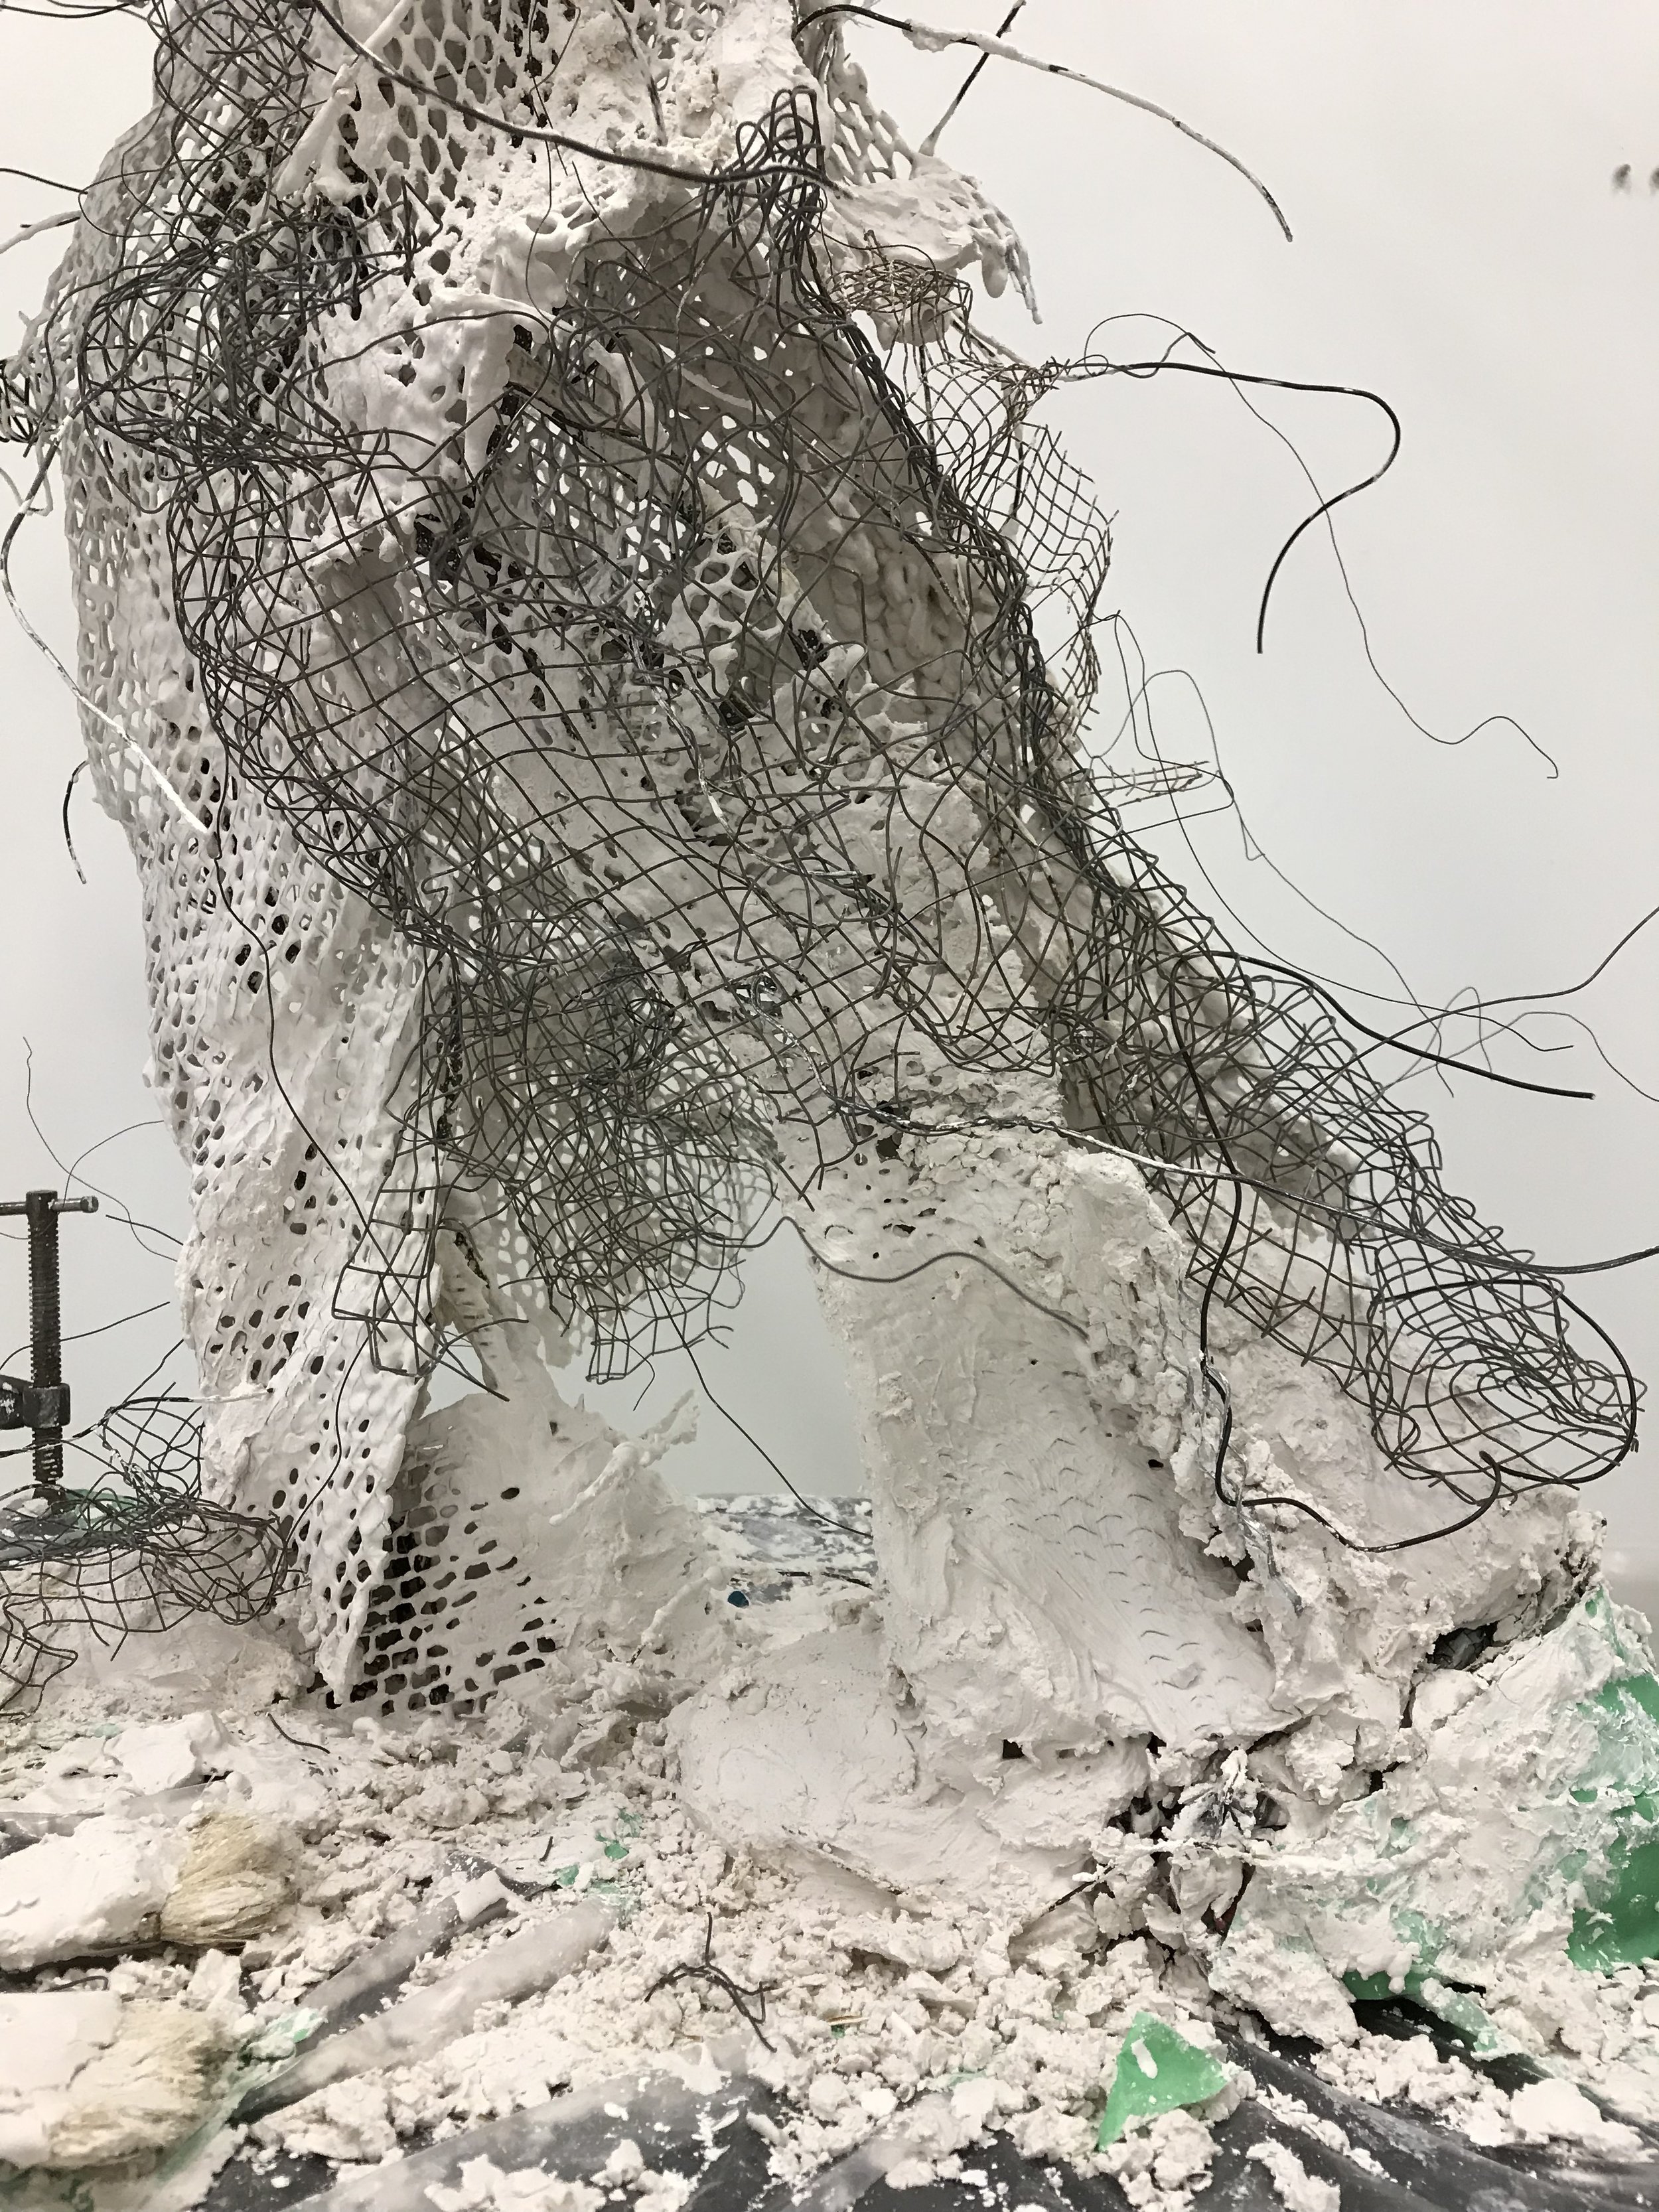
Today’s ingredients

Hay, string and wire-cloth to be mixed with plaster.

The left leg Preplaster


Hoof vibrations
The first day of plaster


Frint side of Left leg
Right leg

Left leg side view
Building the ears and adding baling wire before the plaster.

Looking nose to nose


the pig face

view of facing the nose

Side view

covering the bridge of the nose and forehead
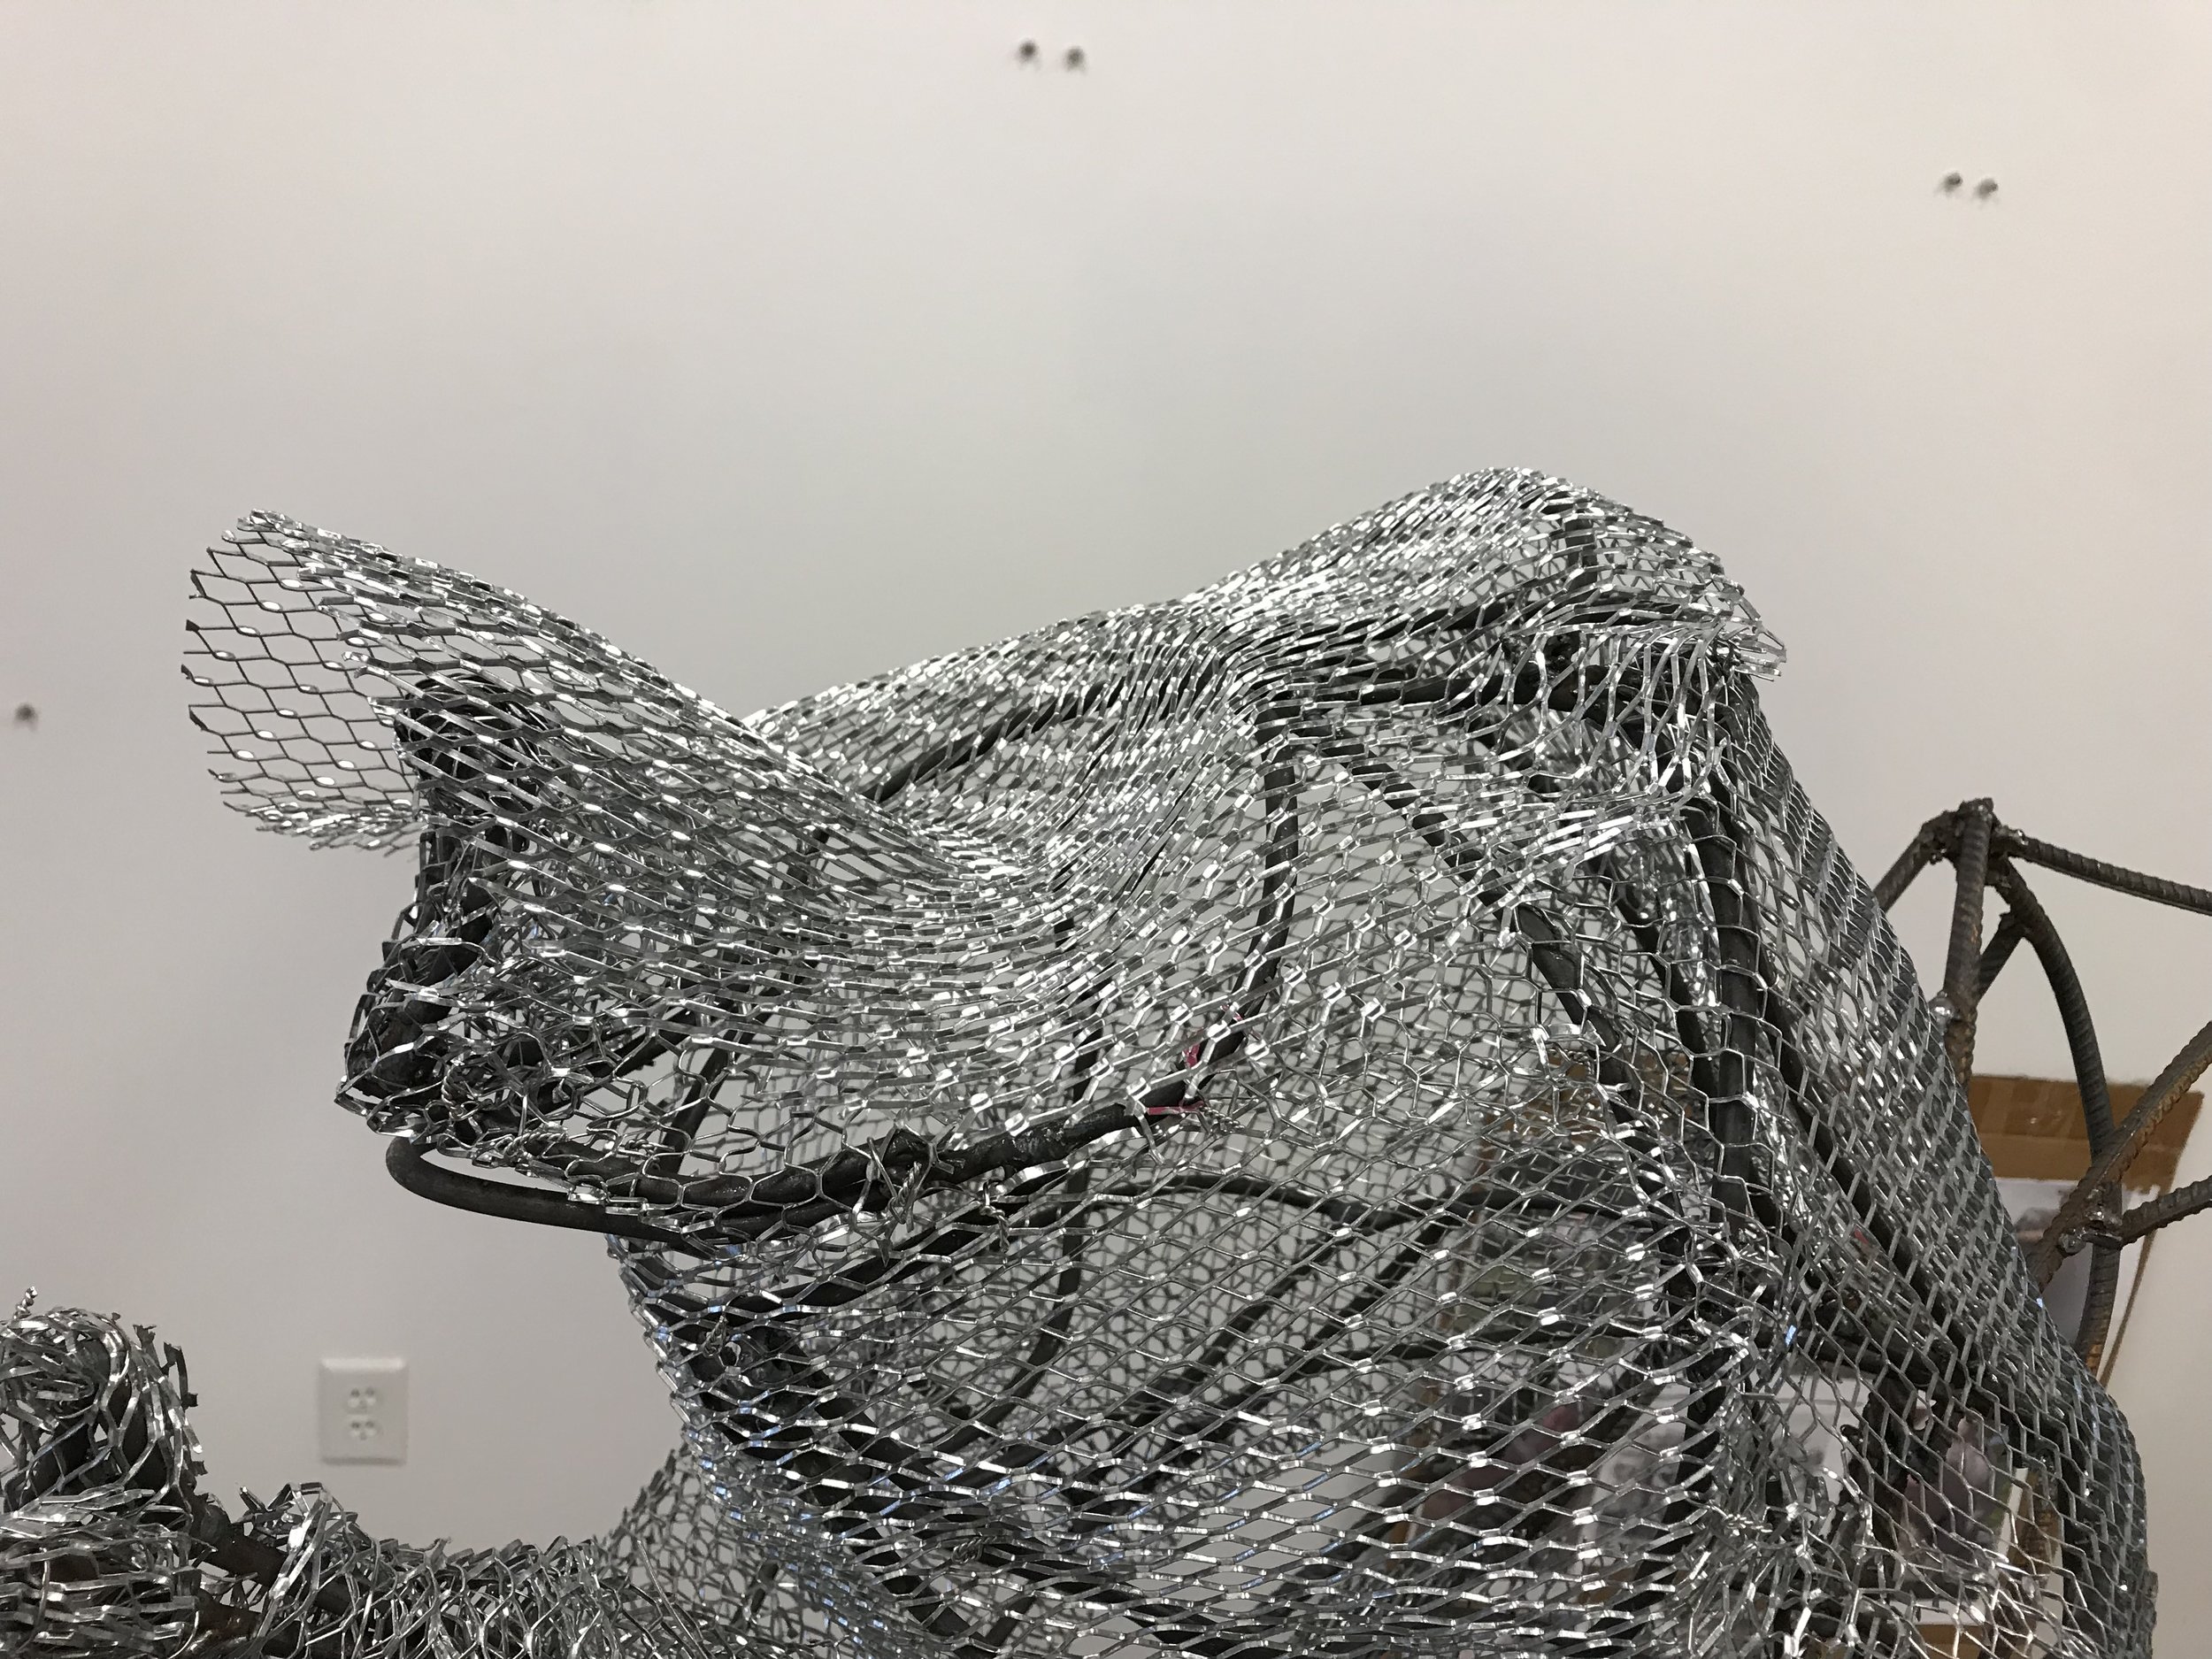

Back of the head

The mouth
🤔

The man’s hands and the pigs belly.


progress-
Hands and hoofs
hands
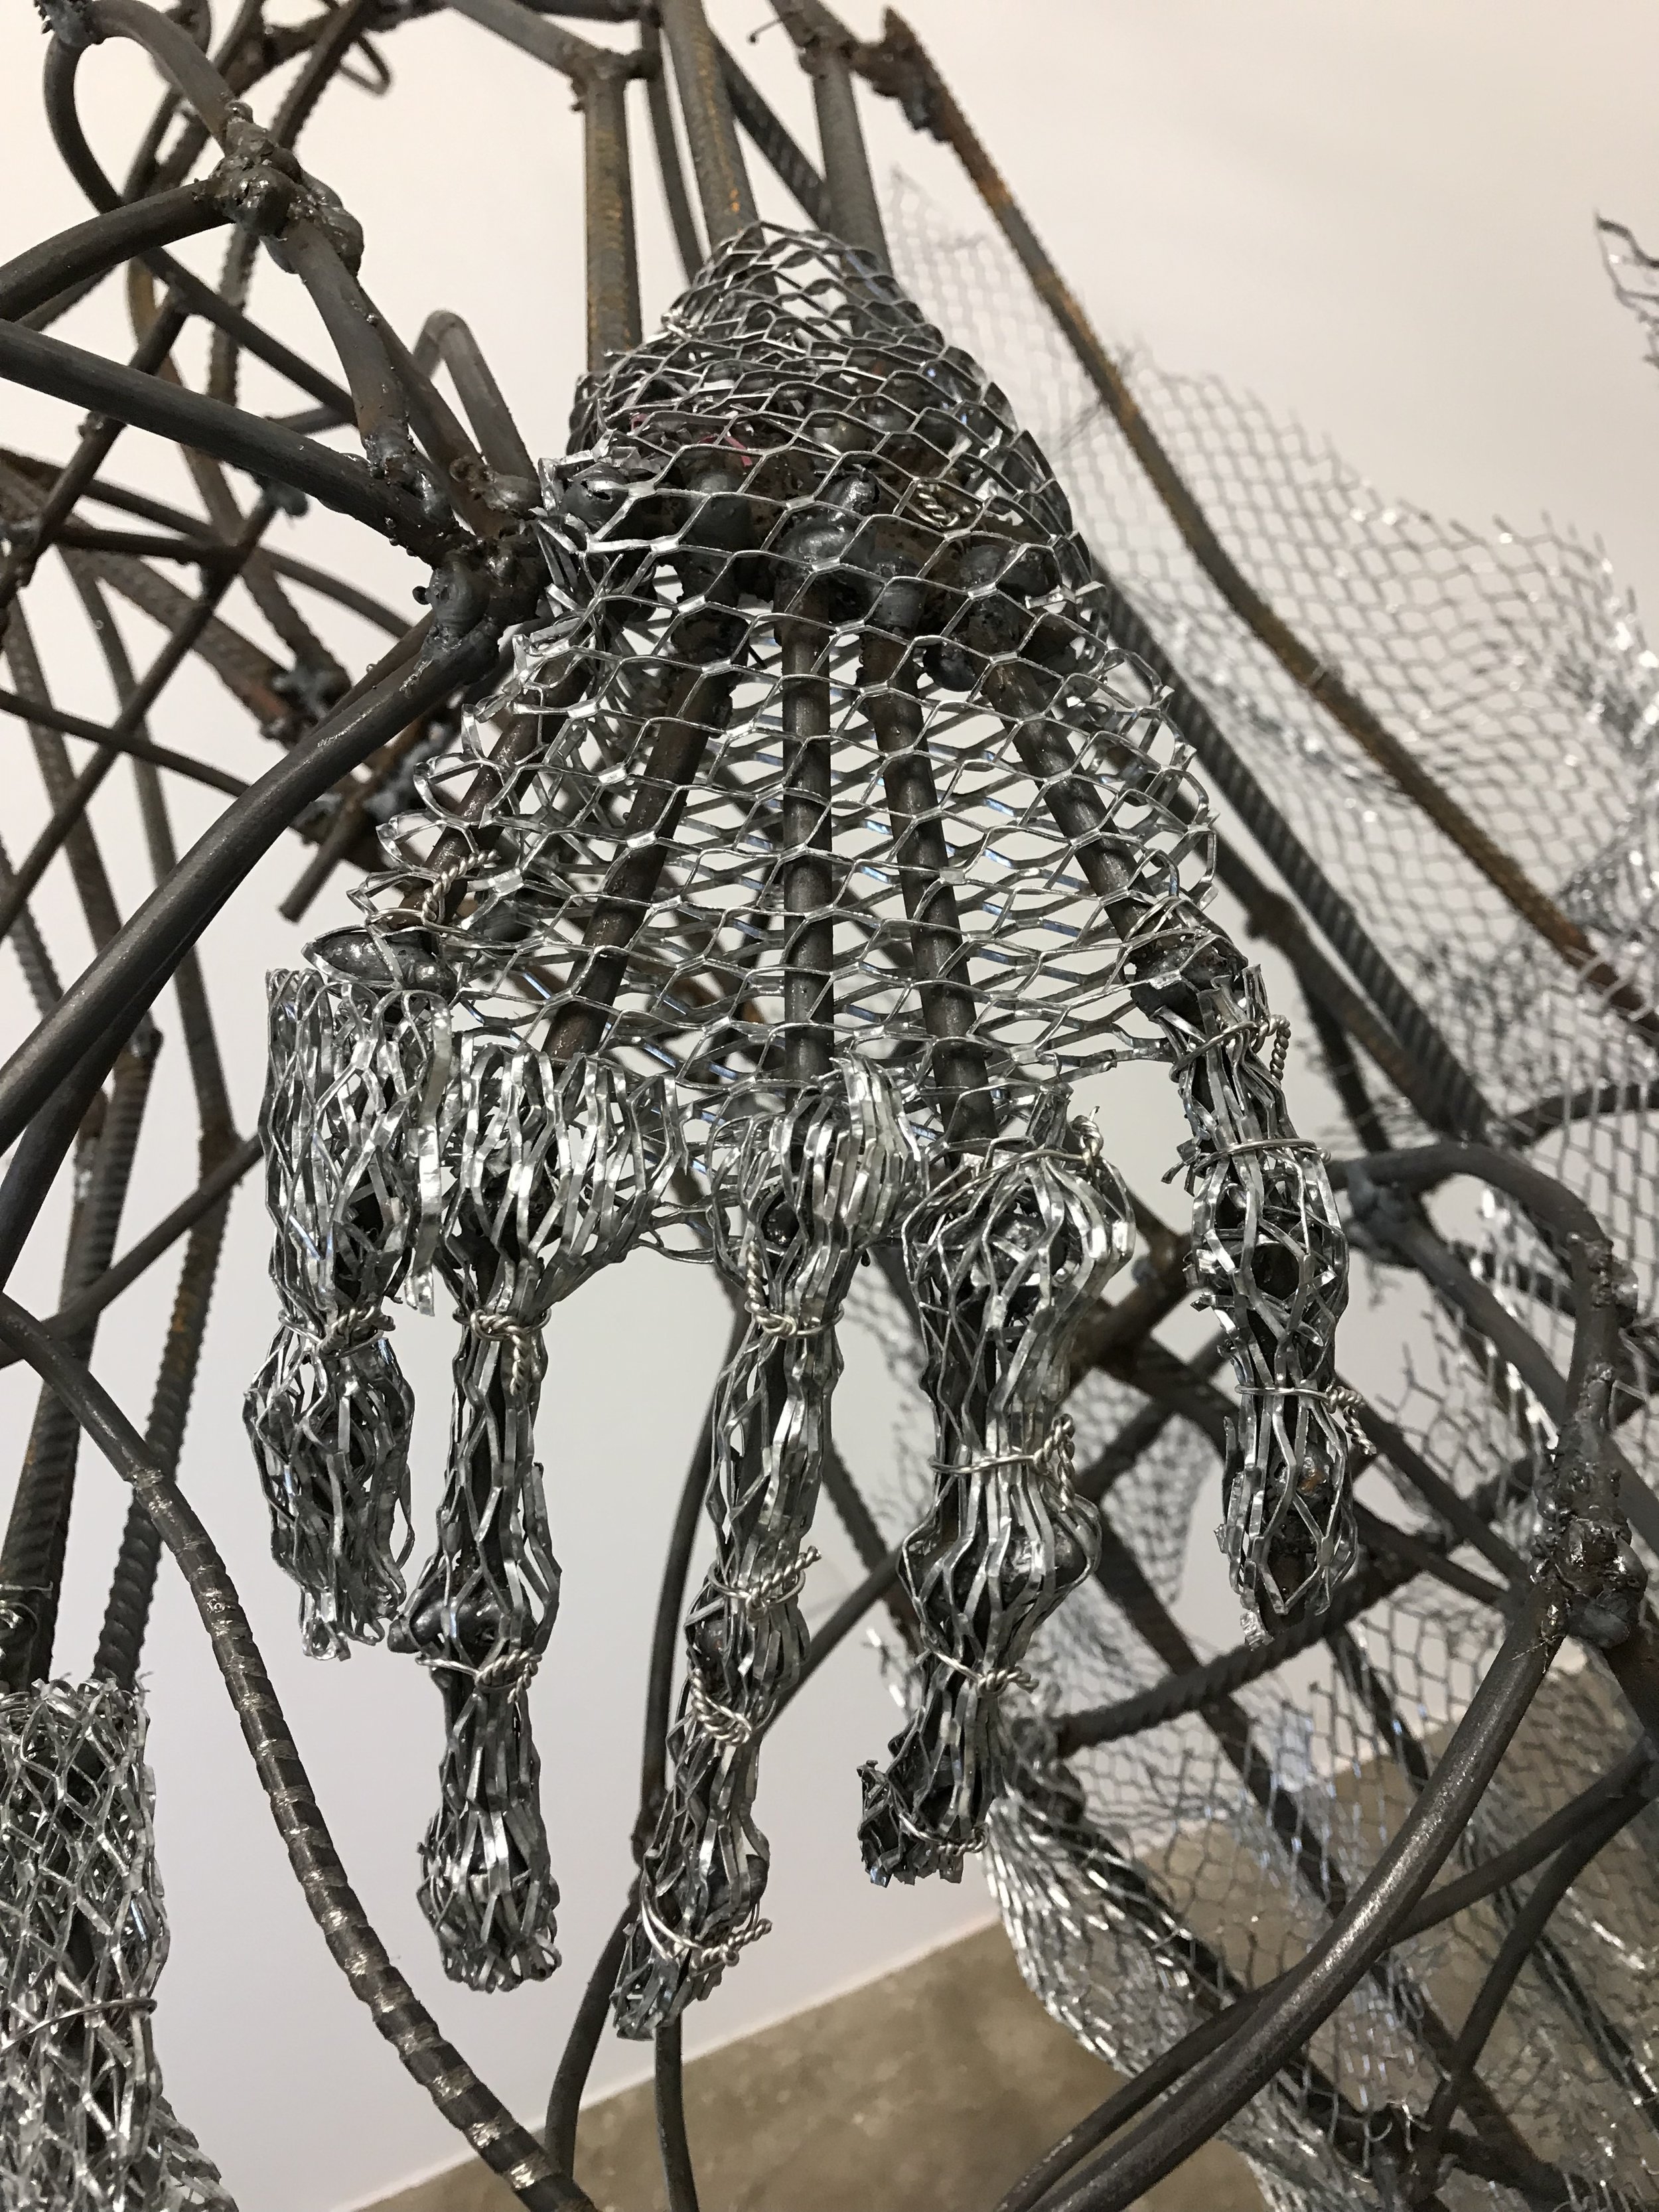

Hoofs


Today’s progress-
Feet and legs


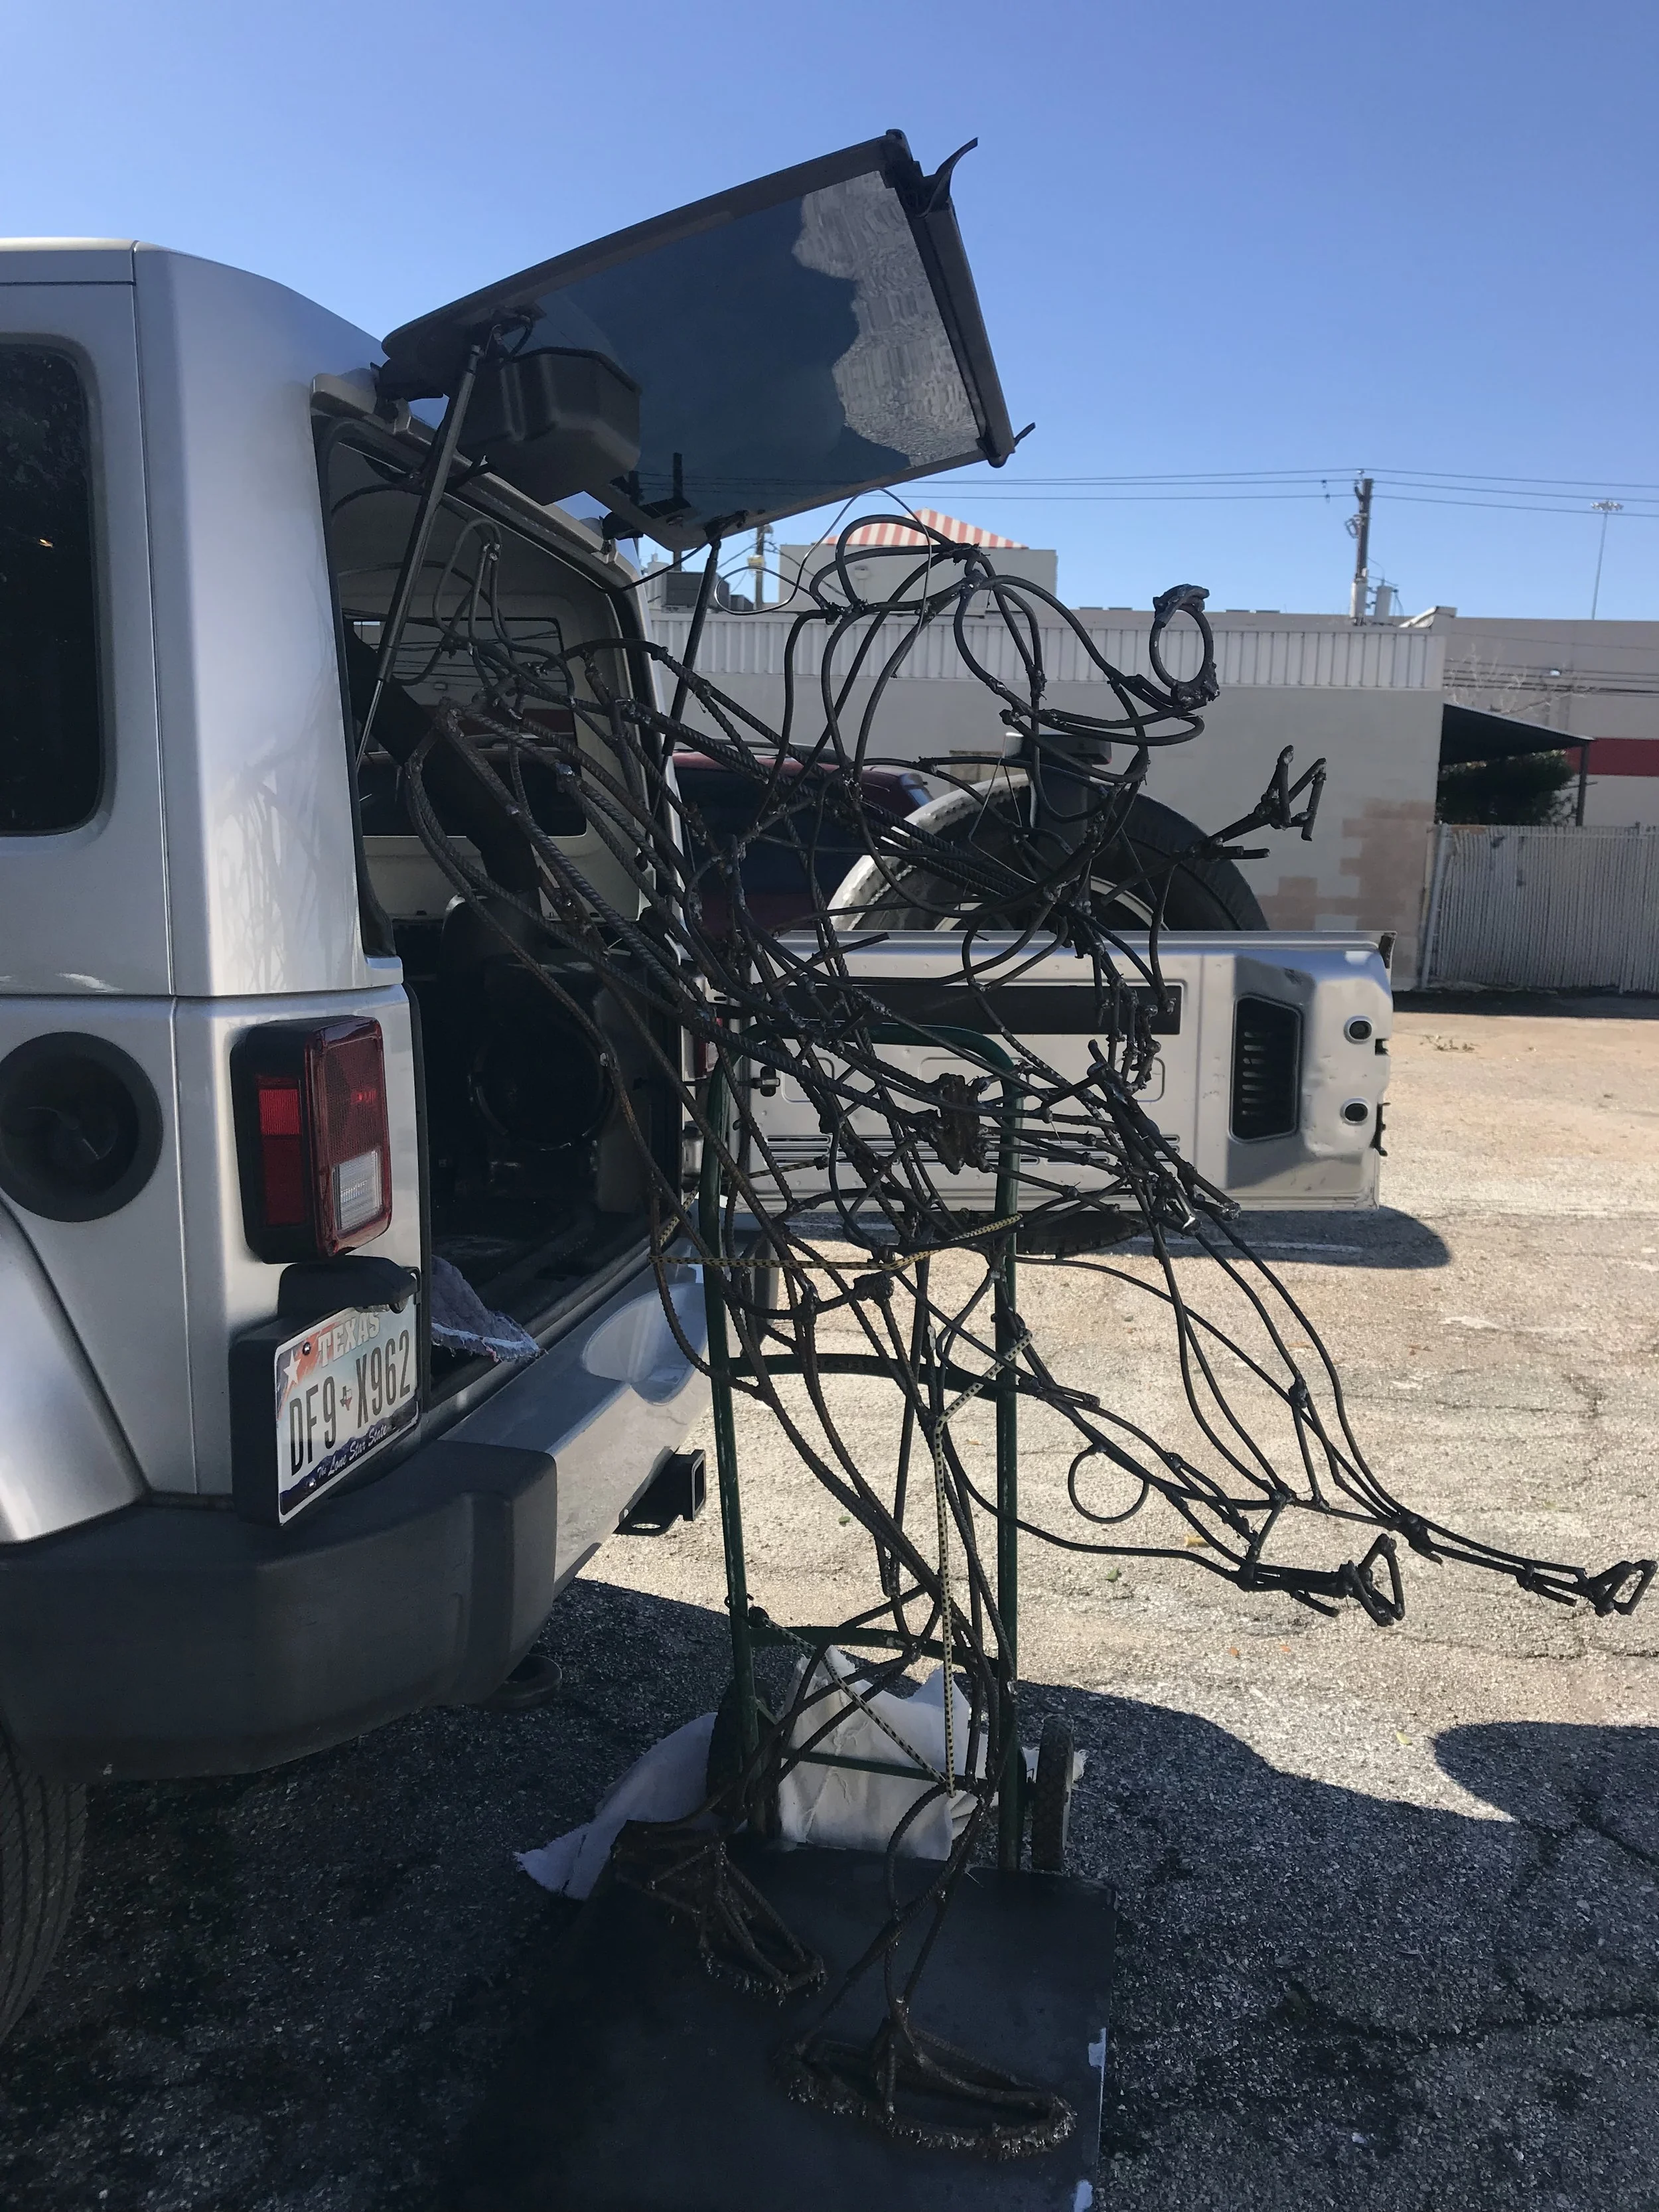
What a relief, I was able to get the piece in my car and to the sheet metal fabricators. .

The sheet Metal fabricators did a beautiful job leveling the steel base.

With this cold weather it is nice to get out of the garage and working inside my studio.
I will take down all the drawings, I want them to be very pressed for the exhibit and I need a clean wall to use as a backdrop as I work on the next stage of the sculpture . In order to press them I bought two pieces of sheet rock to press them under. I also stack my bronze hats on them for extra weight.

I unclamped the armature from the dolly to load it into my car and........... Houston, we have a problem! The base has warped from the heat of weld on the feet. The base is a basic potato chip. Fixing this is beyond my welding capabilities. This is a job for Blumenthal Sheet Metal. I think if they can weld basically a 2” wide frame around the edge, that would level the edge. It would still bubble in the middle, but that will not matter. I just need an edge that rests on the floor.

I will find out interesting he morning. 🤞
I added the man’s thrown back chin, a suggestion of his head shape, and reinforced his wrist and hands. I also added the pig’s tail, reinforced his hoofs, and a added a suggestion of some very big ears.

from the front

From slight left

Left side
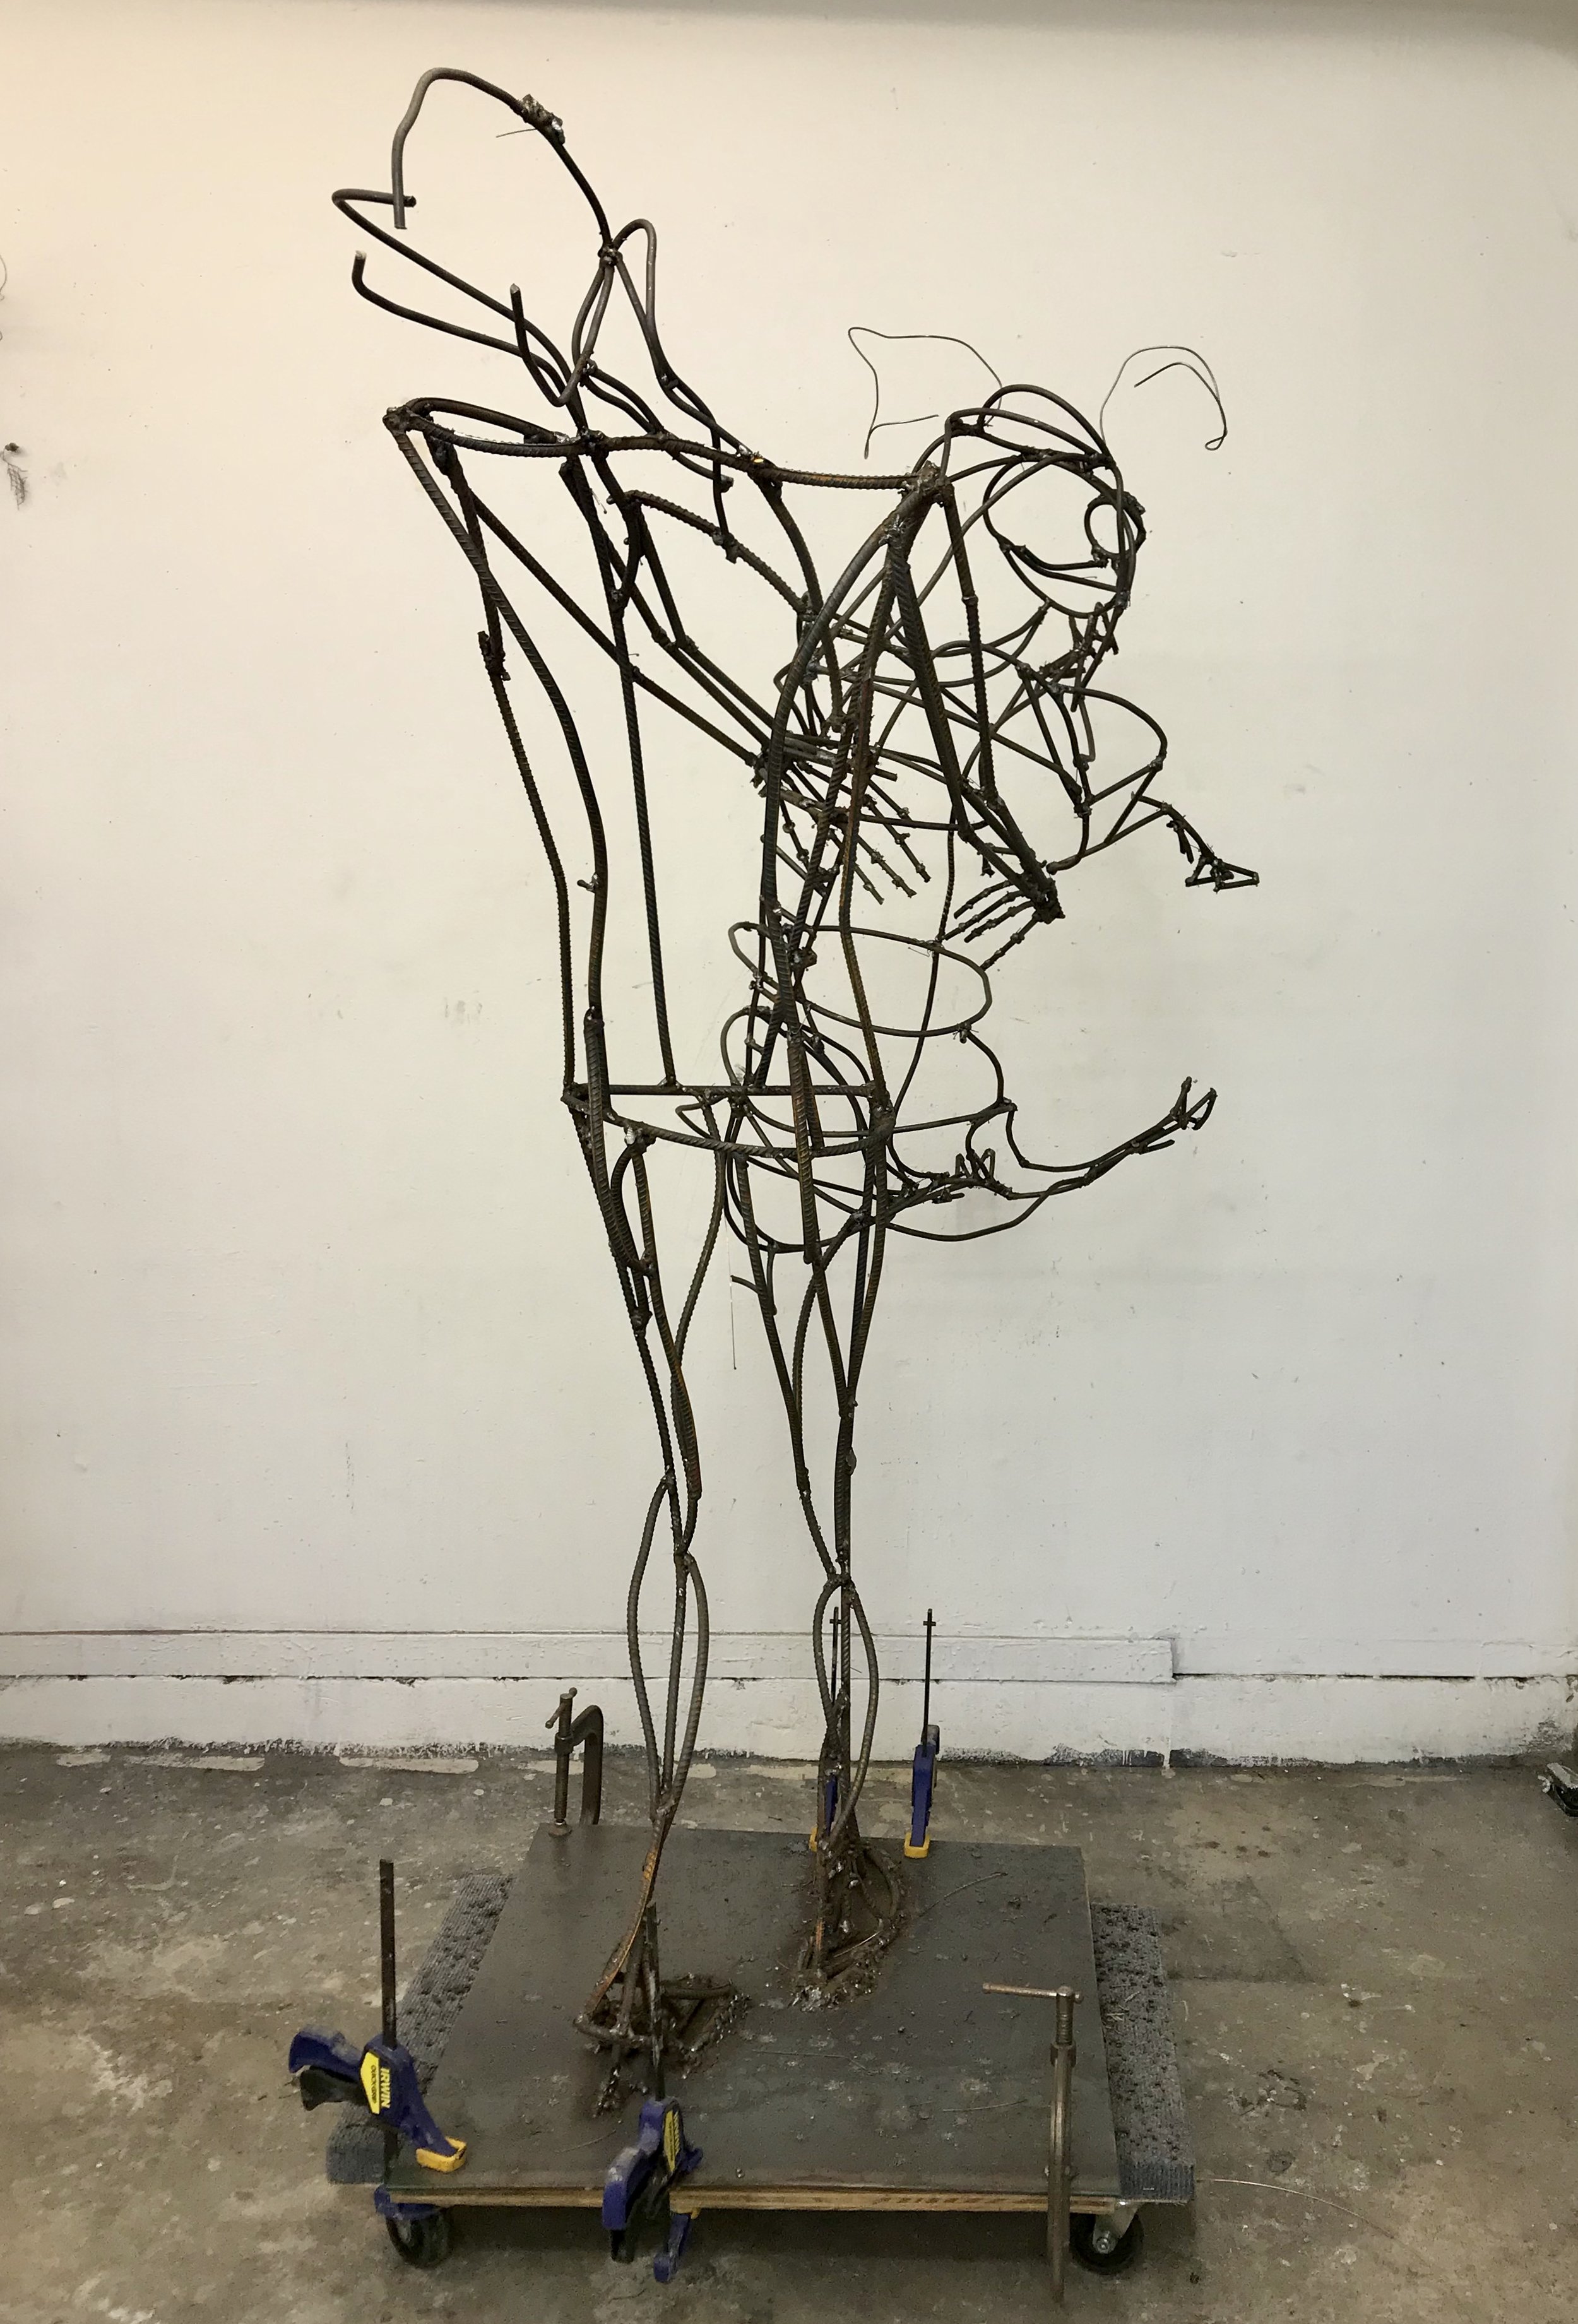
The back side
The right side.
Hands, hands, hands= frustration
I thought I had a really good plan of attack: draw out a hand the size I want, measure how big each bone should be, cut the bones, and tack them together. Once they are tacked together, bend them into position. This is where the frustration began. Some of the tacks would either not bend or some would break, and I would then have to reweld them. I did finally get them all together. I was mentally exhausted, so I decided to attach them permanently to the arms tomorrow when I am more refreshed.
I did just tack them just to see how they look.
I hope I like them tomorrow.
FYI - I put really big welds on the knuckles because I like knarly fingers with big knuckles. If you deal with livestock, you probably have some pretty banged up fingers. :)

Digits barely tacked together

Left hand gripping Mr. Pig

Right hand gripping Mr. Pig

Both hands

The grip
I am getting close to completing the armature.
My day started with an empty tank. I was ready to roll and I had to run refill my argon tank. :(
really irritating

Refilling my Argonne tank.
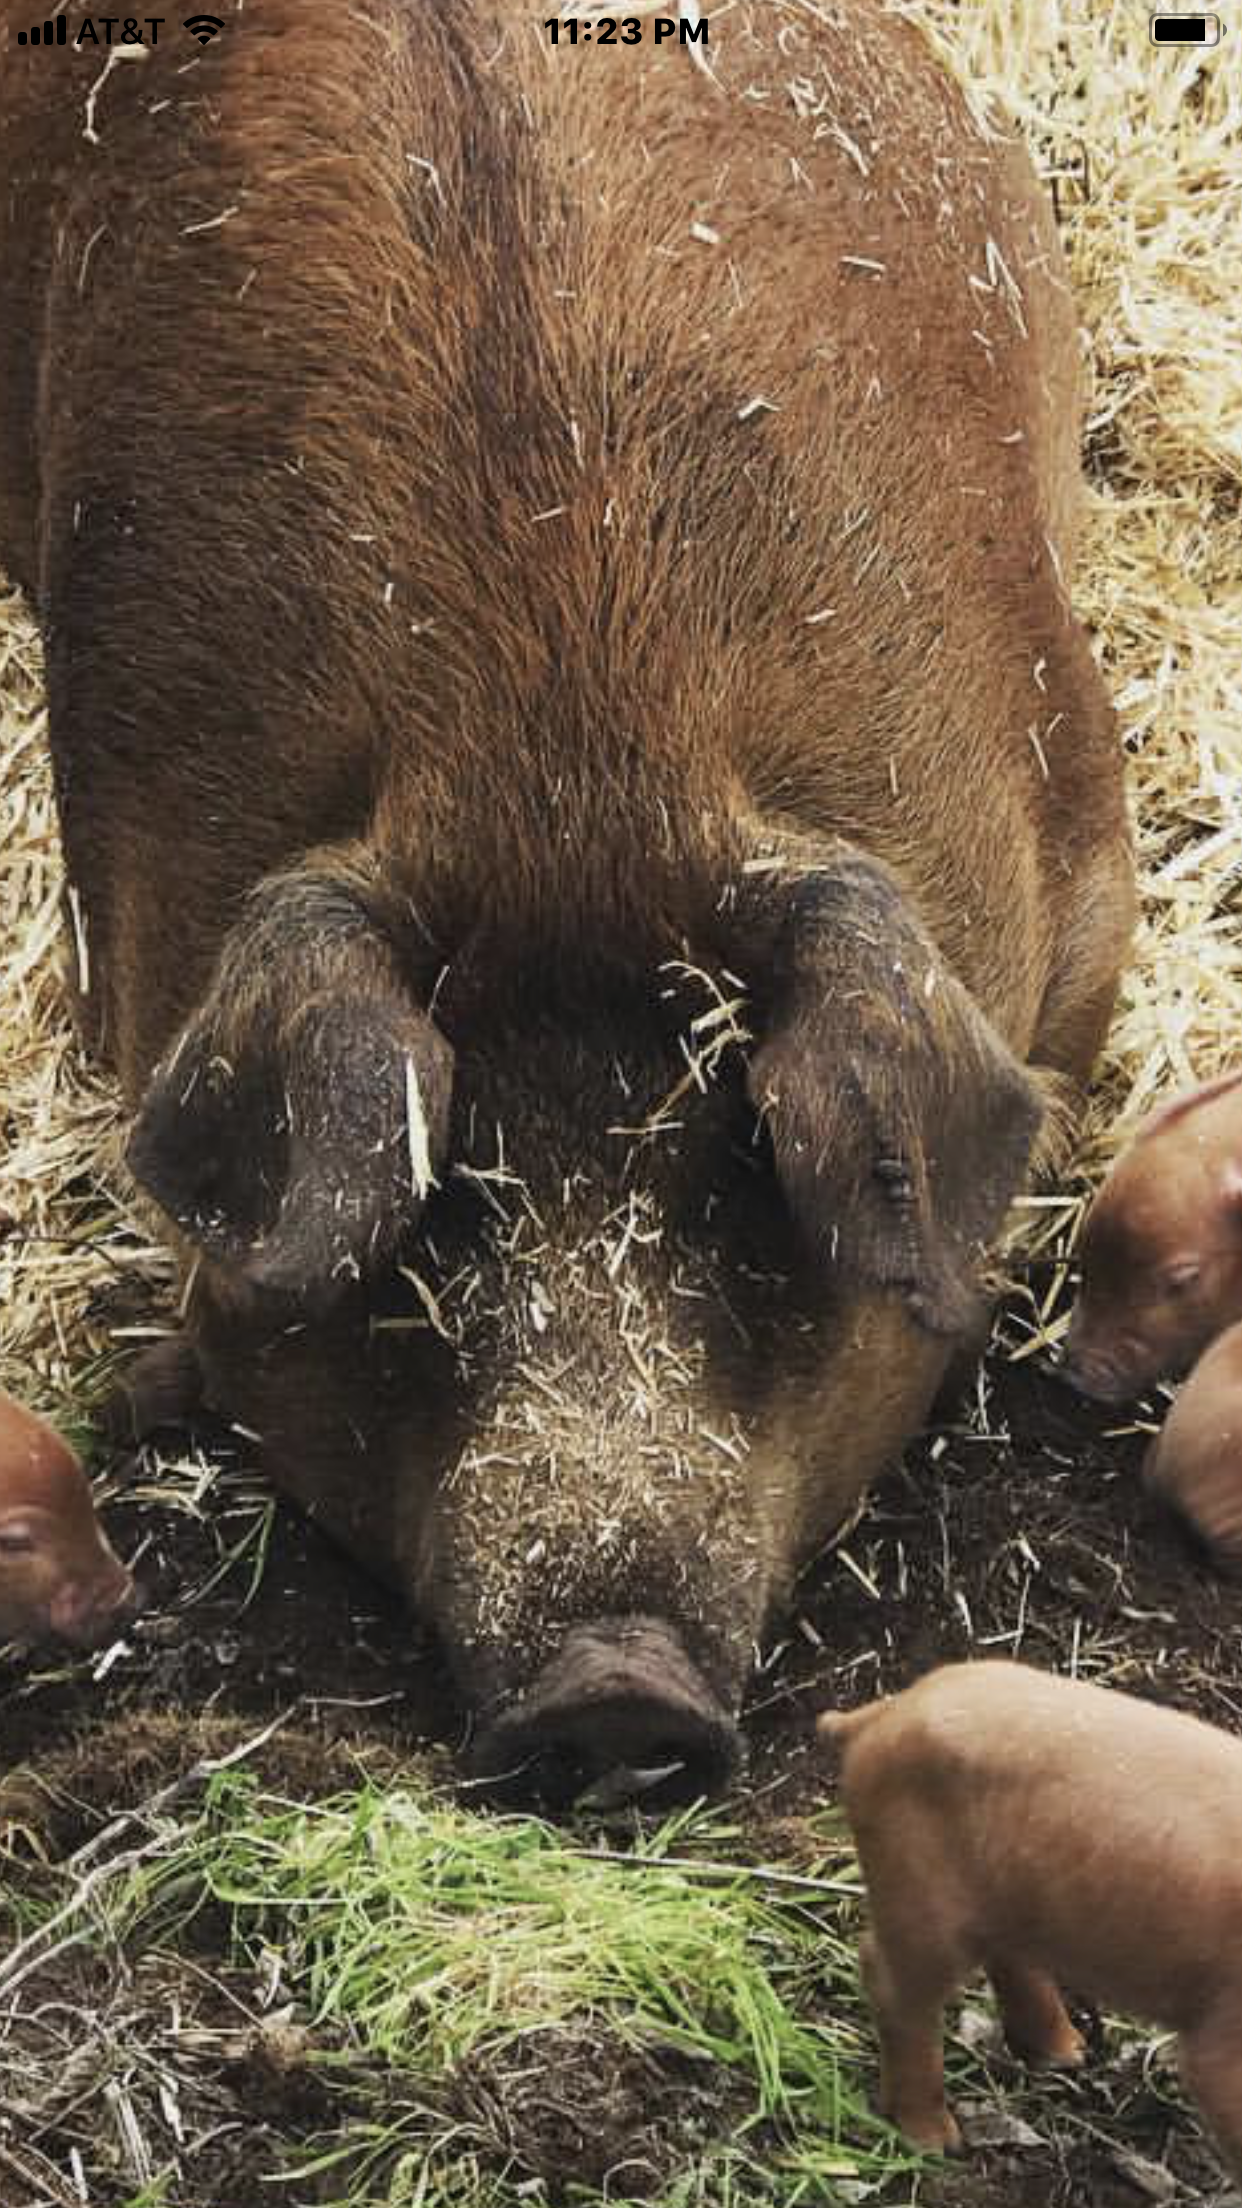
After lunch I finally got to work. Yesterday, I started the pig’s groin. I figured a pig’s groin looks like a dog’s groin. Not true - I decided to double check, and it turns out pig groins are pudgy and round. Dog groins are more like an empty bowl. It’s good I checked!
Here are images I used for reference. I googled “pig groin” and .....you don’t want to do that. People only post images of pig groins that a Veterinarian should see. I then googled “carrying a pig”. The below image shows how pudgy their grojns are.

Once I lay the lath over the armature, it will look a lot different. It looks weird now. I only put the armature at places that protrude. In the concave places, I will press the lath in. That is why the nose looks bizarre.


I can’t wait until tomorrow to do the hands. :)
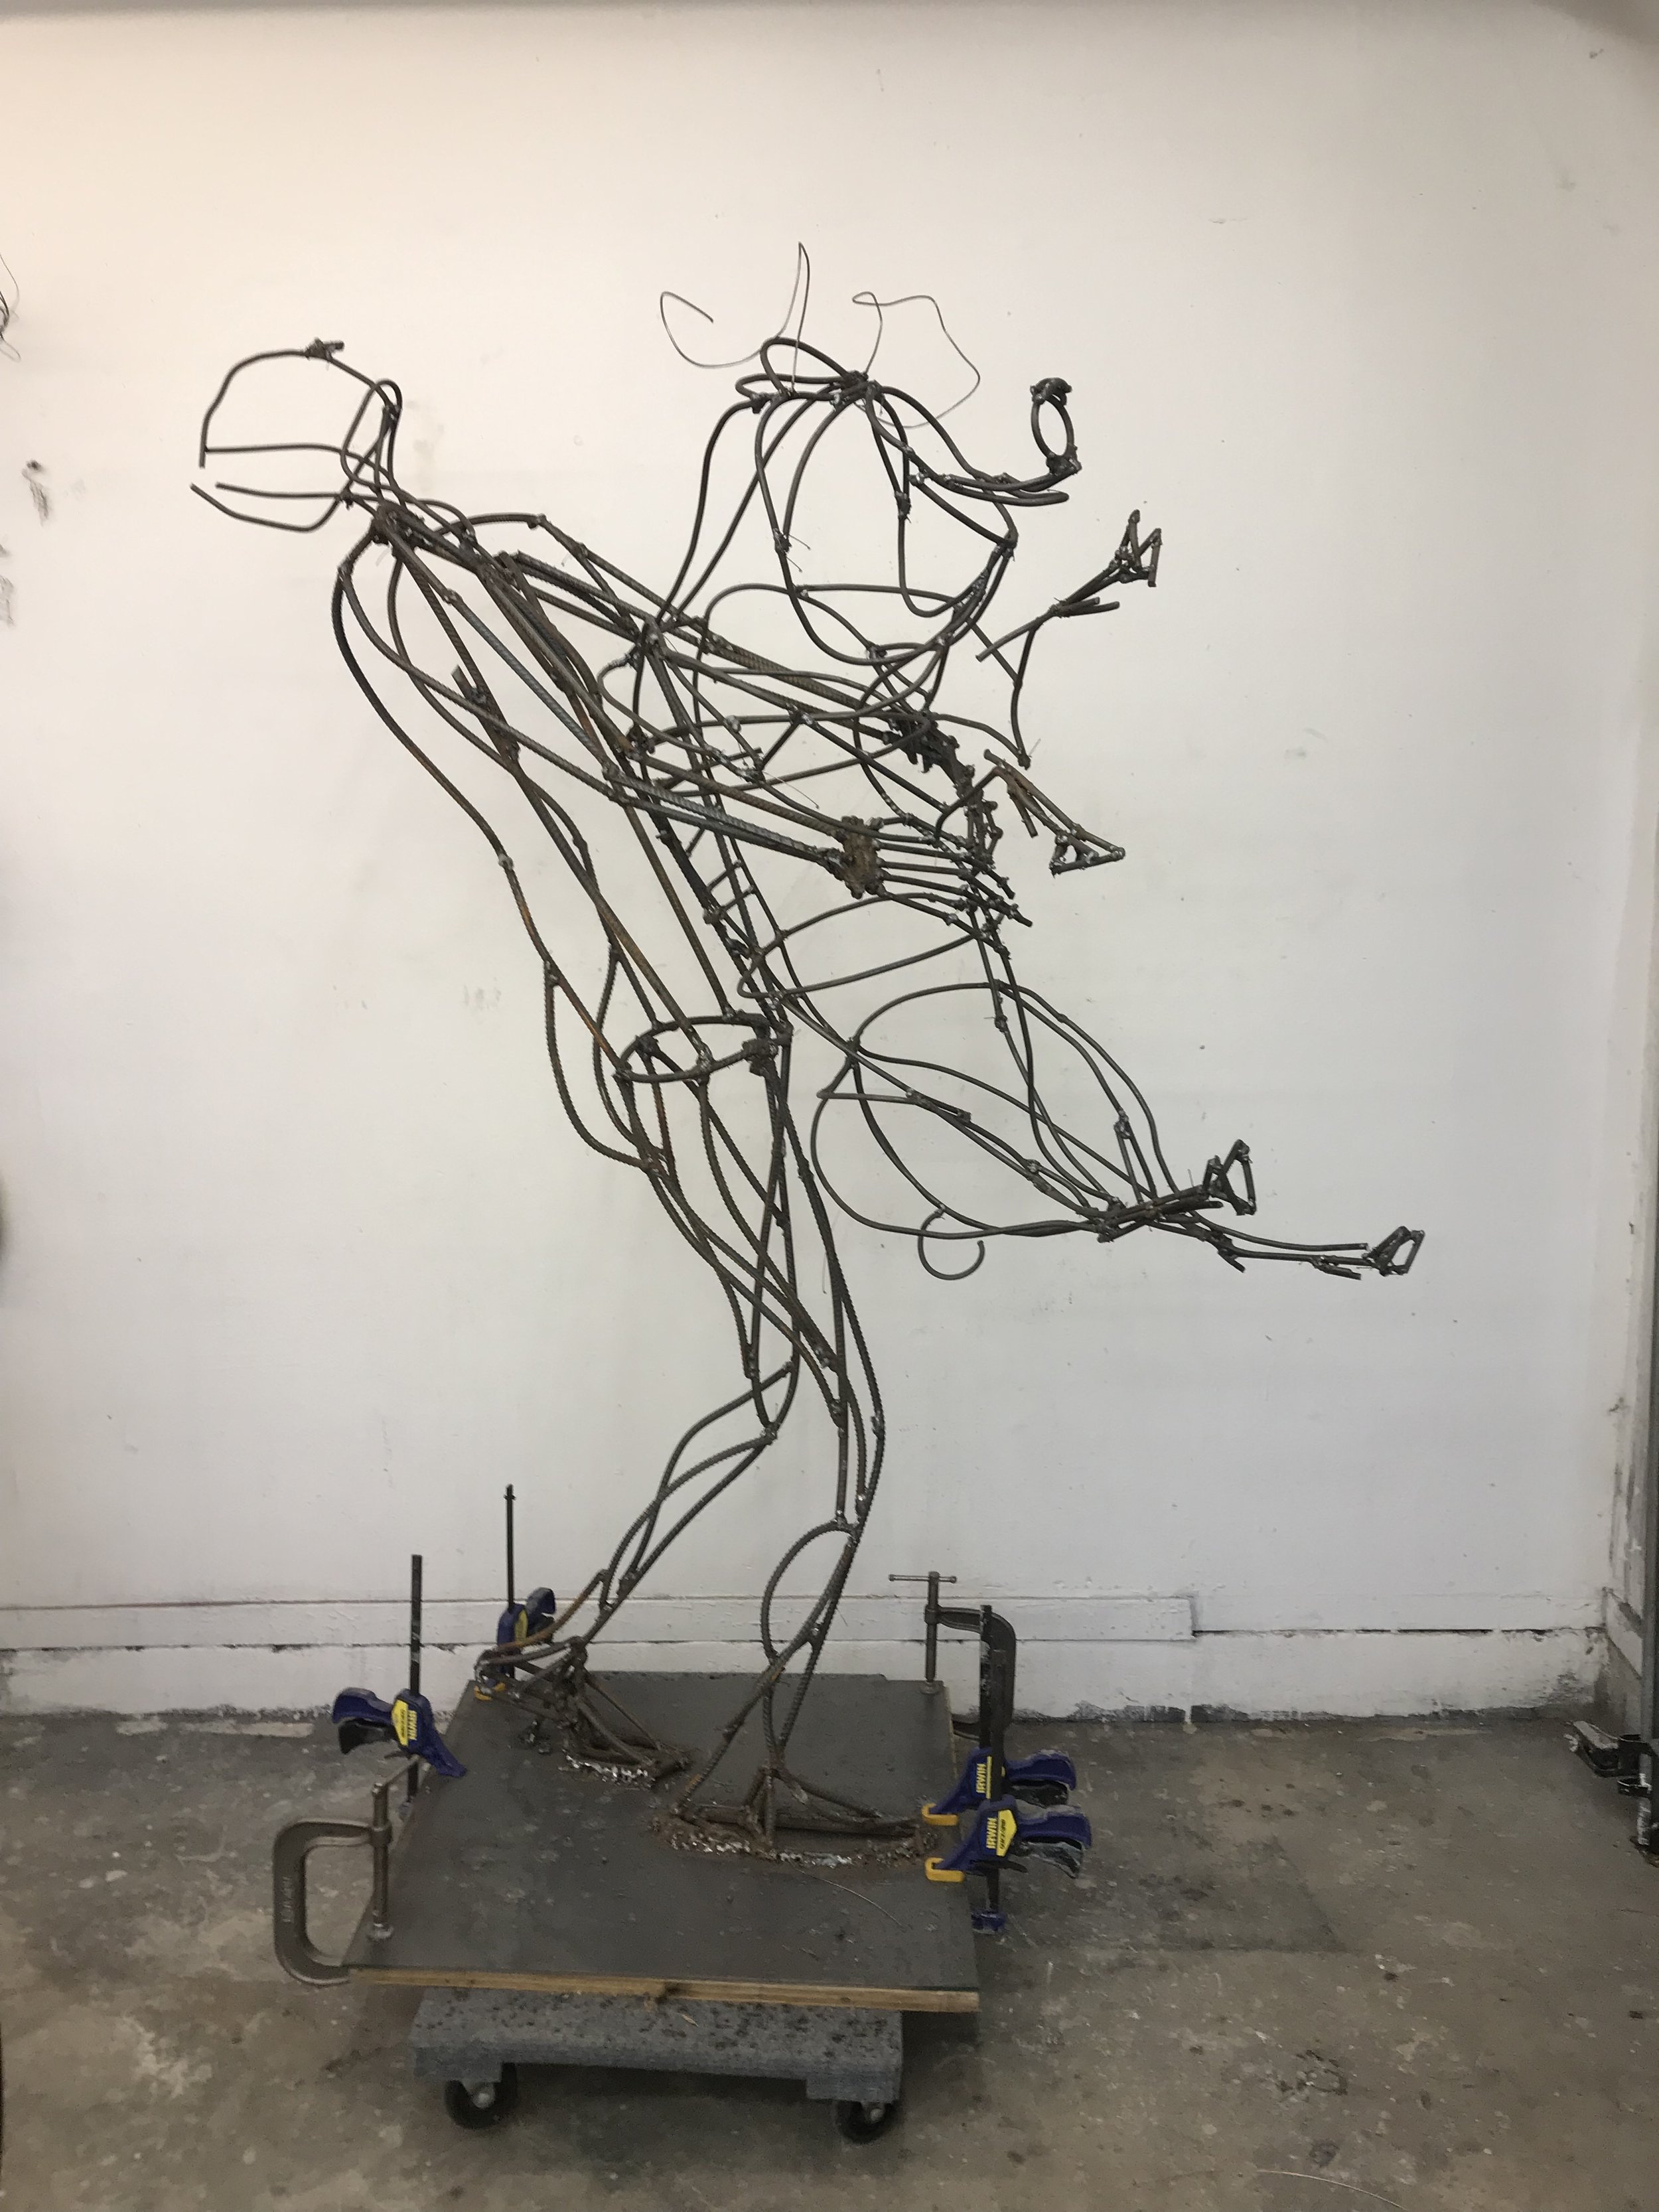
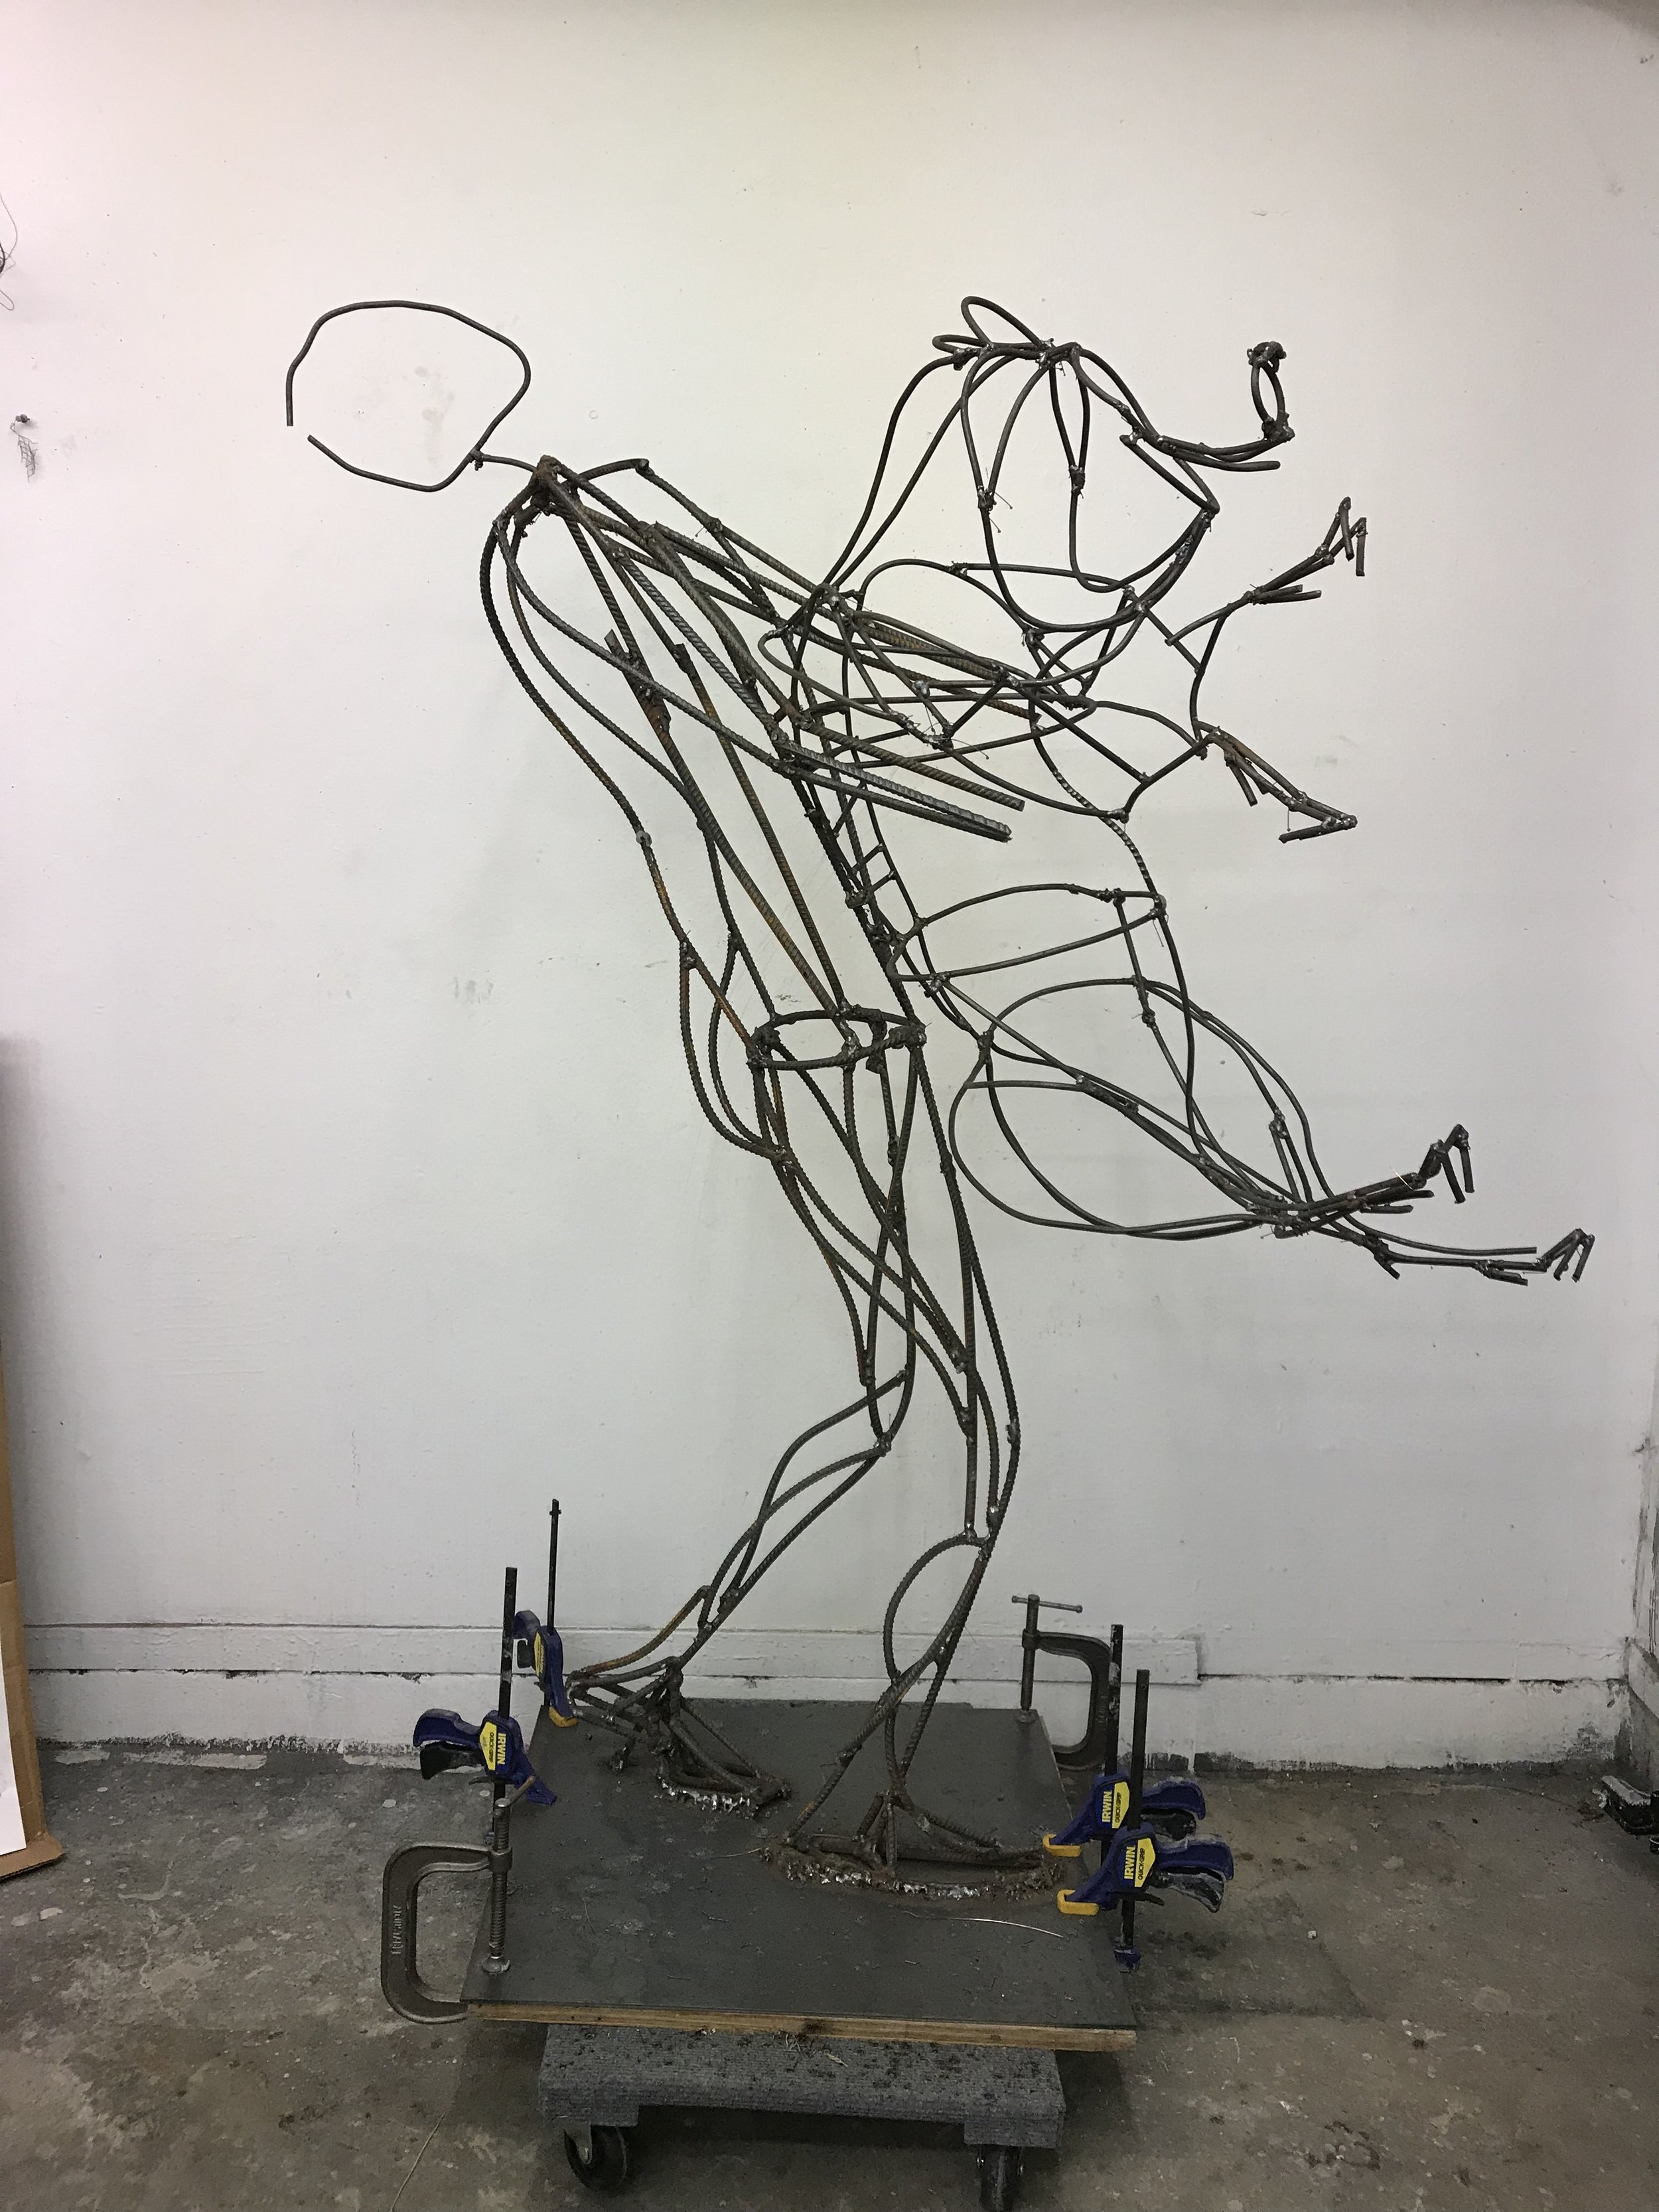
The tension is starting to build.
For this piece to work I have to be able to show the strain or tension between the man and the pig.
The pig is huge and would have been extremely heavy to pick up. And pigs are not comfortable being carried, he would have been squirming like crazy to pull away from the rescuer.
I added the man’s head outline first. I want his head to thrust back to add to the tension between the man and the pig. Then I added the largest part of the pig's stomach. I need to know where the biggest part is in order to figure out where the man’s arms and hands are going to be gripping the pig. The man's hands will be just above the larges part of the pig gripping it tightly.

Front view

You can now start seeing the tension created with the pull of the man’s head and his arms vs the pigs legs.
Note to self on the head- make the armature on the small side, I can always add plaster to make it larger.

From the back

I still need- pig ears, tail, and to finish the pig’s legs and abdomen. The man needs his head, hands and more definition or volume on the arms.
INSPIRATION-
I am always looking for inspiration to use when sculpting. I follow @mcteams3842 who photographs Navy Seals in training. When I saw the image below I thought of the energy needed to of lift a big pig. I took a screen shot and saved it to my file of photos I look at when working on the piece. I would love to have the rescuer’s head this far back ....... I will have to experiment with it.
I highly recommend @mcteam3842 for amazing photography.
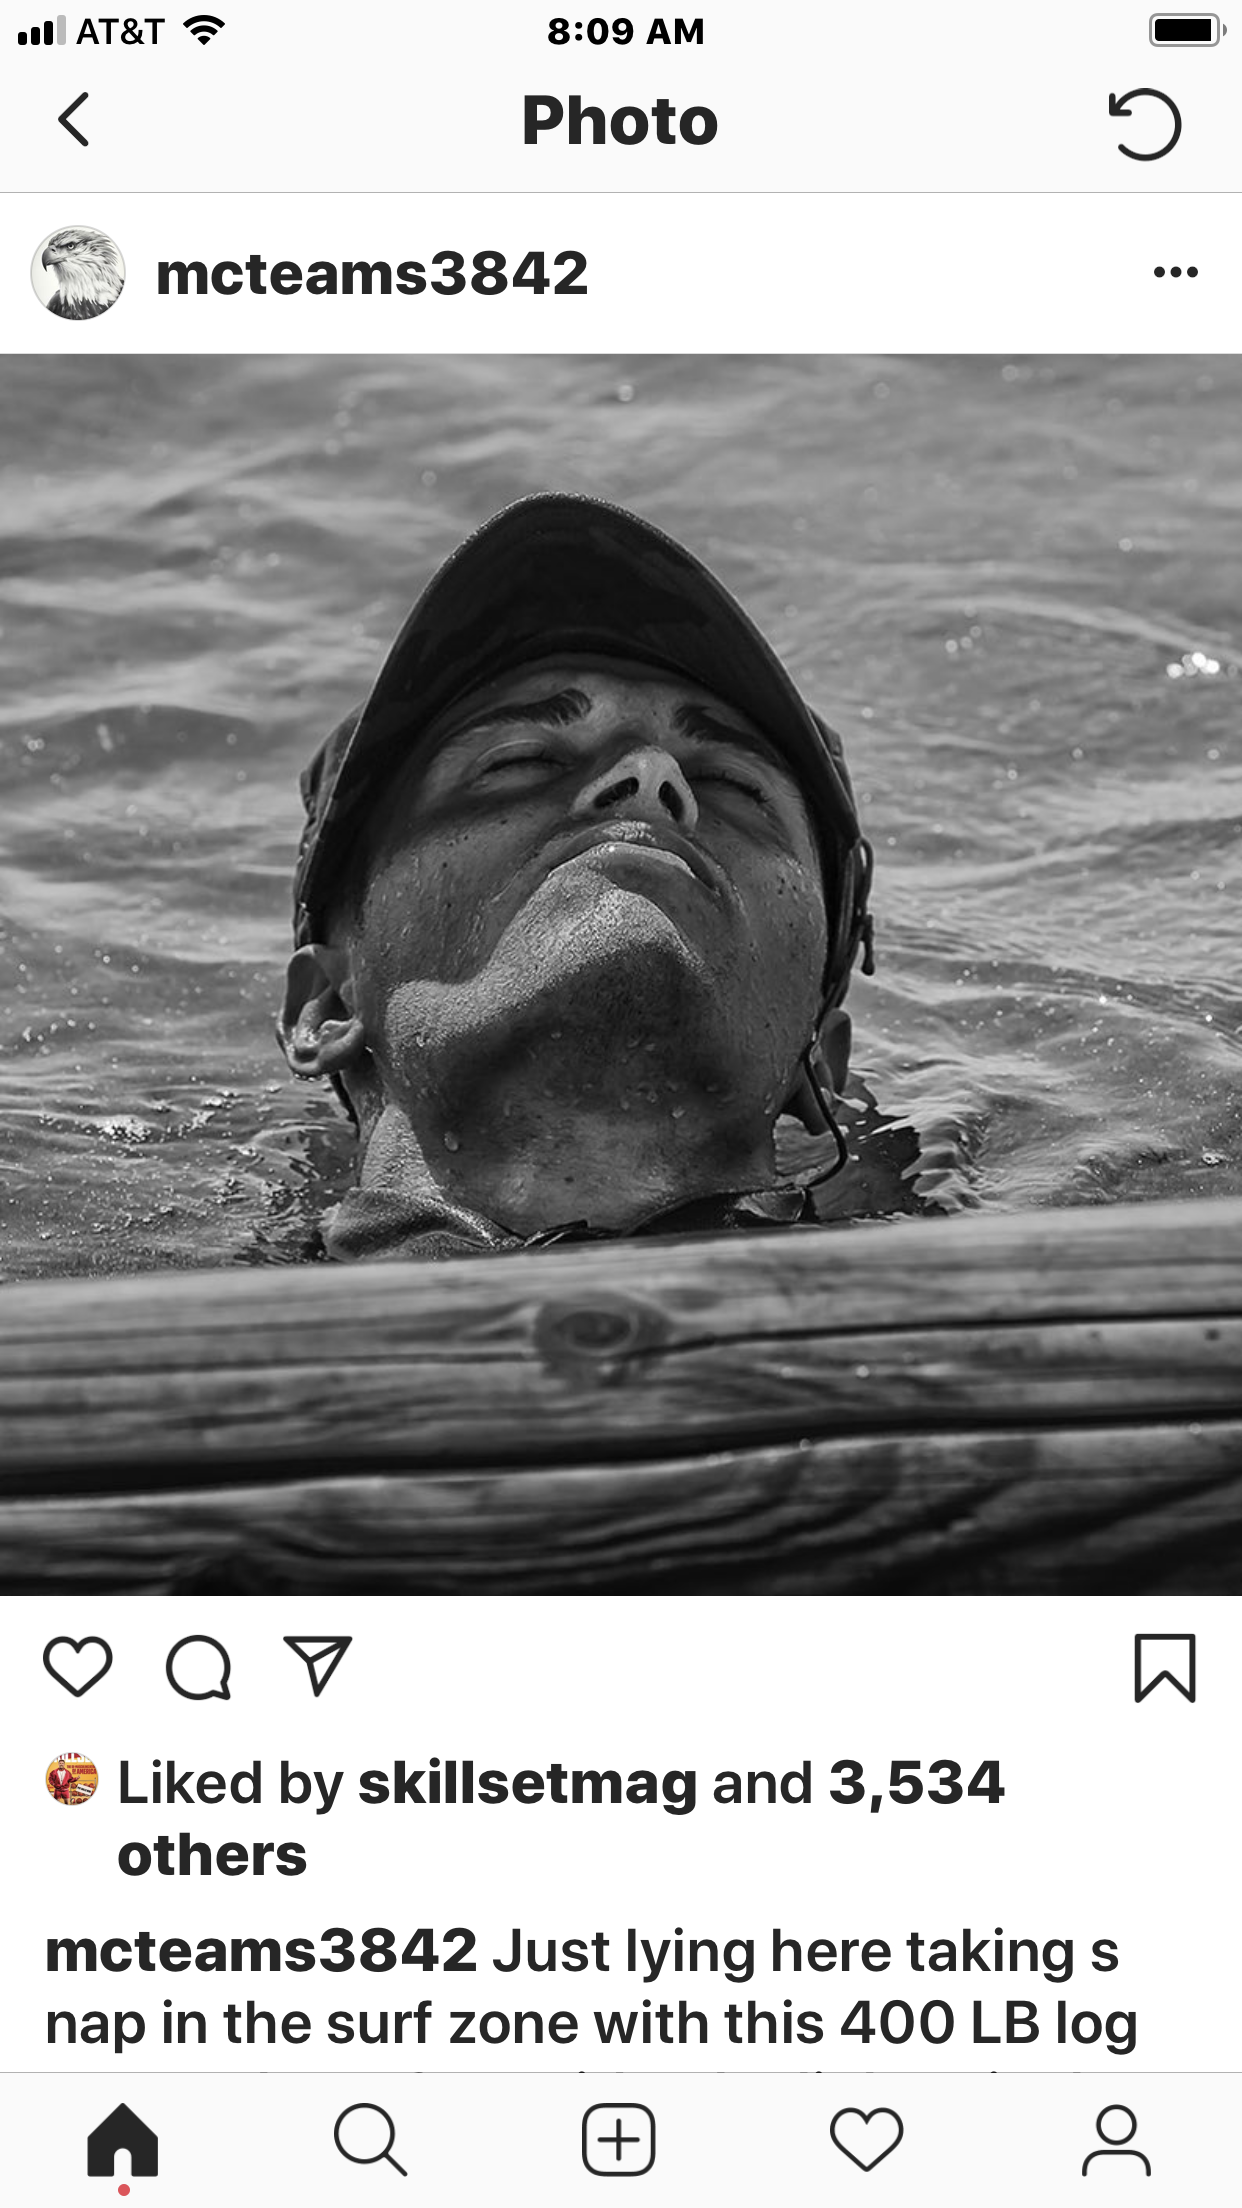
I am thinking of putting a cap on him and loved the brim on the below Navy Seals cap. instagram is a treasure chest of inspiration.