I added the man’s thrown back chin, a suggestion of his head shape, and reinforced his wrist and hands. I also added the pig’s tail, reinforced his hoofs, and a added a suggestion of some very big ears.
from the front
Left side
The back side
Your Custom Text Here
I added the man’s thrown back chin, a suggestion of his head shape, and reinforced his wrist and hands. I also added the pig’s tail, reinforced his hoofs, and a added a suggestion of some very big ears.
from the front
Left side
The back side
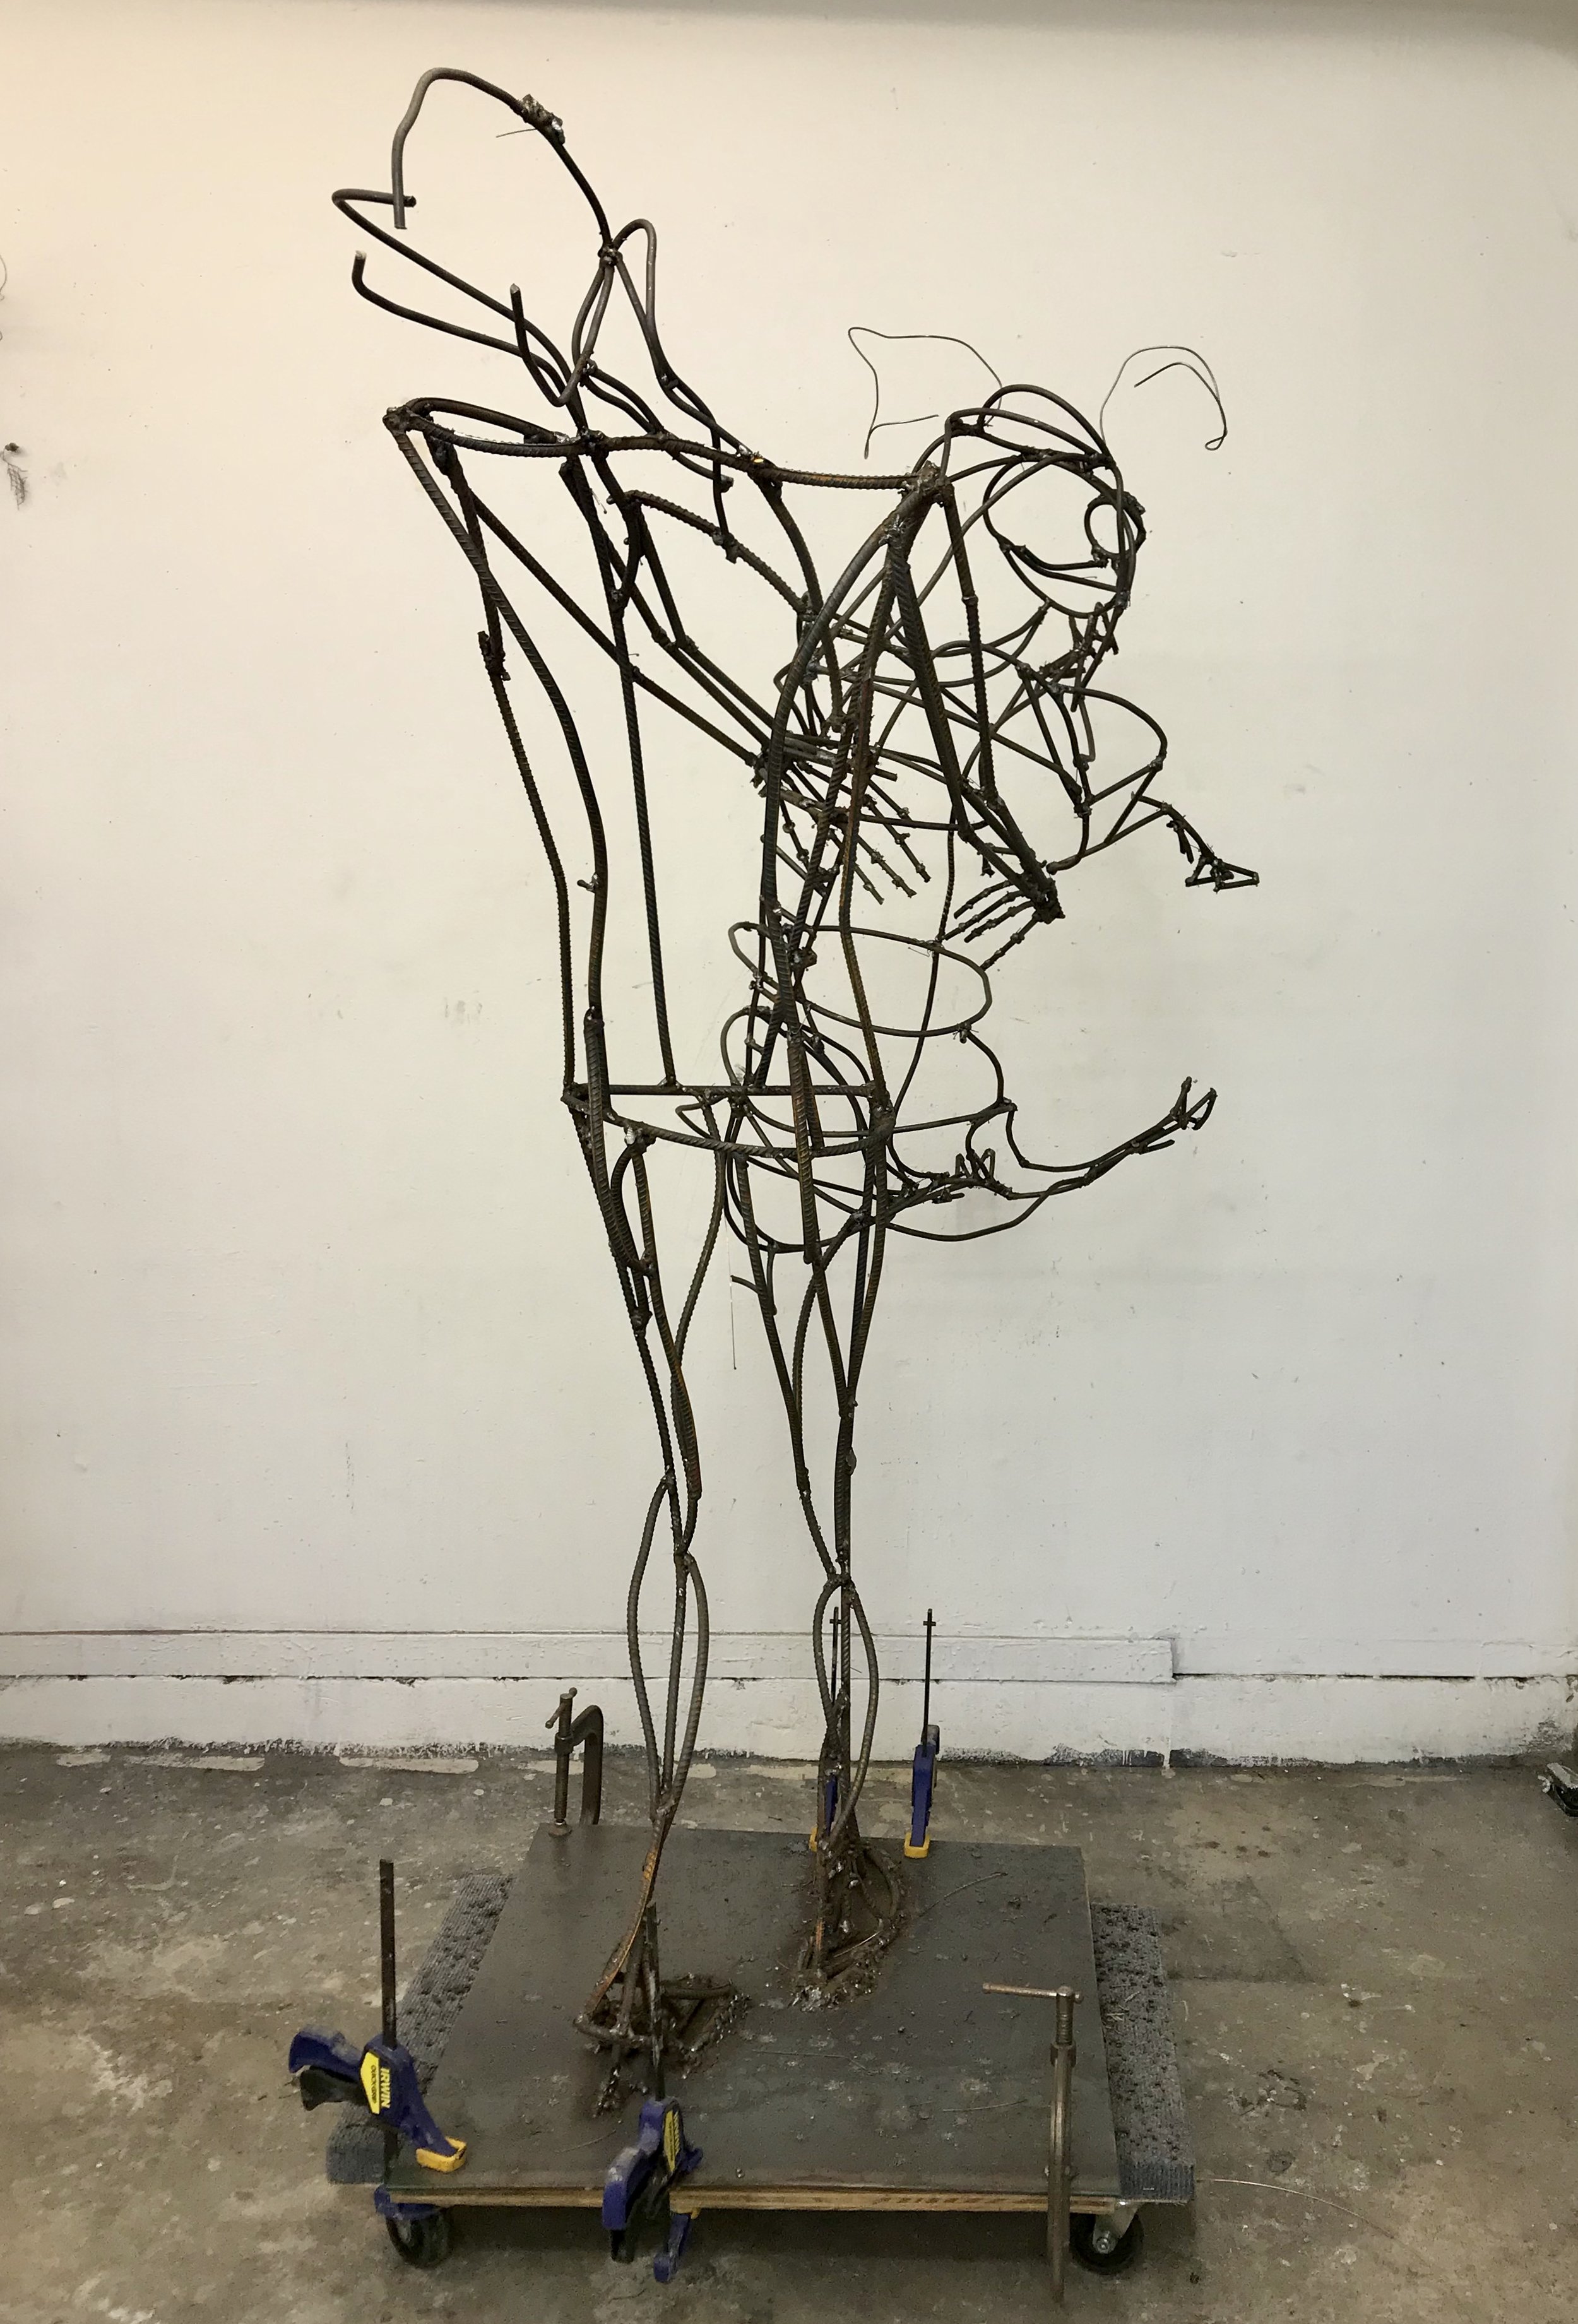
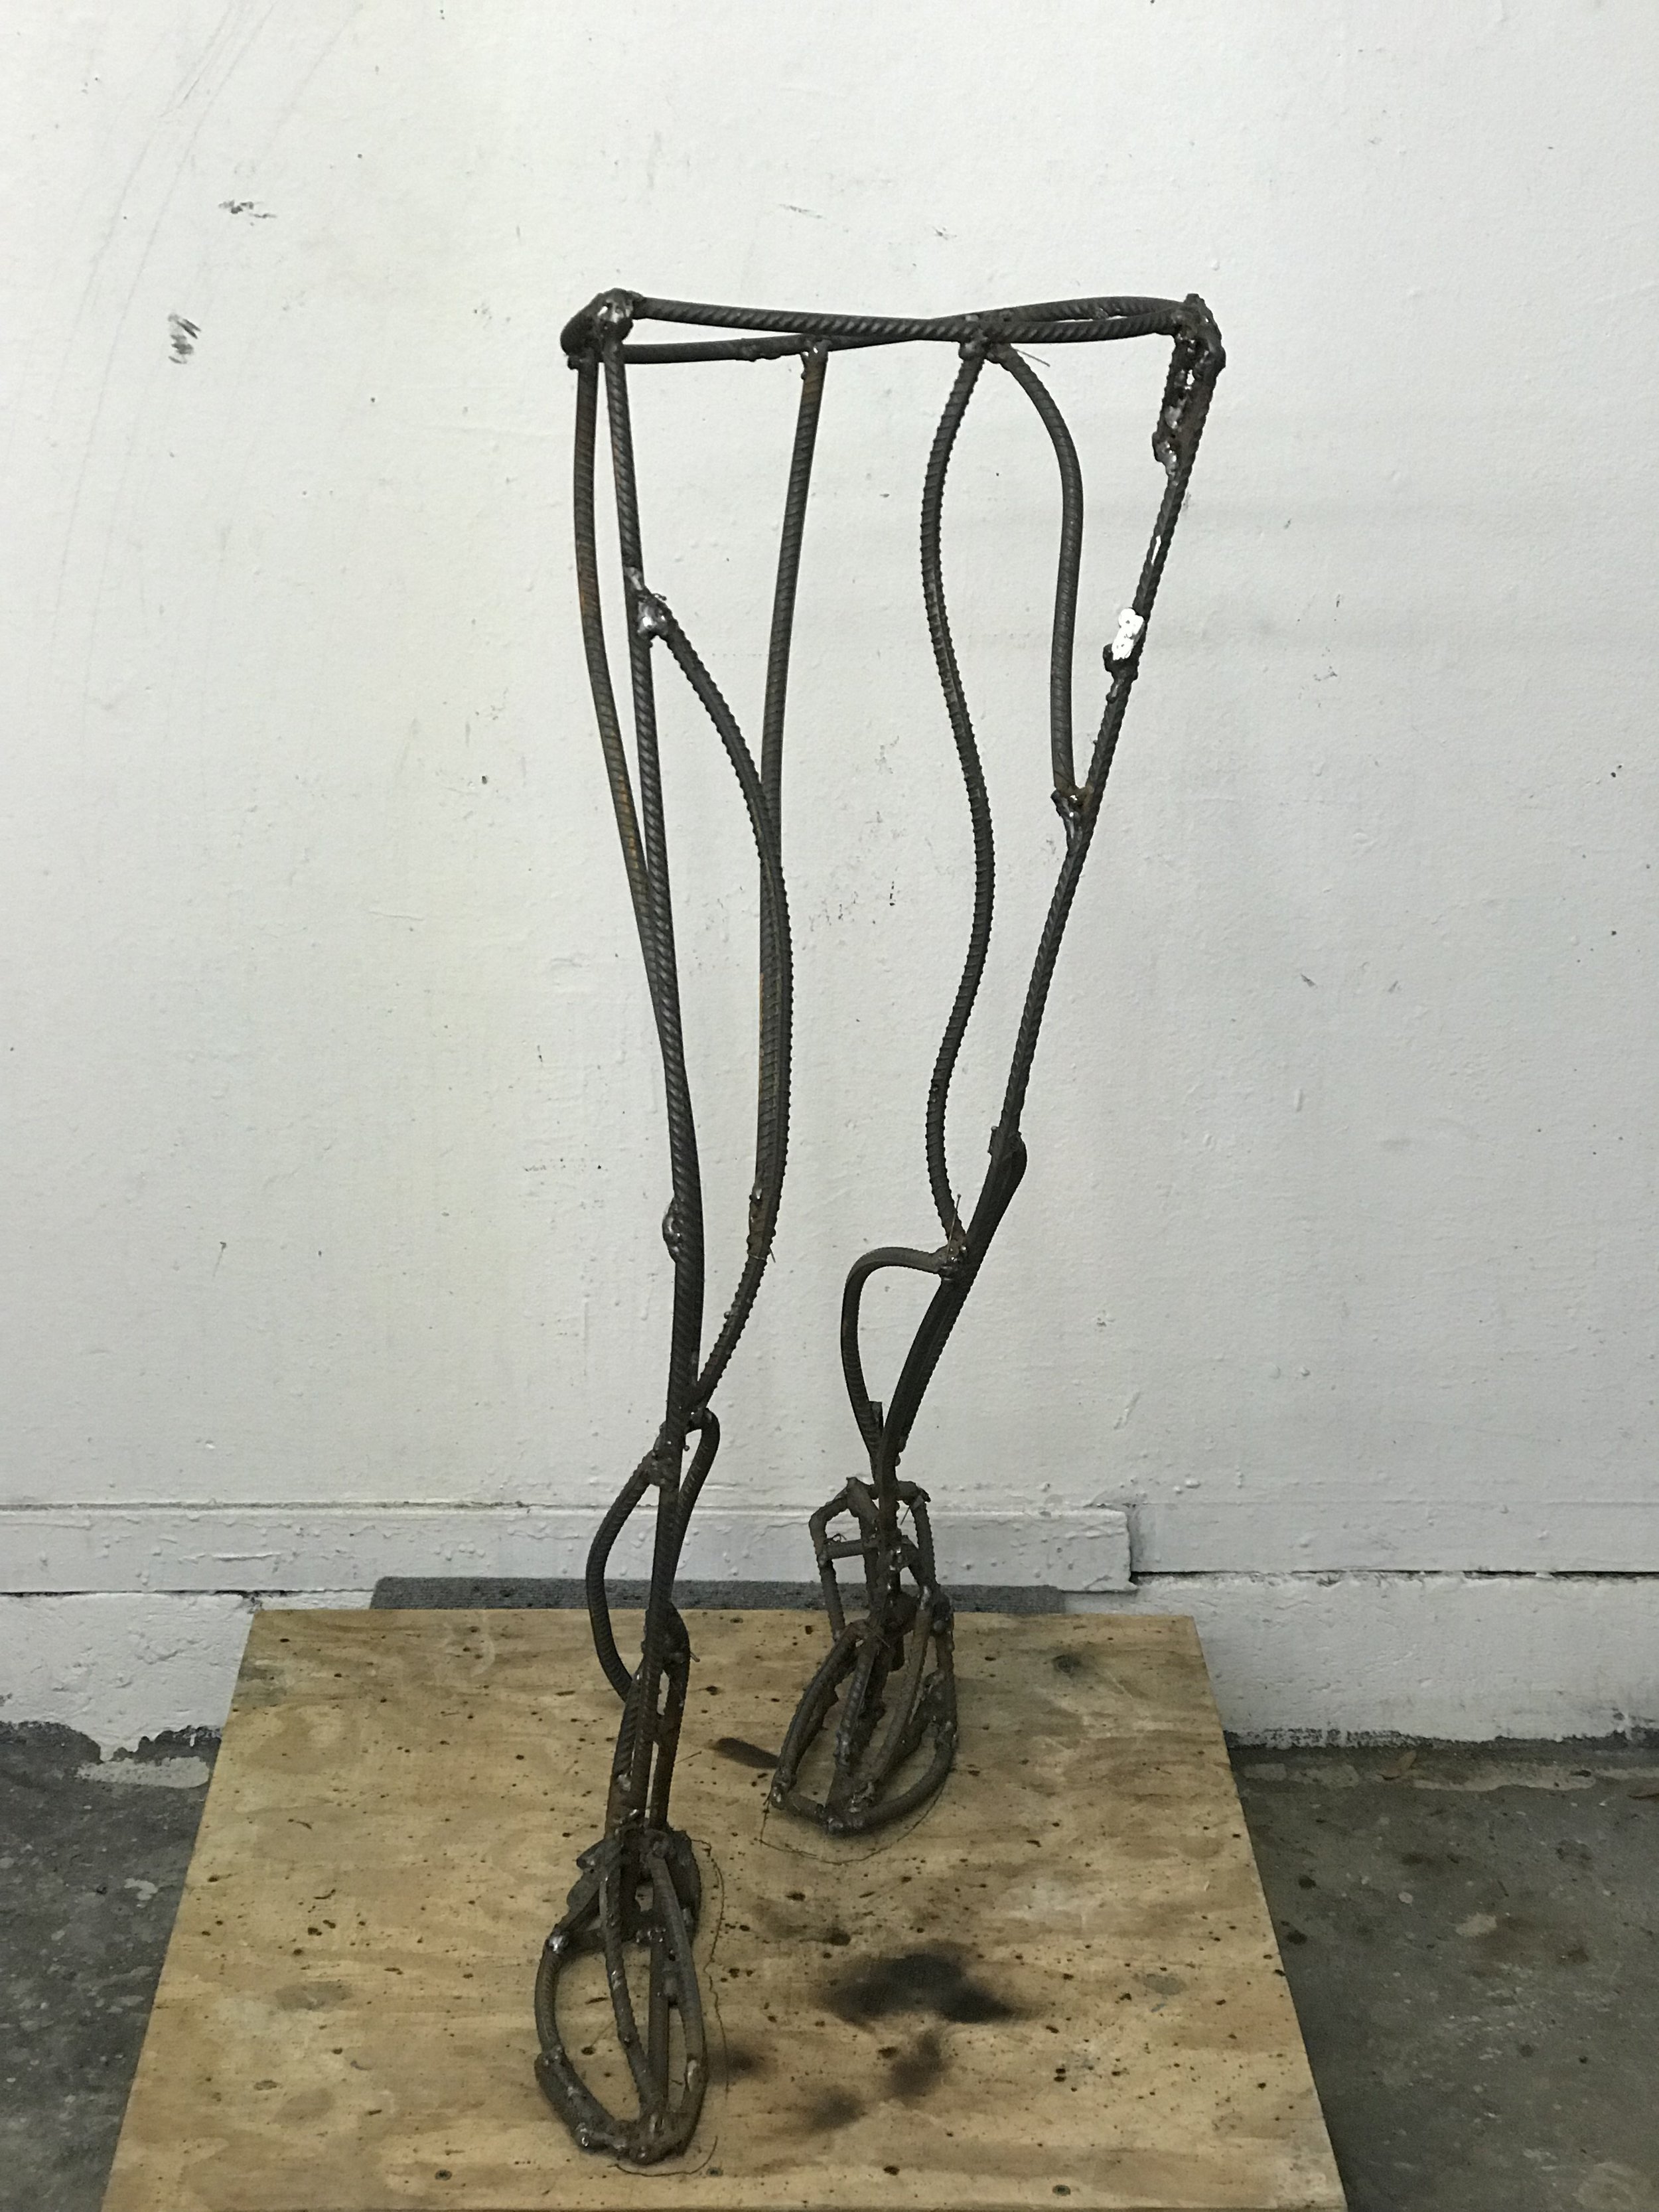
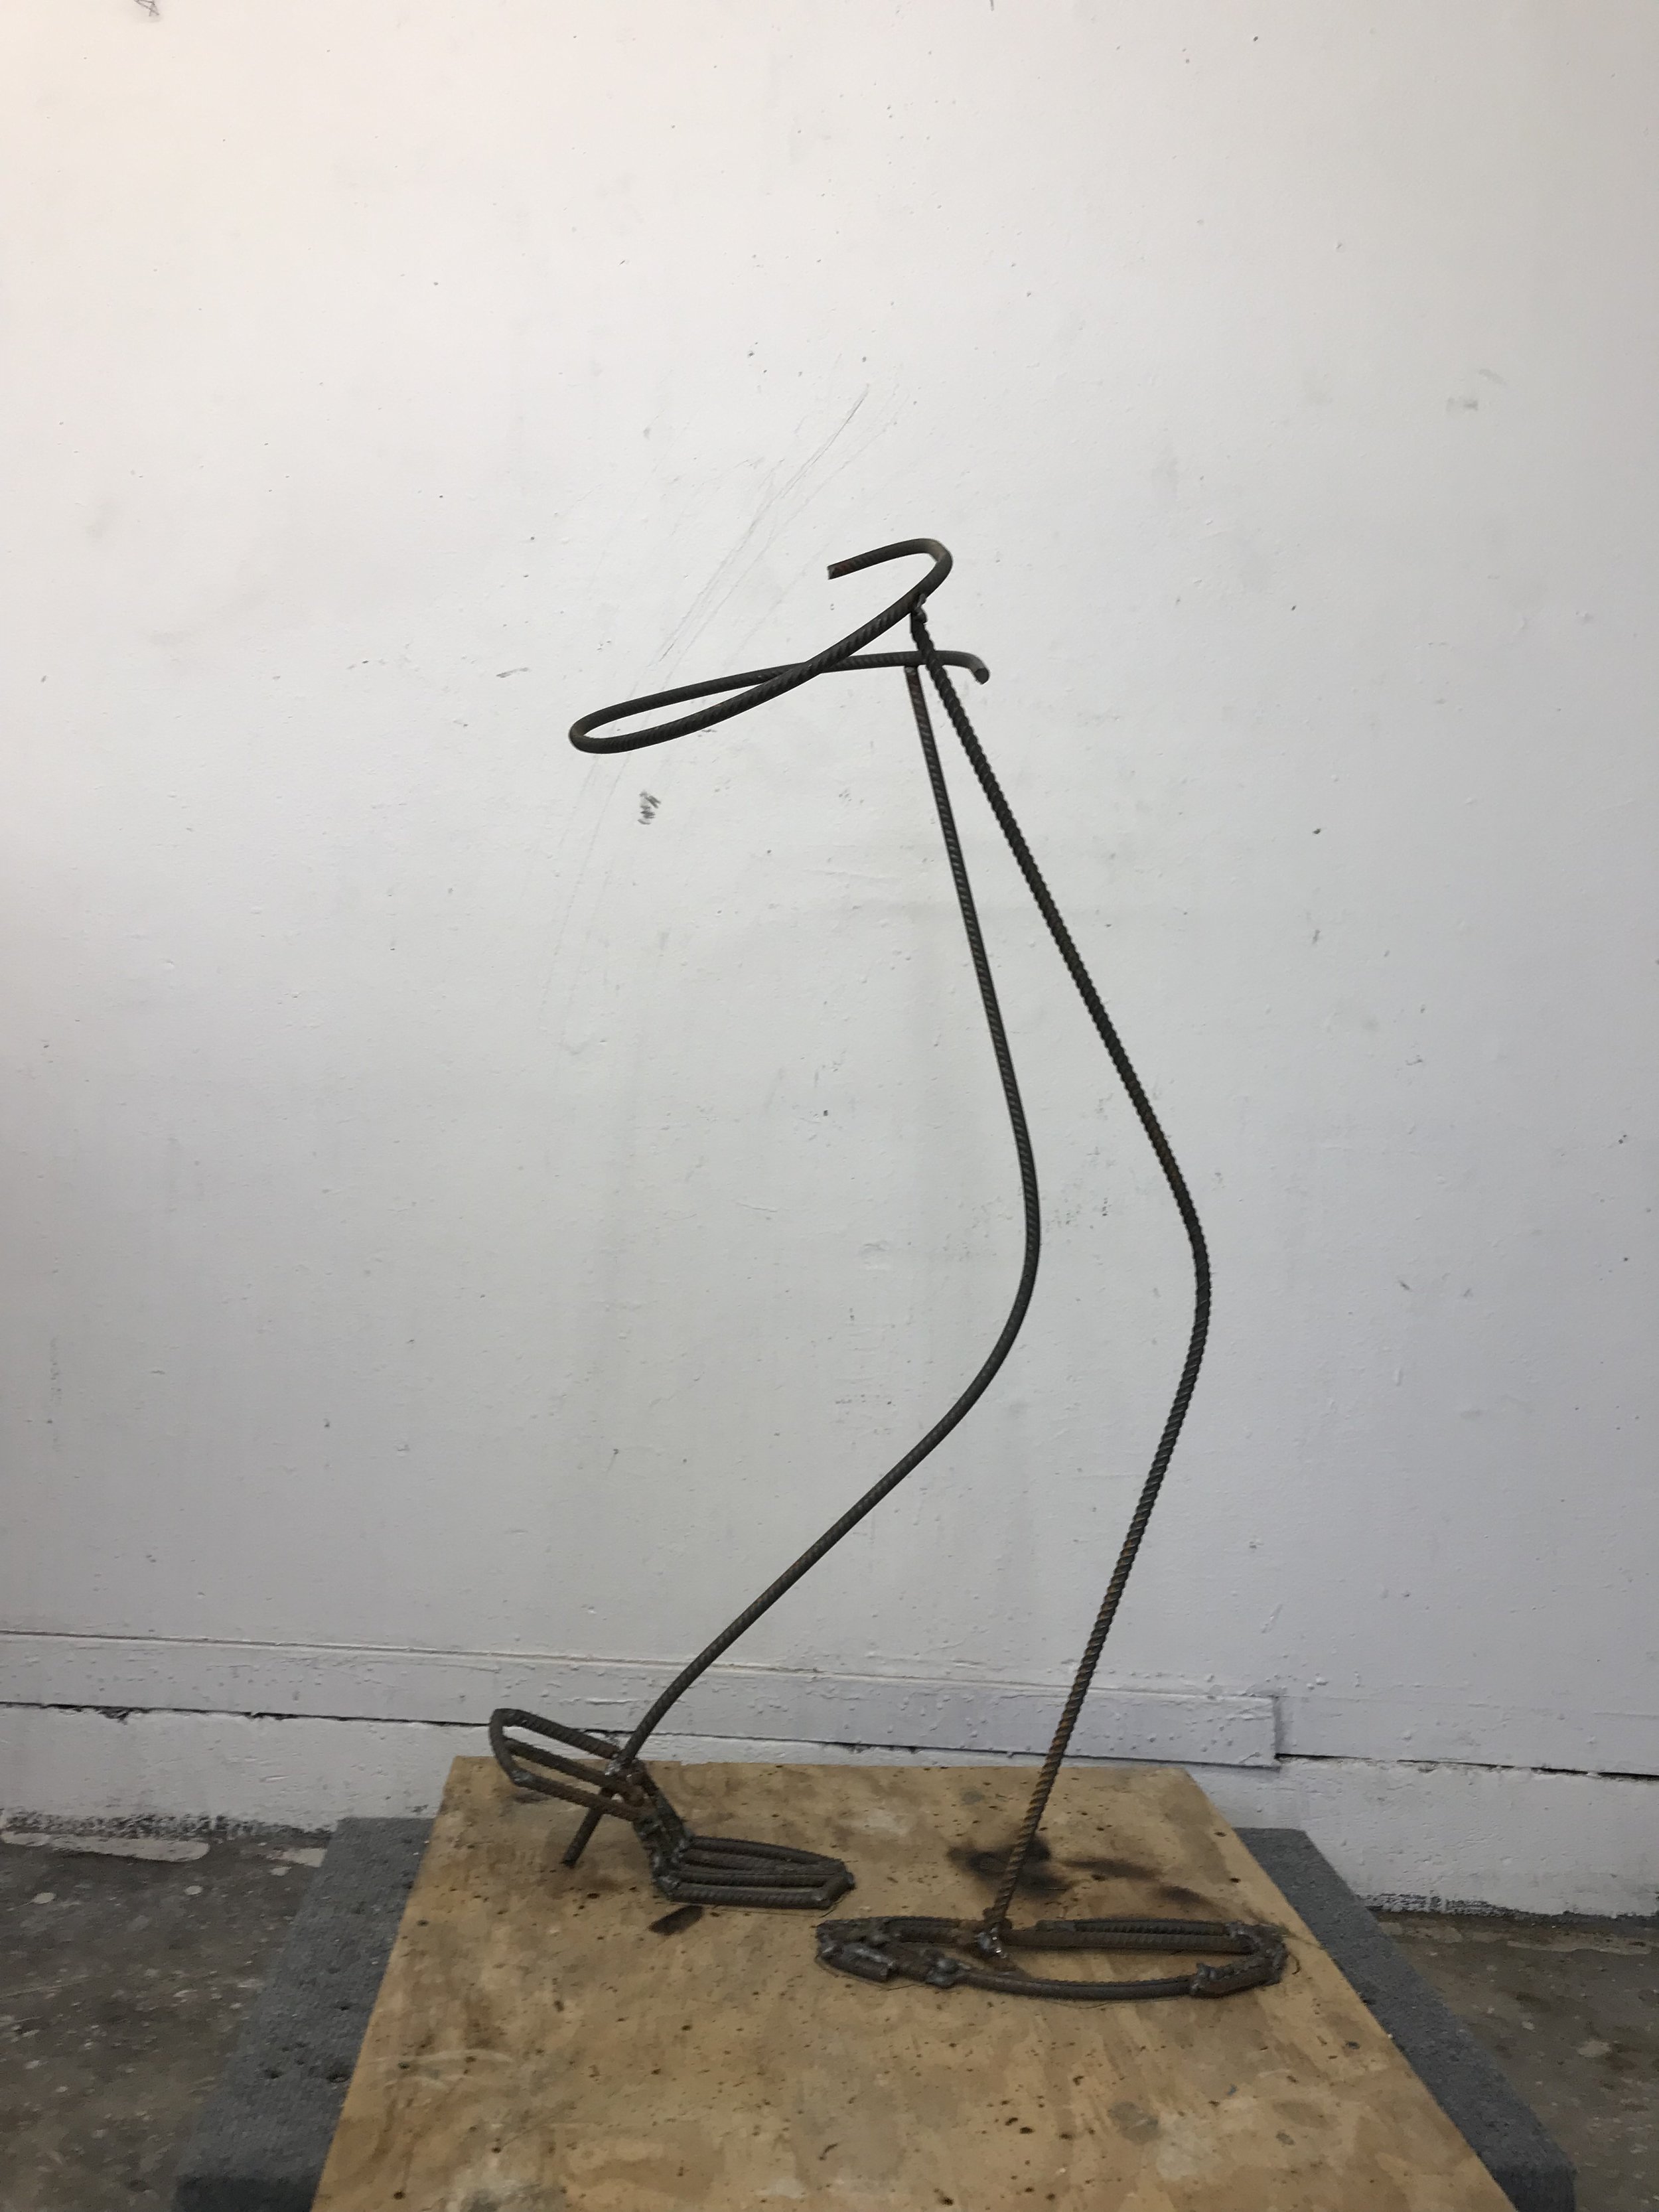
Hands, hands, hands= frustration
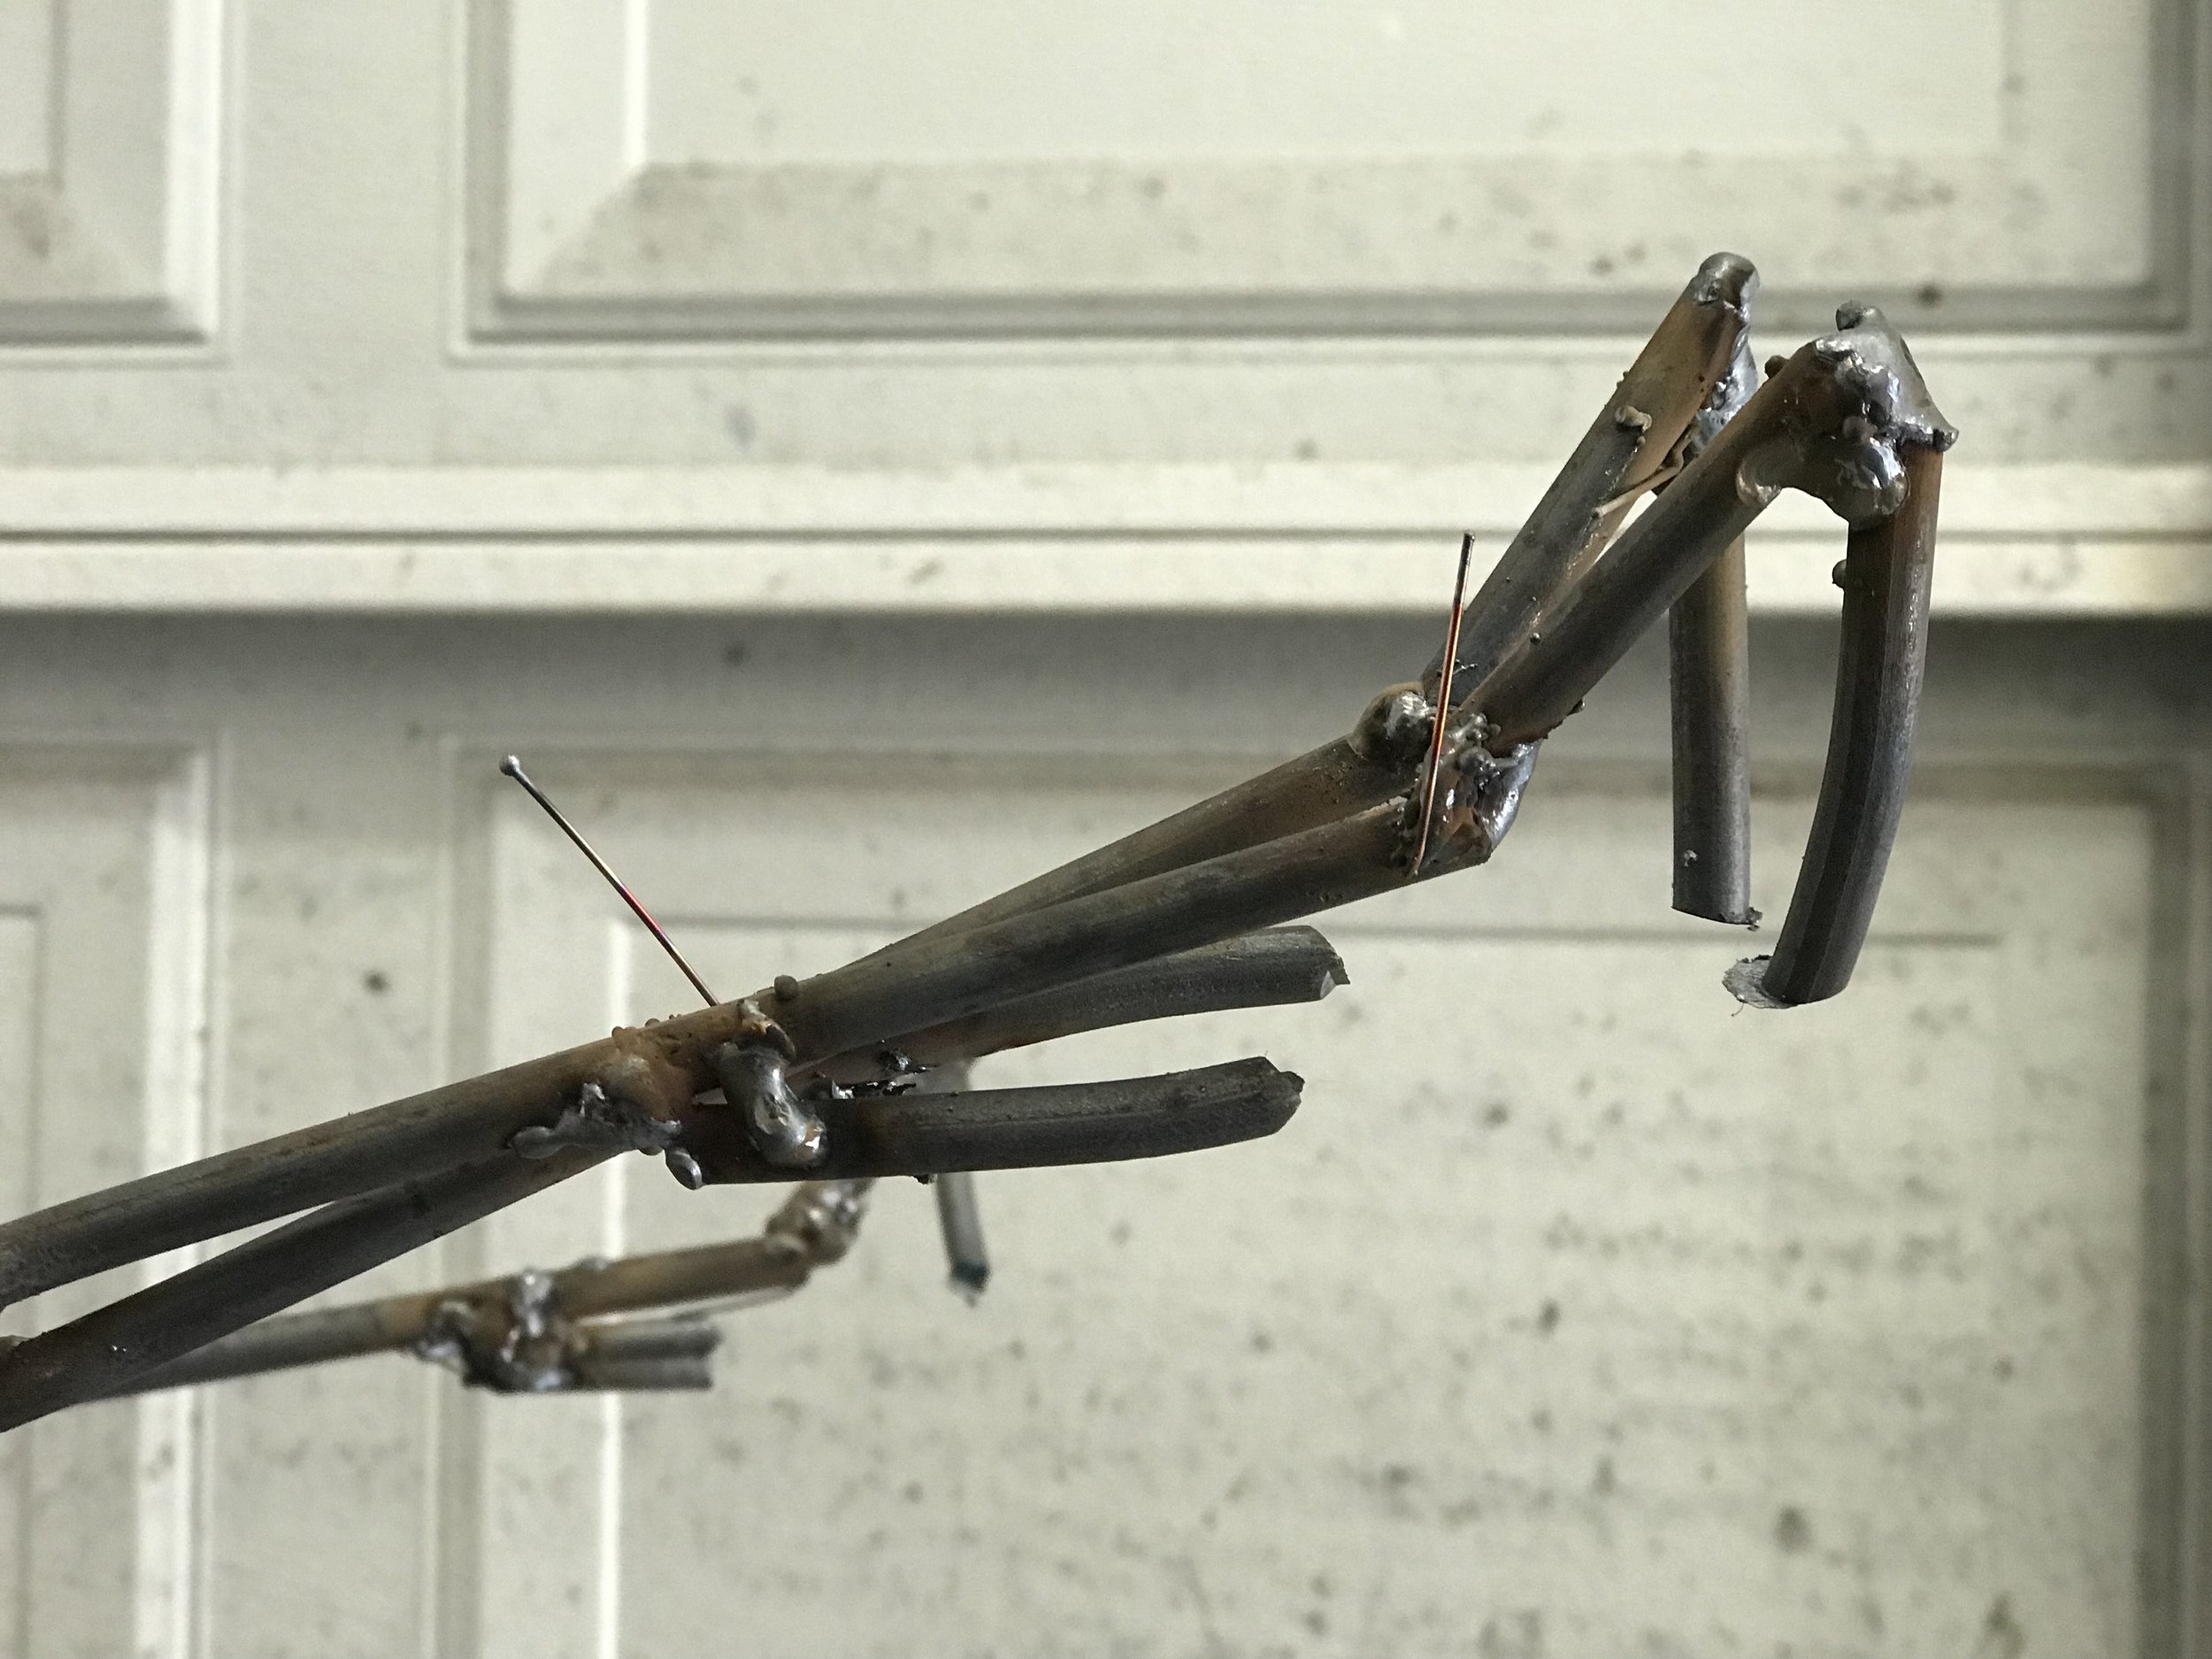
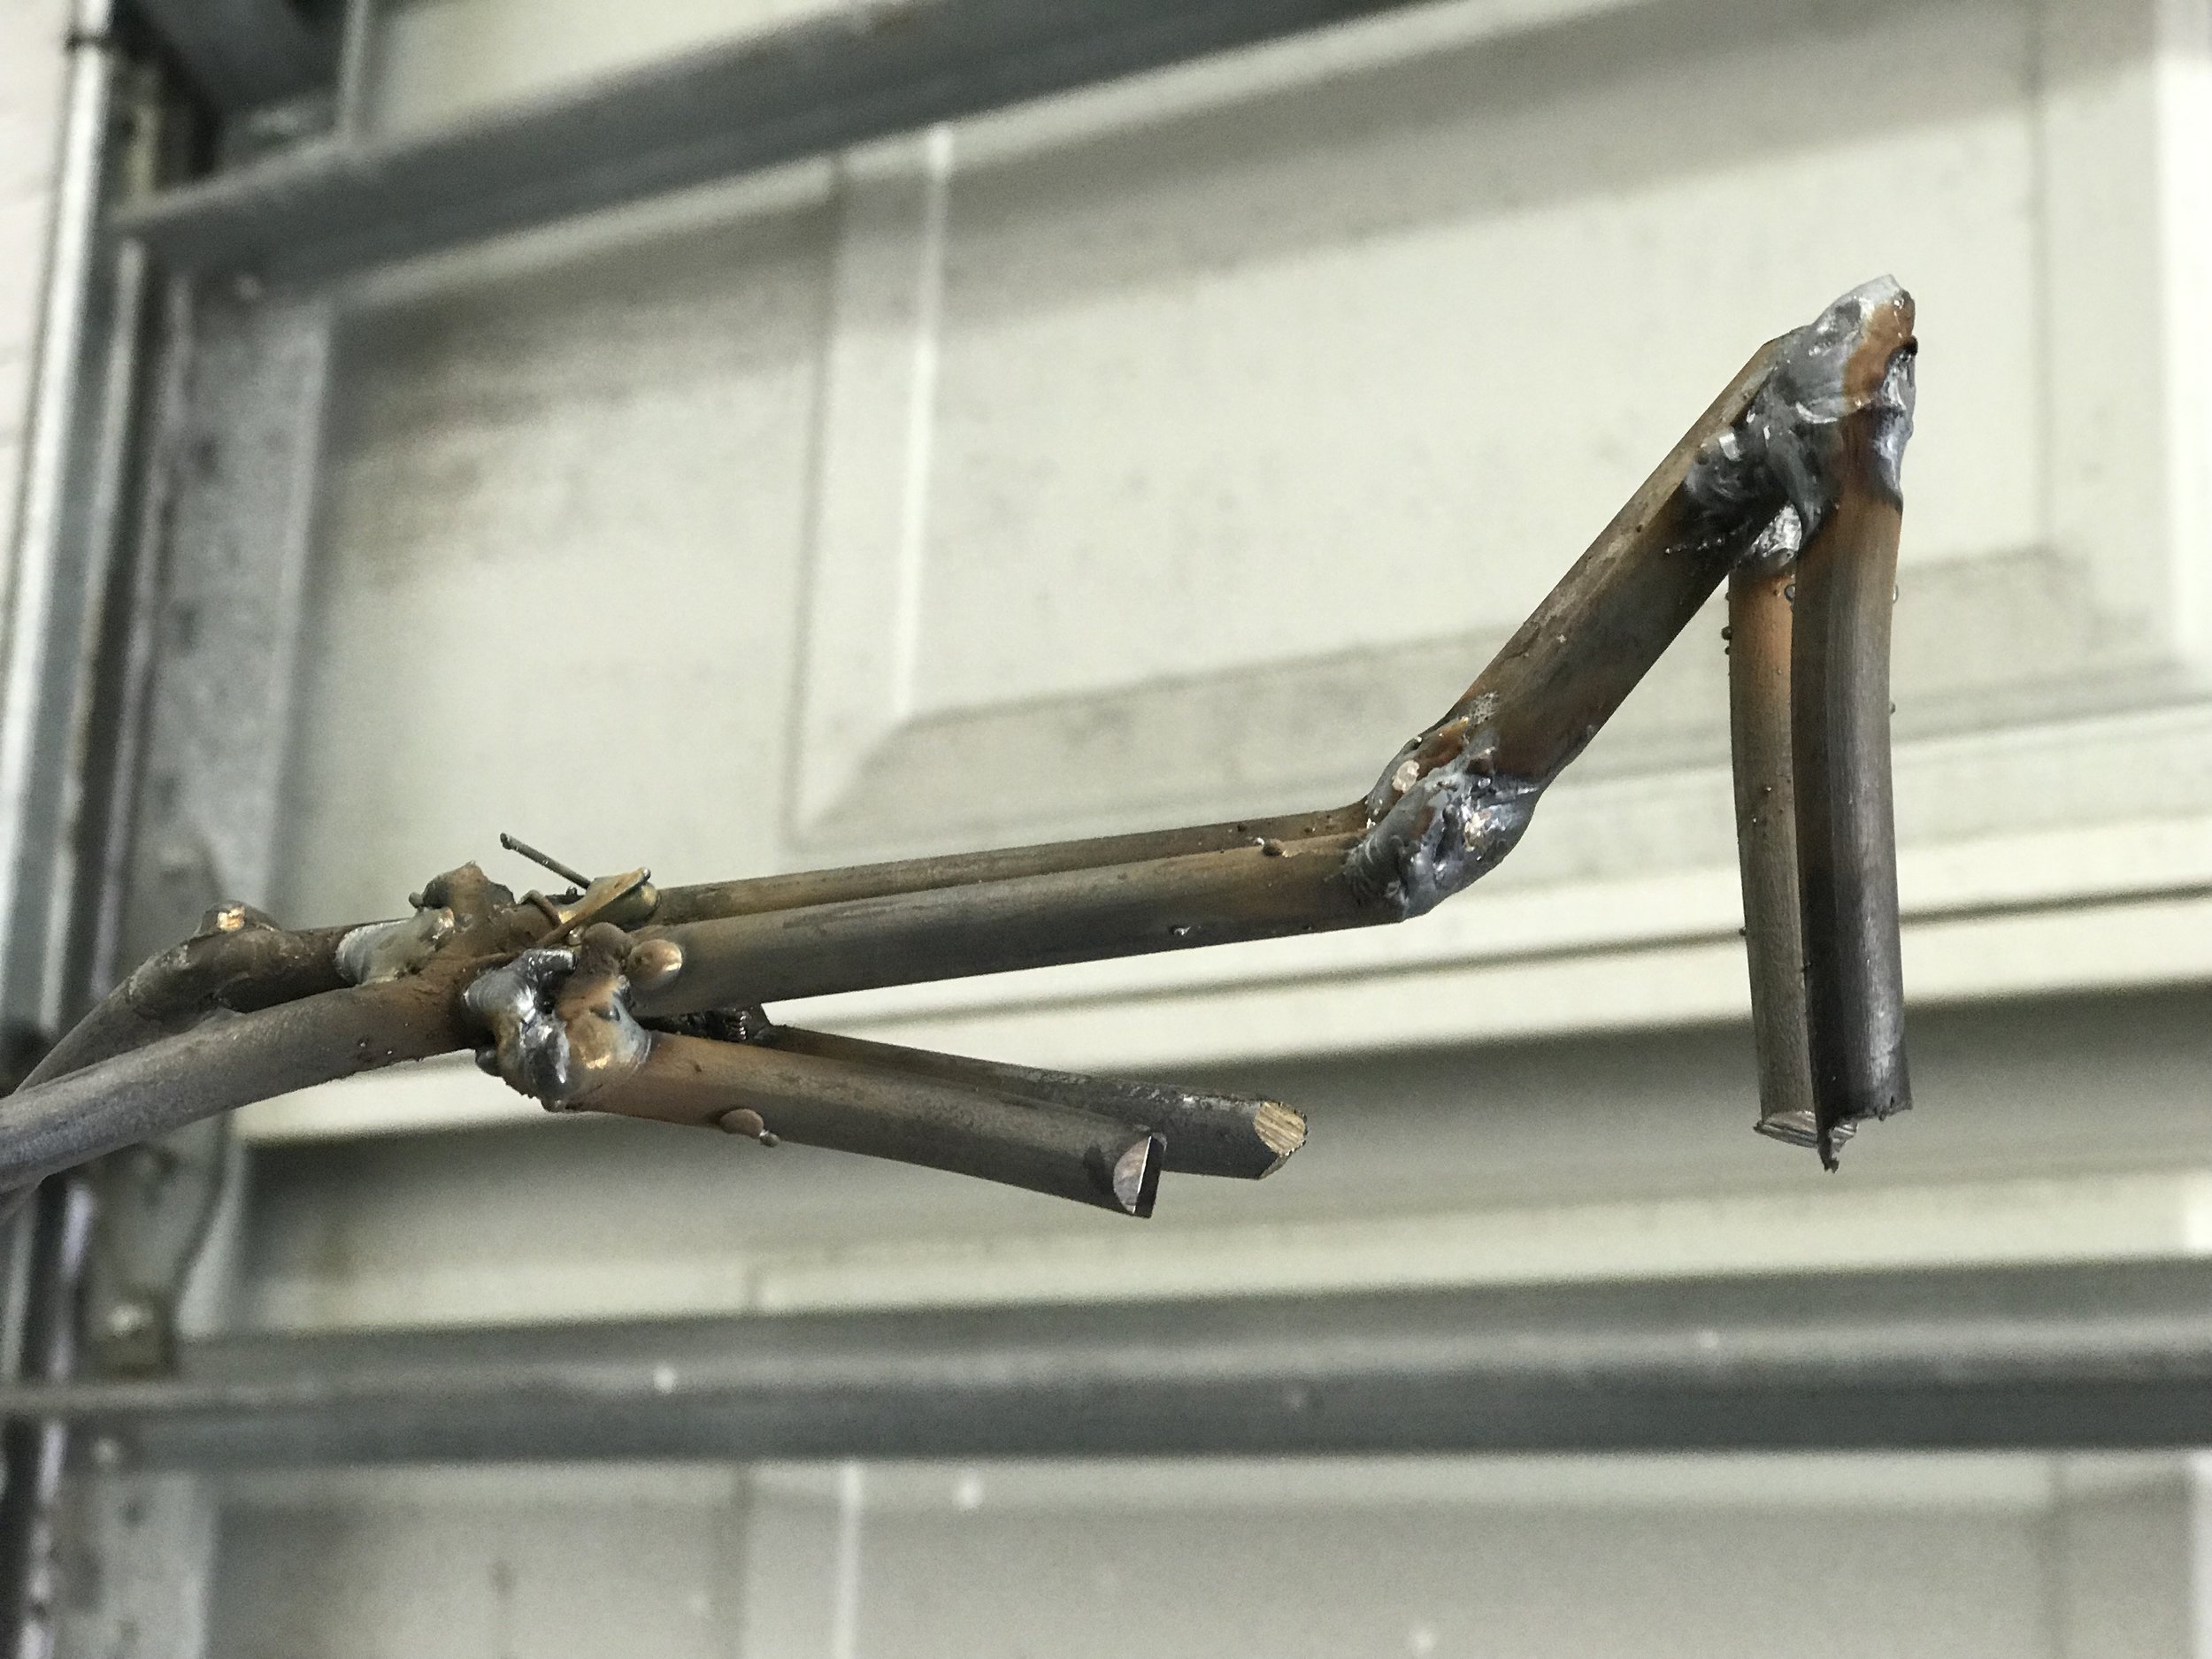
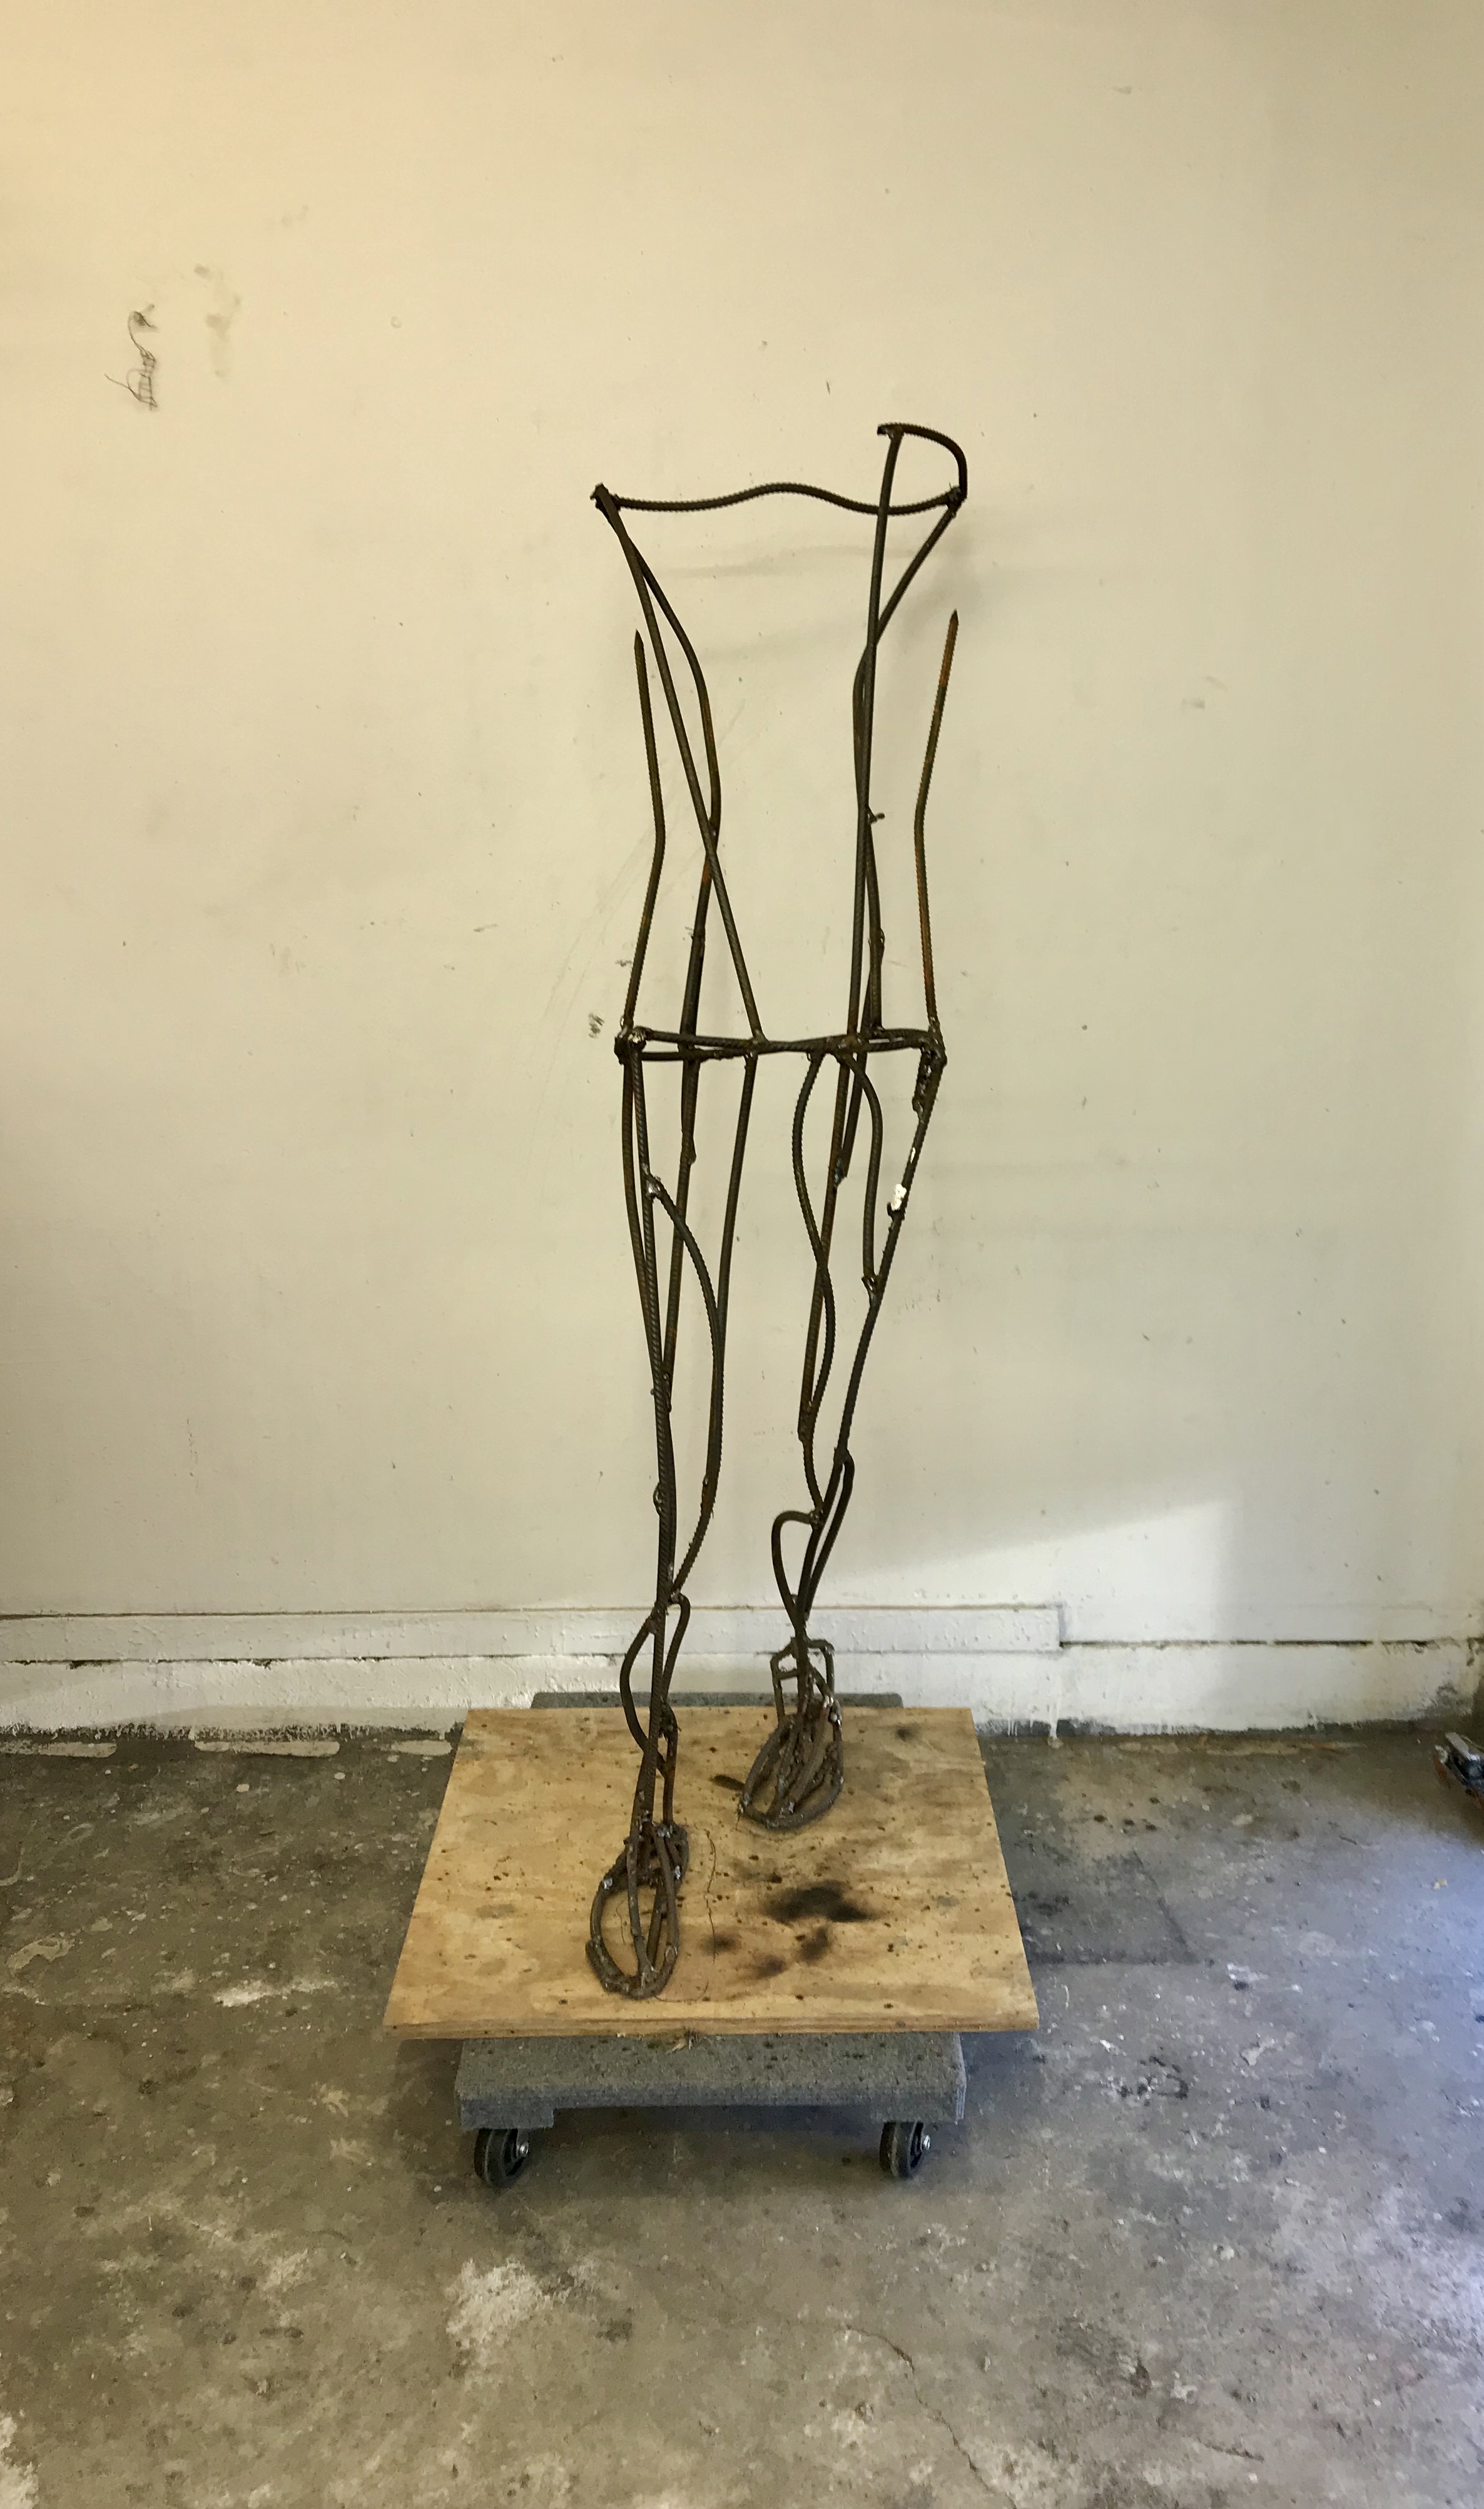
I thought I had a really good plan of attack: draw out a hand the size I want, measure how big each bone should be, cut the bones, and tack them together. Once they are tacked together, bend them into position. This is where the frustration began. Some of the tacks would either not bend or some would break, and I would then have to reweld them. I did finally get them all together. I was mentally exhausted, so I decided to attach them permanently to the arms tomorrow when I am more refreshed.
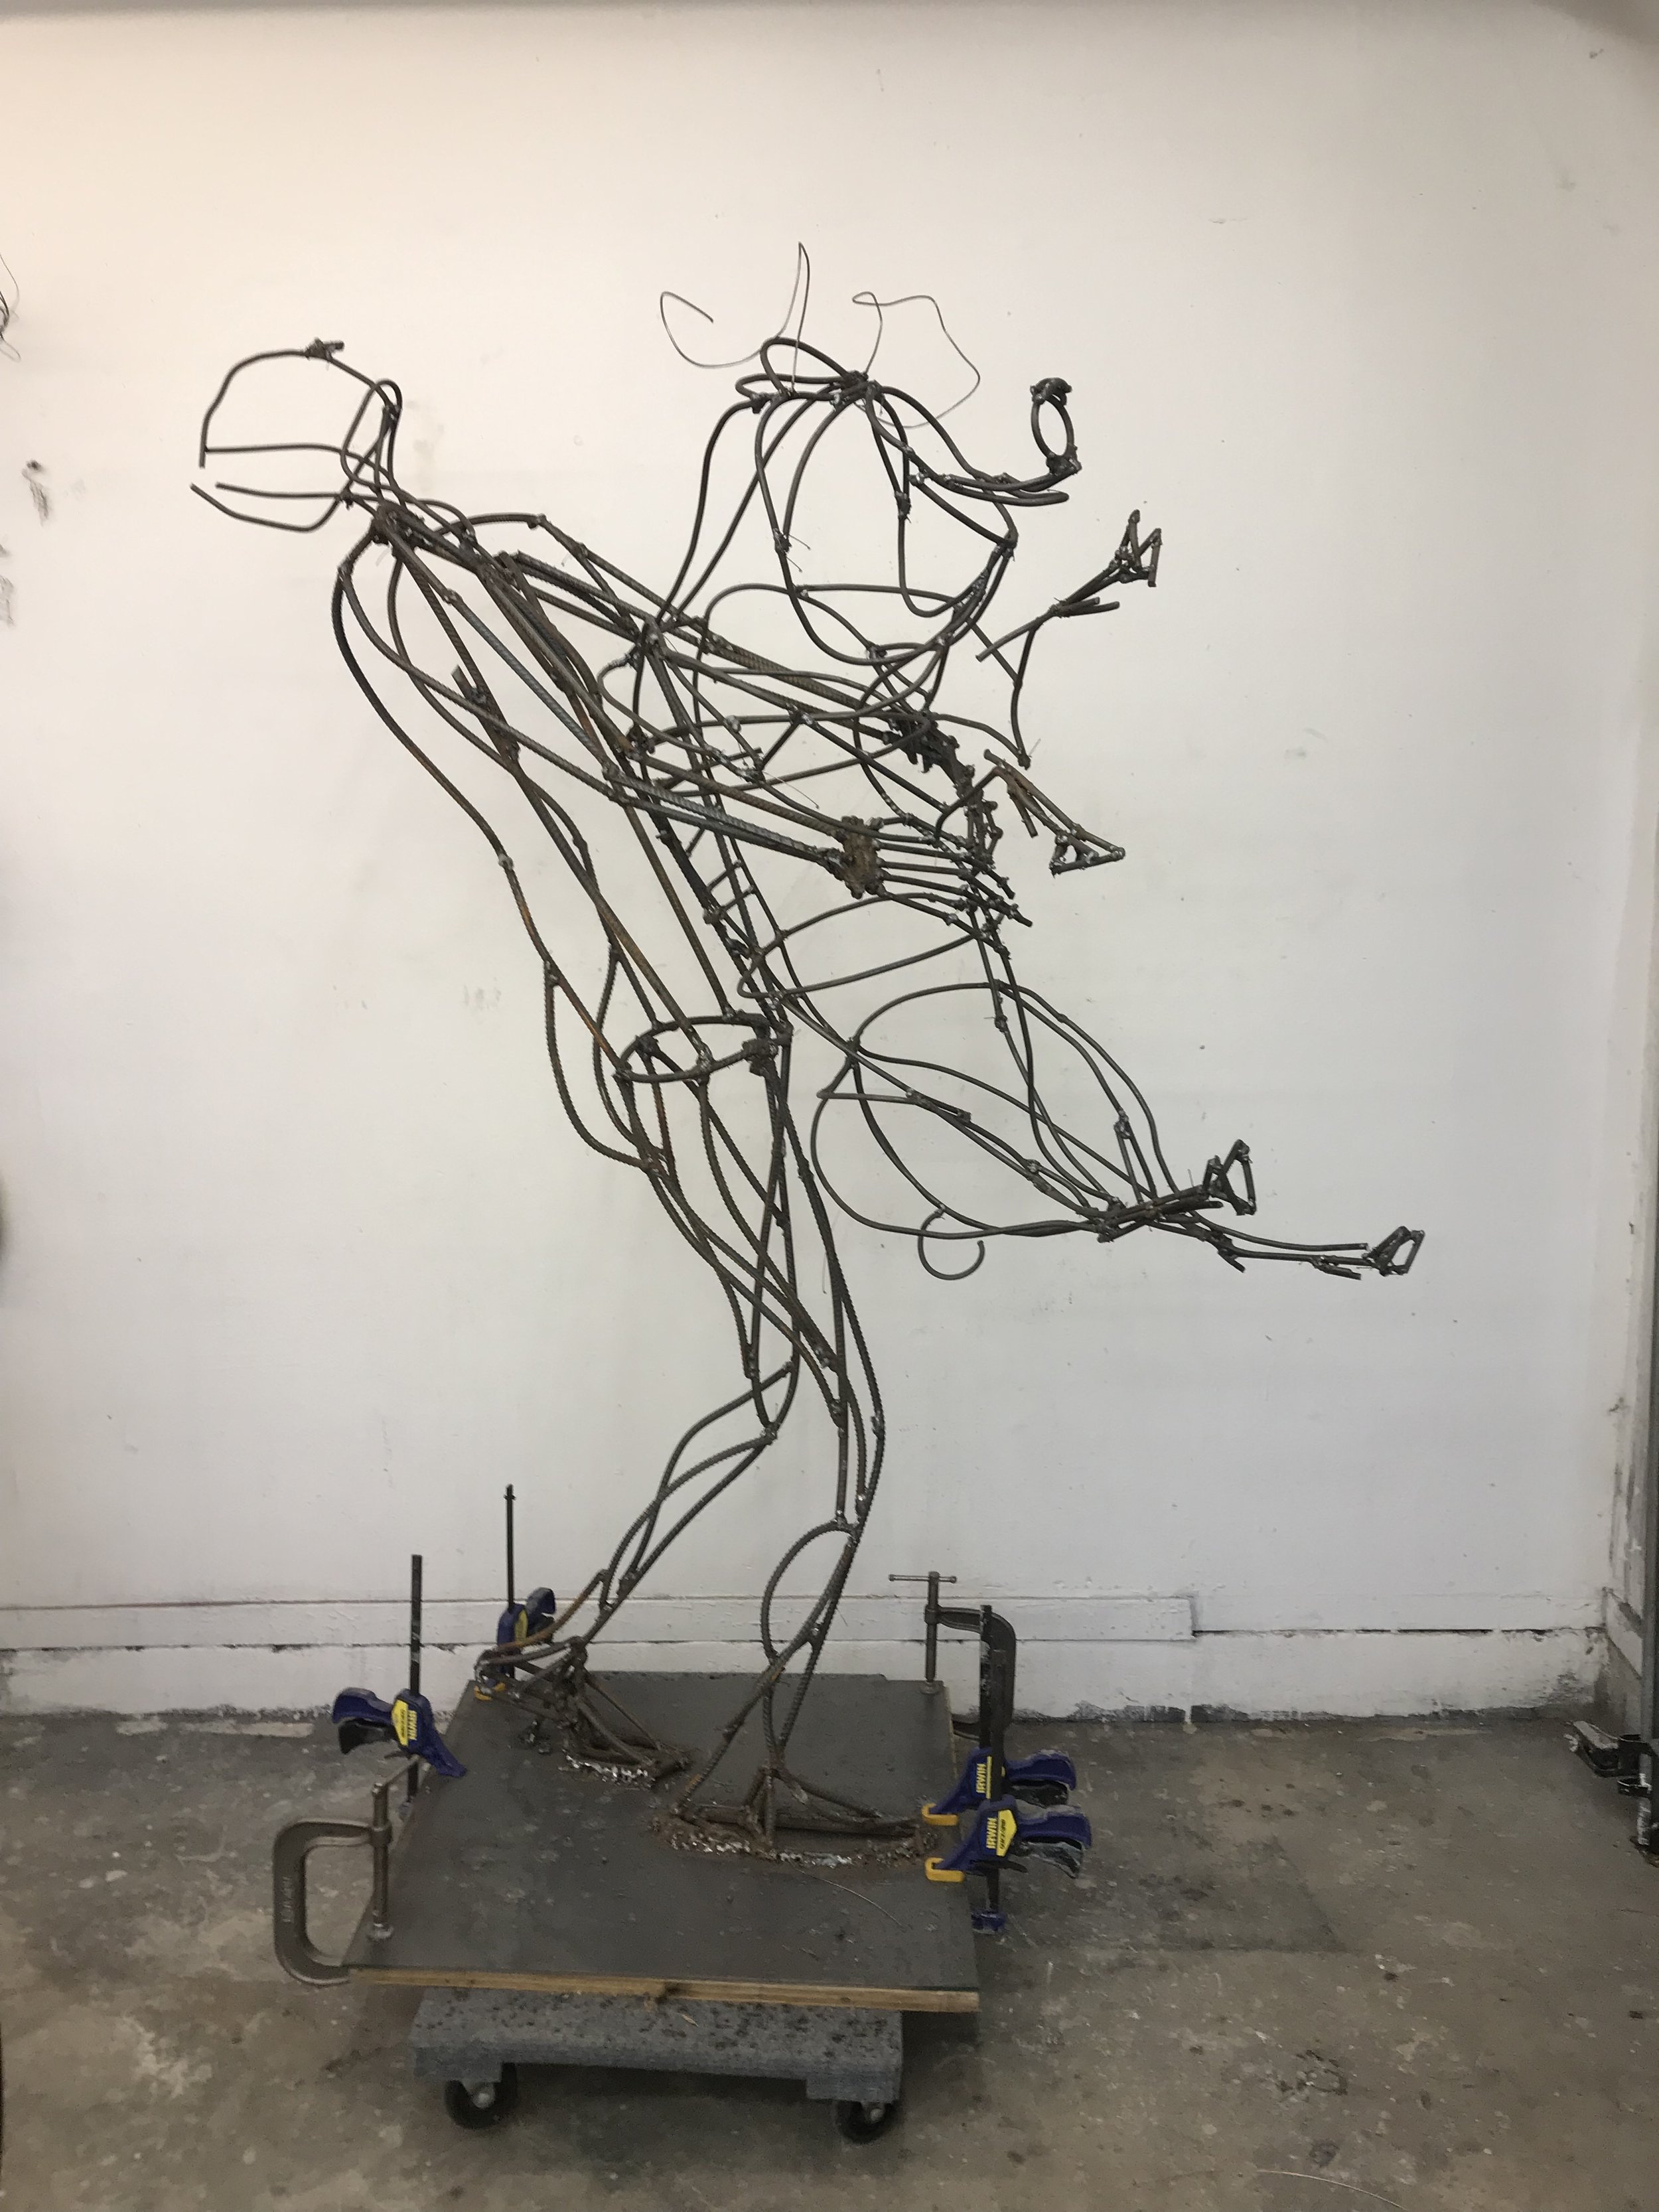
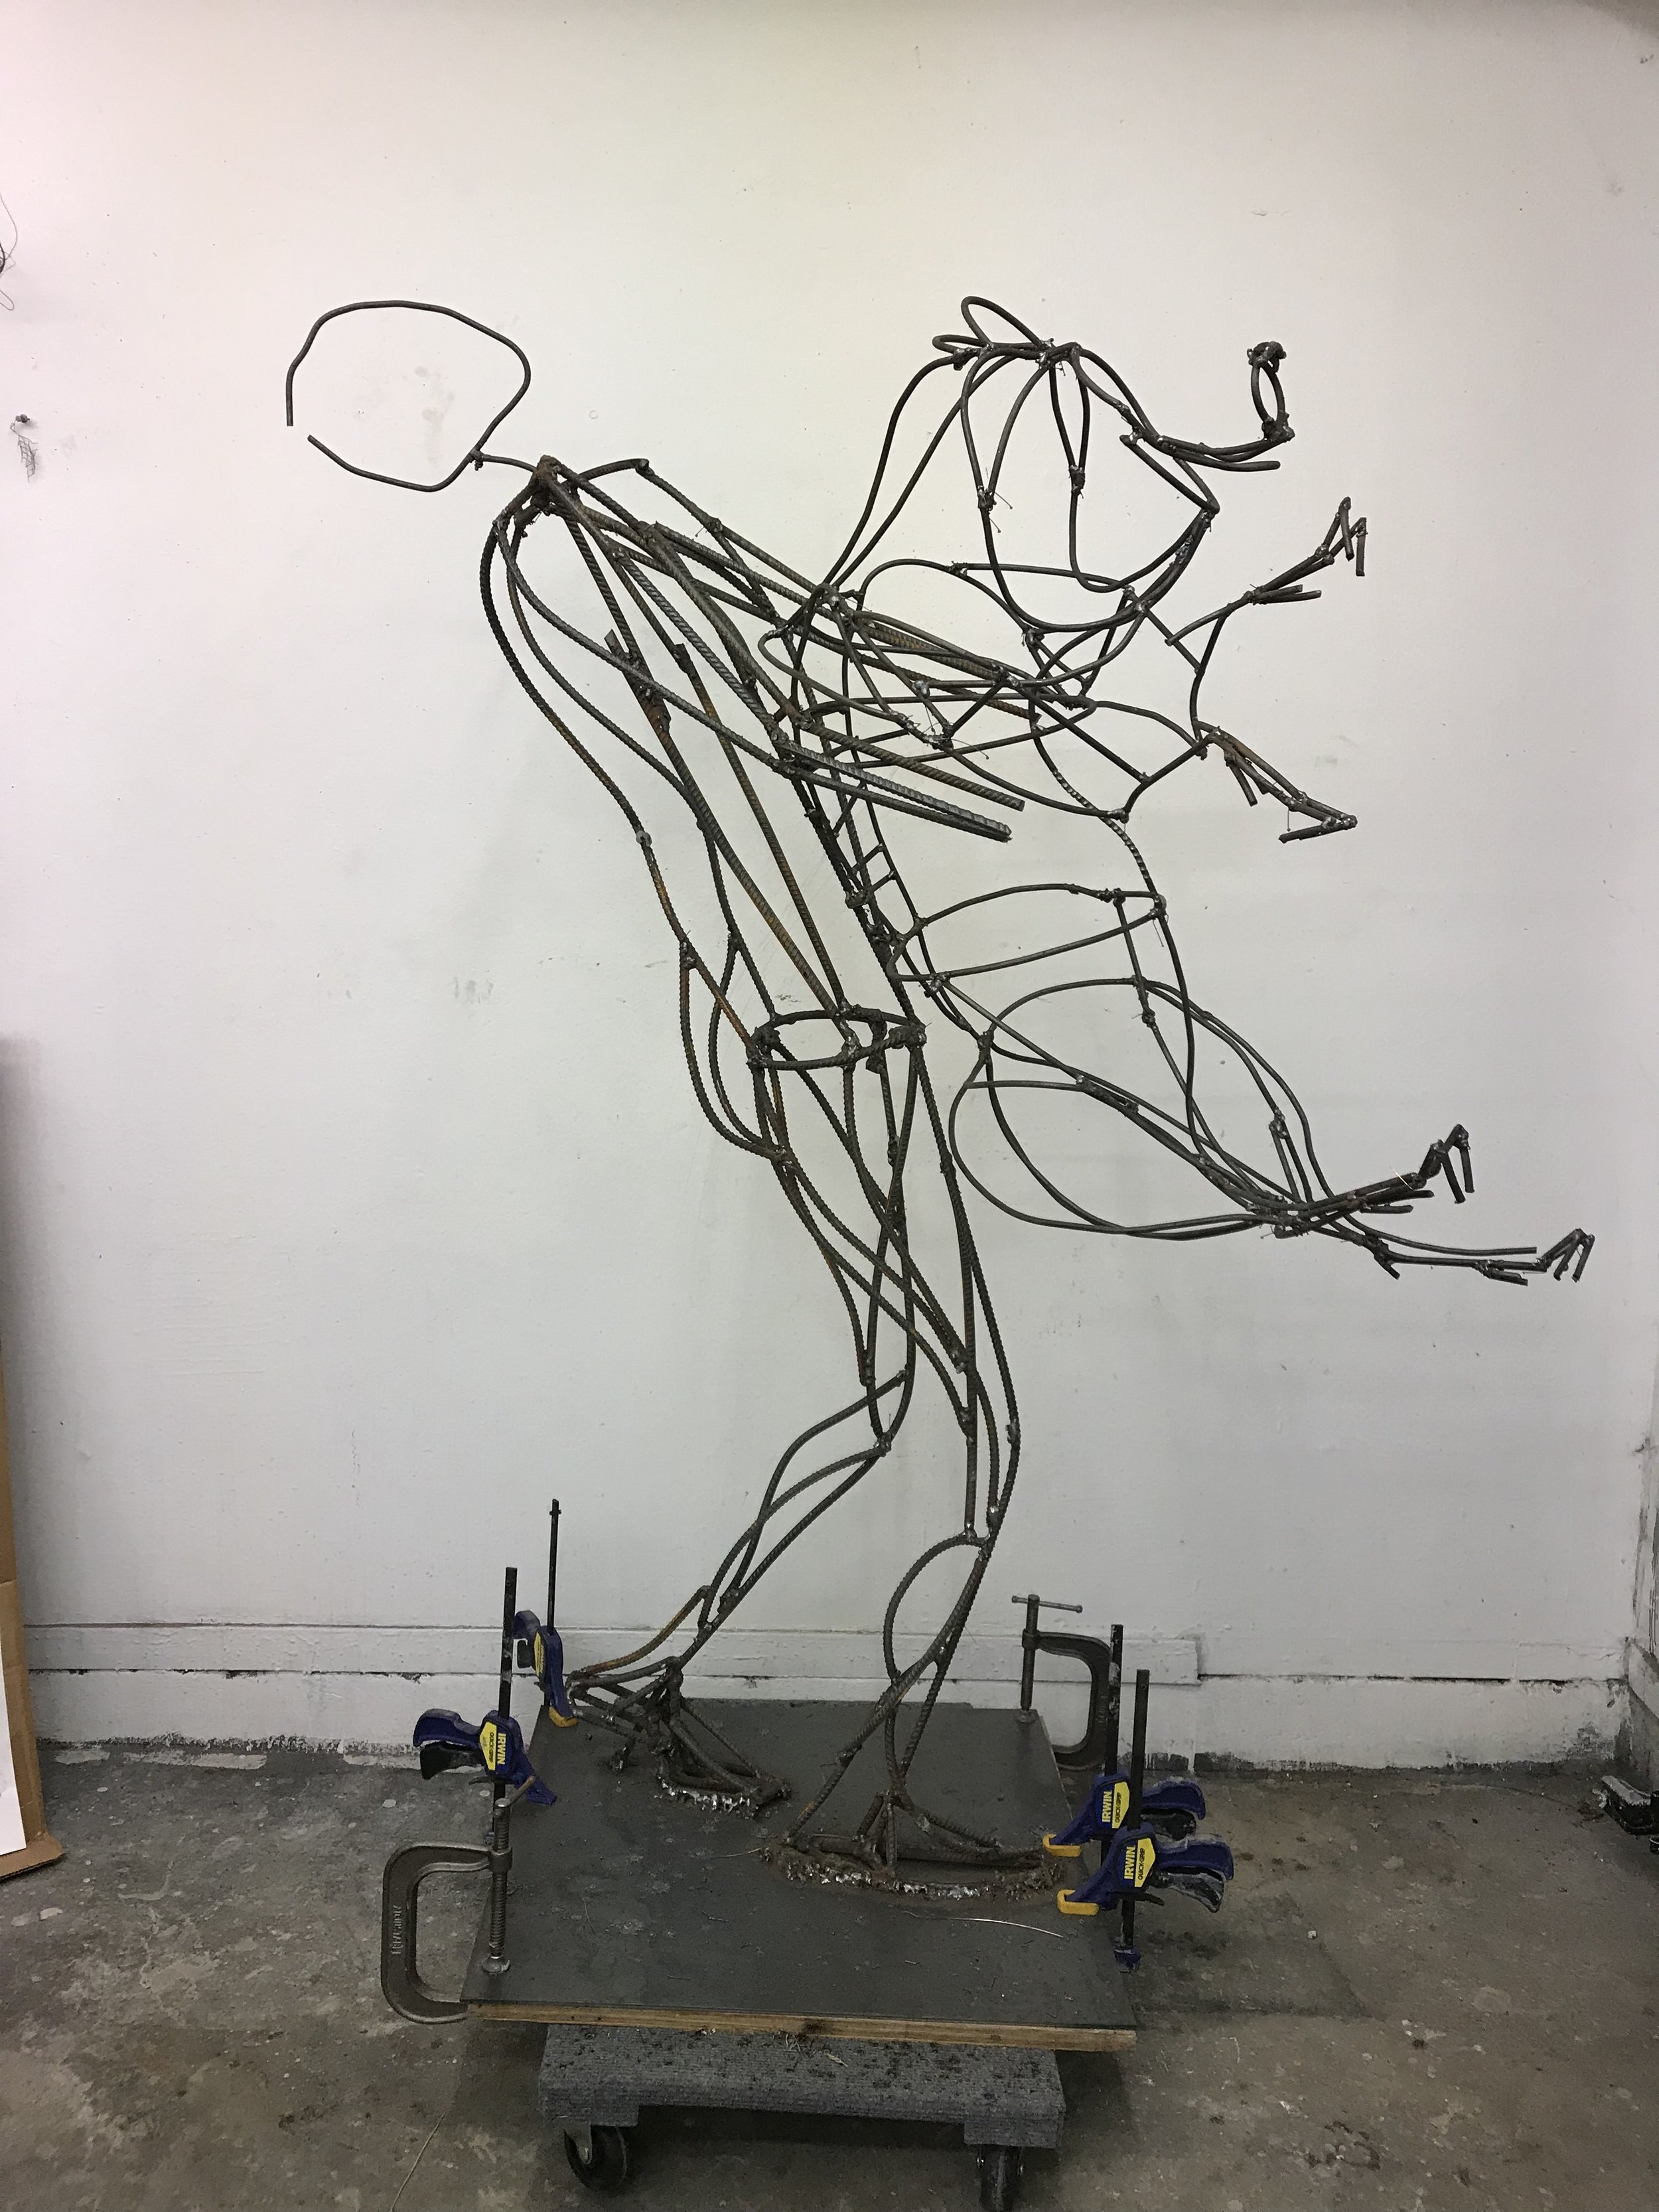
I did just tack them just to see how they look.
I hope I like them tomorrow.
FYI - I put really big welds on the knuckles because I like knarly fingers with big knuckles. If you deal with livestock, you probably have some pretty banged up fingers. :)
Digits barely tacked together
Left hand gripping Mr. Pig
Right hand gripping Mr. Pig
Both hands
The grip
I am getting close to completing the armature.
My day started with an empty tank. I was ready to roll and I had to run refill my argon tank. :(
really irritating
I can’t wait until tomorrow to do the hands. :)
The tension is starting to build.
For this piece to work I have to be able to show the strain or tension between the man and the pig.
The pig is huge and would have been extremely heavy to pick up. And pigs are not comfortable being carried, he would have been squirming like crazy to pull away from the rescuer.
I added the man’s head outline first. I want his head to thrust back to add to the tension between the man and the pig. Then I added the largest part of the pig's stomach. I need to know where the biggest part is in order to figure out where the man’s arms and hands are going to be gripping the pig. The man's hands will be just above the larges part of the pig gripping it tightly.
Front view
You can now start seeing the tension created with the pull of the man’s head and his arms vs the pigs legs.
Note to self on the head- make the armature on the small side, I can always add plaster to make it larger.
From the back
I still need- pig ears, tail, and to finish the pig’s legs and abdomen. The man needs his head, hands and more definition or volume on the arms.
INSPIRATION-
I am always looking for inspiration to use when sculpting. I follow @mcteams3842 who photographs Navy Seals in training. When I saw the image below I thought of the energy needed to of lift a big pig. I took a screen shot and saved it to my file of photos I look at when working on the piece. I would love to have the rescuer’s head this far back ....... I will have to experiment with it.
I highly recommend @mcteam3842 for amazing photography.
I am thinking of putting a cap on him and loved the brim on the below Navy Seals cap. instagram is a treasure chest of inspiration.
Chest, hoofs and dewclaws
Upper chest connected
Hoof and dewclaw
Hoof and dew claw
Hoof and dew claw
Today I made and attached the 2-4th legs and 3 hoofs.
View from the front
Right side view
The legs are only attached by 1 piece of pencil rebar at this point. Once I know exactly what position I want them in I will attach them at 2-3 more locations.
Pig nose
Building up the nose tip.
Aerial view
Nose and snout
side view
back view
Front view- pig nose, snout, back and 1 back leg, clipped to rescuer
Side view of rescuer and part of the pig.
Today I adjusted the shoulder width, started the chest and connected the back extensions at the top.
View from the front
View from the back
I might need to trim up his chest tomorrow. Grrrrrr
I started the upper torso.
I always make the shoulders too broad and then have to adjust them. I will do that tomorrow.
My work day was short today.
Today I spent a lot of time cutting off and rewelding. The upper leg/booty was too big. After four hours it now has a trimmer.
I am trying to decide if I need to reinforce the lower half of the body or move on. Once I reinforce the joints it is a lot more difficult to make changes. If I move on without reinforcing the welding joints, the piece could fall apart. That is my dilemma.
Connecting the legs and reinforcing them.
Building the hips and connecting the legs
Side view
I create triangles to give the piece stability and strength.
Left side view with triangles
View from the back
view of the right side
Using scraps to create triangles to strengthen the ankles.
Looking back, I can now see the hips are not right and are exaggerating the movement. I will have the movement exaggerated when the piece is finished, but for the armature, I will have to tone it down.
This sculpture is about the movement and the energy of rescuing livestock (a pig) during Hurricane Harvey. Today I have to decide on where the figure's weight needs to be to best balance the sculpture and express the energy of hoisting the swine to safety. The photos I took of Griffin while he was walking helped me committe to the foot placement. For the weight, I need new reference photos taken from each side. I am fortunate that my husband is always agreeable to posing for me. We wrapped a stool in a towel to stand in for the pig. Below are the new photos.
back view
Step one - I find or take a photo to use as a reference. Many times I take screen shots from videos I find online. This time I took photos of Griffin and Alex. At the time I was planning on sculpting “The Guy In the Astros Cap”. I had Griffin carry Alex and I took photos as he walked. I can still use the pictures of Griffin walking. Alex is too cute and tiny to stand in for the pig. I will have to wing the pig.
Step 2- I start with the armature for the feet, piecing them together from the small leftover scraps of my last sculpture.
I really like the pigeon toed aspect of this photo.
Even though I like work from photos I feel free to change anything I want.
You can see the rough coat on the underside of the bench. I am ready for the second application of concrete.
I have flipped the bench over and will work from the top to the bottom. You have to work from the top to the bottom because the process is very messy.
Step 1. Protect the bronze birds by covering them with plastic wrap.
Step 2. Paint the lath with a concrete bonding adhesive.
Step. 3 Make a slip from the concrete and the bonding adhesive. Paint the slip onto the piece.
Step.4 Apply concrete by hand.
Mateo. 5 Remain calm, enjoy the process.
It turns out my bonding adhesive is old, as a result my concrete does not want to stick together. I am grateful I am only working on the scratch coat. I can fix anything that falls off when I apply the final coat.
I like this branch growing around the other
Things did not go as planned as I worked on the bench. My bonding adhesive was old and the cement just was not sticking. And marriages do not go as planned. The lesson here is just roll with it. I will get new bonding adhesive next week and the next application will go smoothly. It is not worth getting upset over. The fun part of marriage is having someone go through the rough spots with you, someone who makes the rough spots not so rough, maybe even fun. Look for the good in every situation, it is there. Make your problems work for you.
My first thought was to make a sculpture to be exhibited with the drawings of a man rescuing a woman and a baby. I loved how obvious it is in this drawing that they are strangers. He is carrying her but with his body language he could be carrying a sack of potatoes. His energy is focused inward, perhaps he is worried about his own family. She is the same, she is affectionate with the baby but she is not snuggling into her rescuer. There is not a history between the rescuer and the girl.
After some consideration, I have decided to make the sculpture a livestock piece. I changed my mind because I feel the livestock pieces need to be very large to properly convey the extraordinary feats some people went to in order to save their livestock. I also like the fact that it is unexpected to make the sculpture of a pig rescue. I can always make a sculpture from the other drawing later.
“Bringing home the bacon”
photo by Nash Baker
At the end of every semester at Glassell, we clean out all the disheveled cabinets and drawers. We throw away broken tools and parts and reorganize the rest. A few years ago, while cleaning out the hammer and chisel drawer, I came across a worn out sledge hammer. Through the worn garish red paint the satiny steel skin of the mallet was unblemished, it had gotten better with age. Its handle on the other hand had not weathered as well. It resembled more of the rugged surface of old drift wood than a powerful hand tool. Its life had been extended several times with layers of duct tape that were now thread bare. I could only imagine over the years how many passionate sculptors had partnered with this handle and mallet to create their dreams; how many artist used it to mold their creations. I loved it for the history it held in the splintered grains of wood of its handle and the silent strength of its barely-red steel mallet. It’s days of hard labor are over. I bought the school a shiny new blue and yellow sledge hammer with a rubber handle and took the old red maul home to rest. Uncertain of its exact future, it rested on my den coffee table for the better of a year. Guests always comment on what a cool tool it was. It sparked unsolicited stories of hard work, of past labors and stubborn relatives. This summer, I decided to make a mold of the old maul. Each casting will tell a different story. This first casting is “You Make Me Stronger,” an ode to great partnerships as in the one with the artist, the handle, and the mallet.
In the fall of 2016 I decided to experiment with sculpture materials. I challenged myself to sculpt a new sculpture a week, each week in a different material. As my subject, I chose the German beak crested trumpeter with leg muffs pigeon because he allows me to express a lot of movement and energy. I have many drawings and a bronze sculpture of the German beak trumpeter. From a sculpturing point of view, his feathery feet keep him balanced without a pedestal allowing for lots of the expression of energy and emotion.
It turns out that the bird known in the US as a German beak trumpeter pigeon is the same bird that Picasso drew as the peace dove. Everyone knows His famous "peace doves". This particular pigeon was given to him by Henri Matisse. It is described as a Milanese pigeon. Possibly it was from Milan, but you can tell by the fancy feathers on his feet that it is a German beak-crested trumpeter with leg muffs. In German and French, the term pigeon and dove are interchangeable.
I am no longer committed to sculpt a peace pigeon a week but I don’t hesitate if a material or found object jumps out at me to turn it into a sculpture.
The very last beak break.
Now that I have three pieces in my women’s movement body of work I have decide to alter the title and artist statement of this piece.
March 3, 2013 - Woman Suffrage Procession -Inez Milholland
Riding aside historically represents oppression of women's rights. Suffragette Inez Milholland rode astride in the 1913 ride/march on Washington. Inez was not only protesting for the right to vote, own property, to sue, but also to ride astride.
This is my first piece of work that addresses the women’s movement. It first resonated with me purely from an aesthetic point of view, as I knew the aged leather would reproduce beautifully in bronze. What I did not realize, however, was that this sculpture would represent more than a stereotypical Texas western symbol. In my women’s movement body of art it represents the strength of Victorian women and the beginning of the women’s movement, the March 3, 1913 suffrage parade in Washington.
For more information in the 1913 women’s movement see the links below.