
Echoes of Existence: A Journey Through Nature's Narratives To Redefine The Anthropocene.
Echoes of Existence is a social sculpture site-specific art installation on the campus of Indiana University. It will reside at Hilltop Gardens in a field of manicured turf grass, creating a stark juxtaposition between a cultivated lawn's carbon footprint and a natural carbon sink. A work of conceptual art that the students of Indiana University will install. It is a living labyrinth, sculpted from the tapestry of Southern Indiana's native plants, embodying the region's rich biodiversity and echoing the inherent beauty of natural systems. In a land that once echoed with the thunderous presence of thousands of bison roaming the prairies.
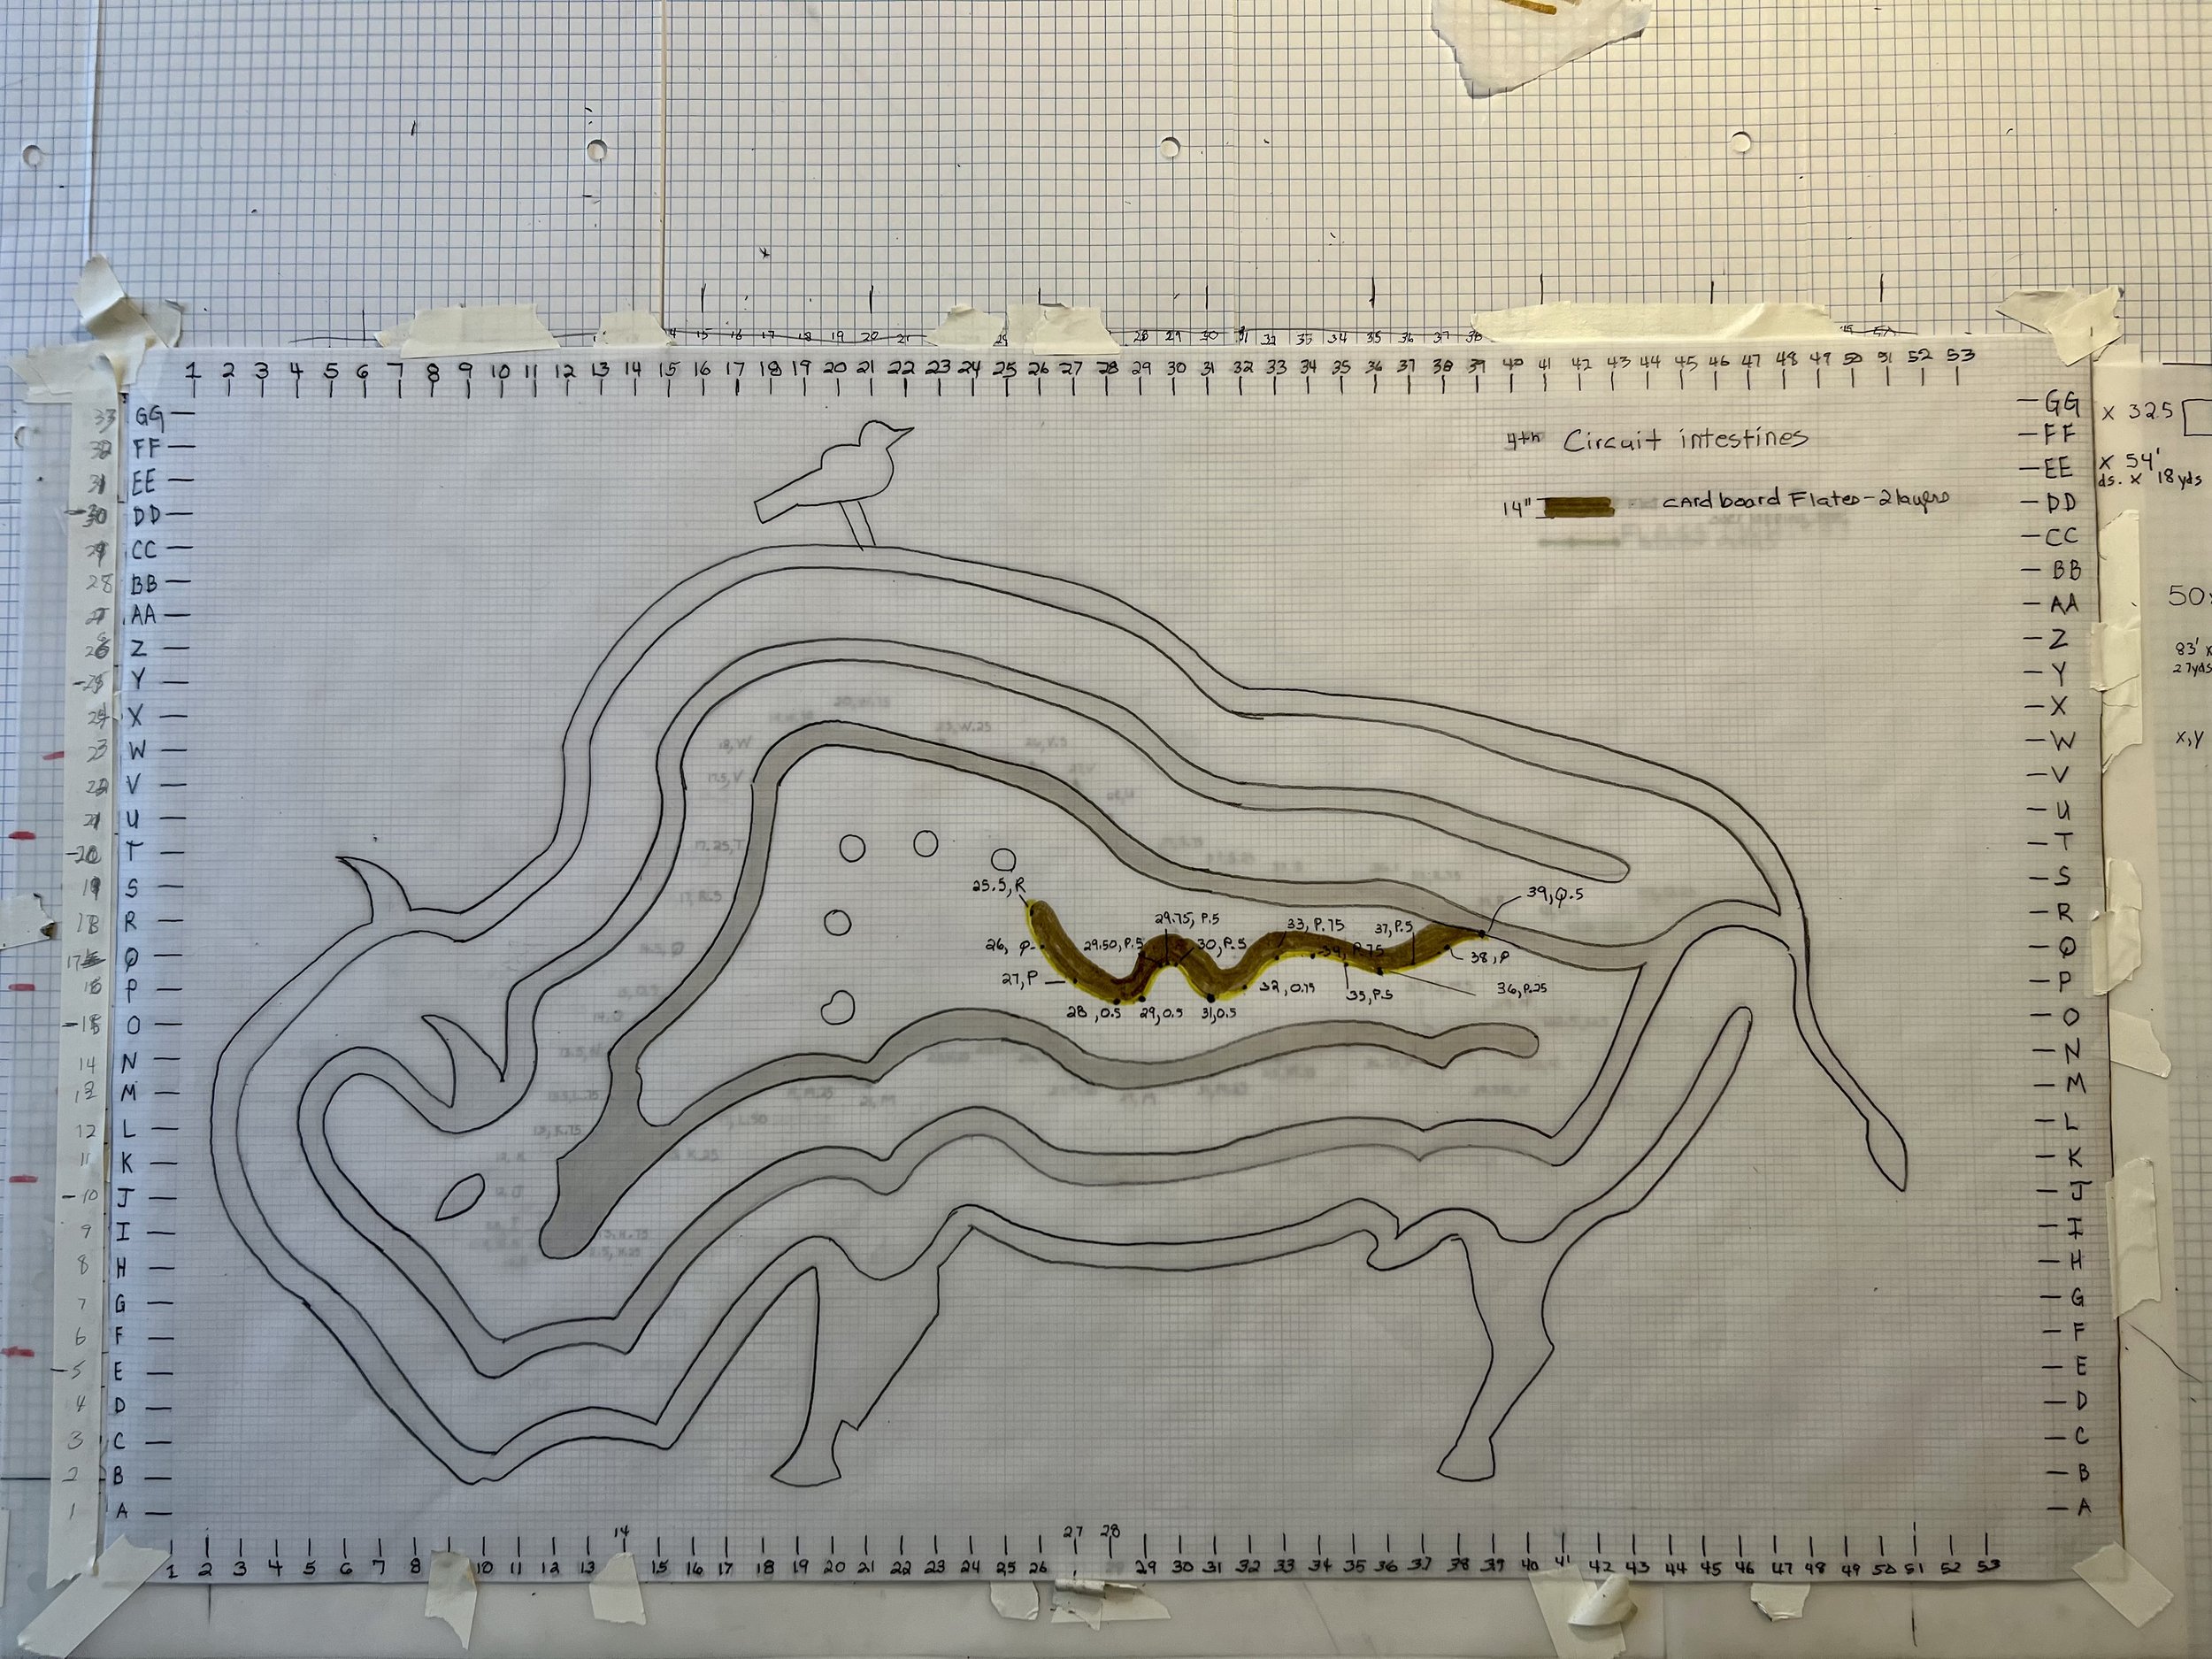
The materials are modeled as b.bison grazing with a bird on its back, a tribute to the bison's eating and waste habits that have supported North America's ecosystems. The entrance, marked by native limestone inscribed with "What might seem like the endpoint..," challenges our perceptions of beginnings and endings, urging us to shift from modern humanity's linear thinking to a cyclical understanding of our relationship with nature.
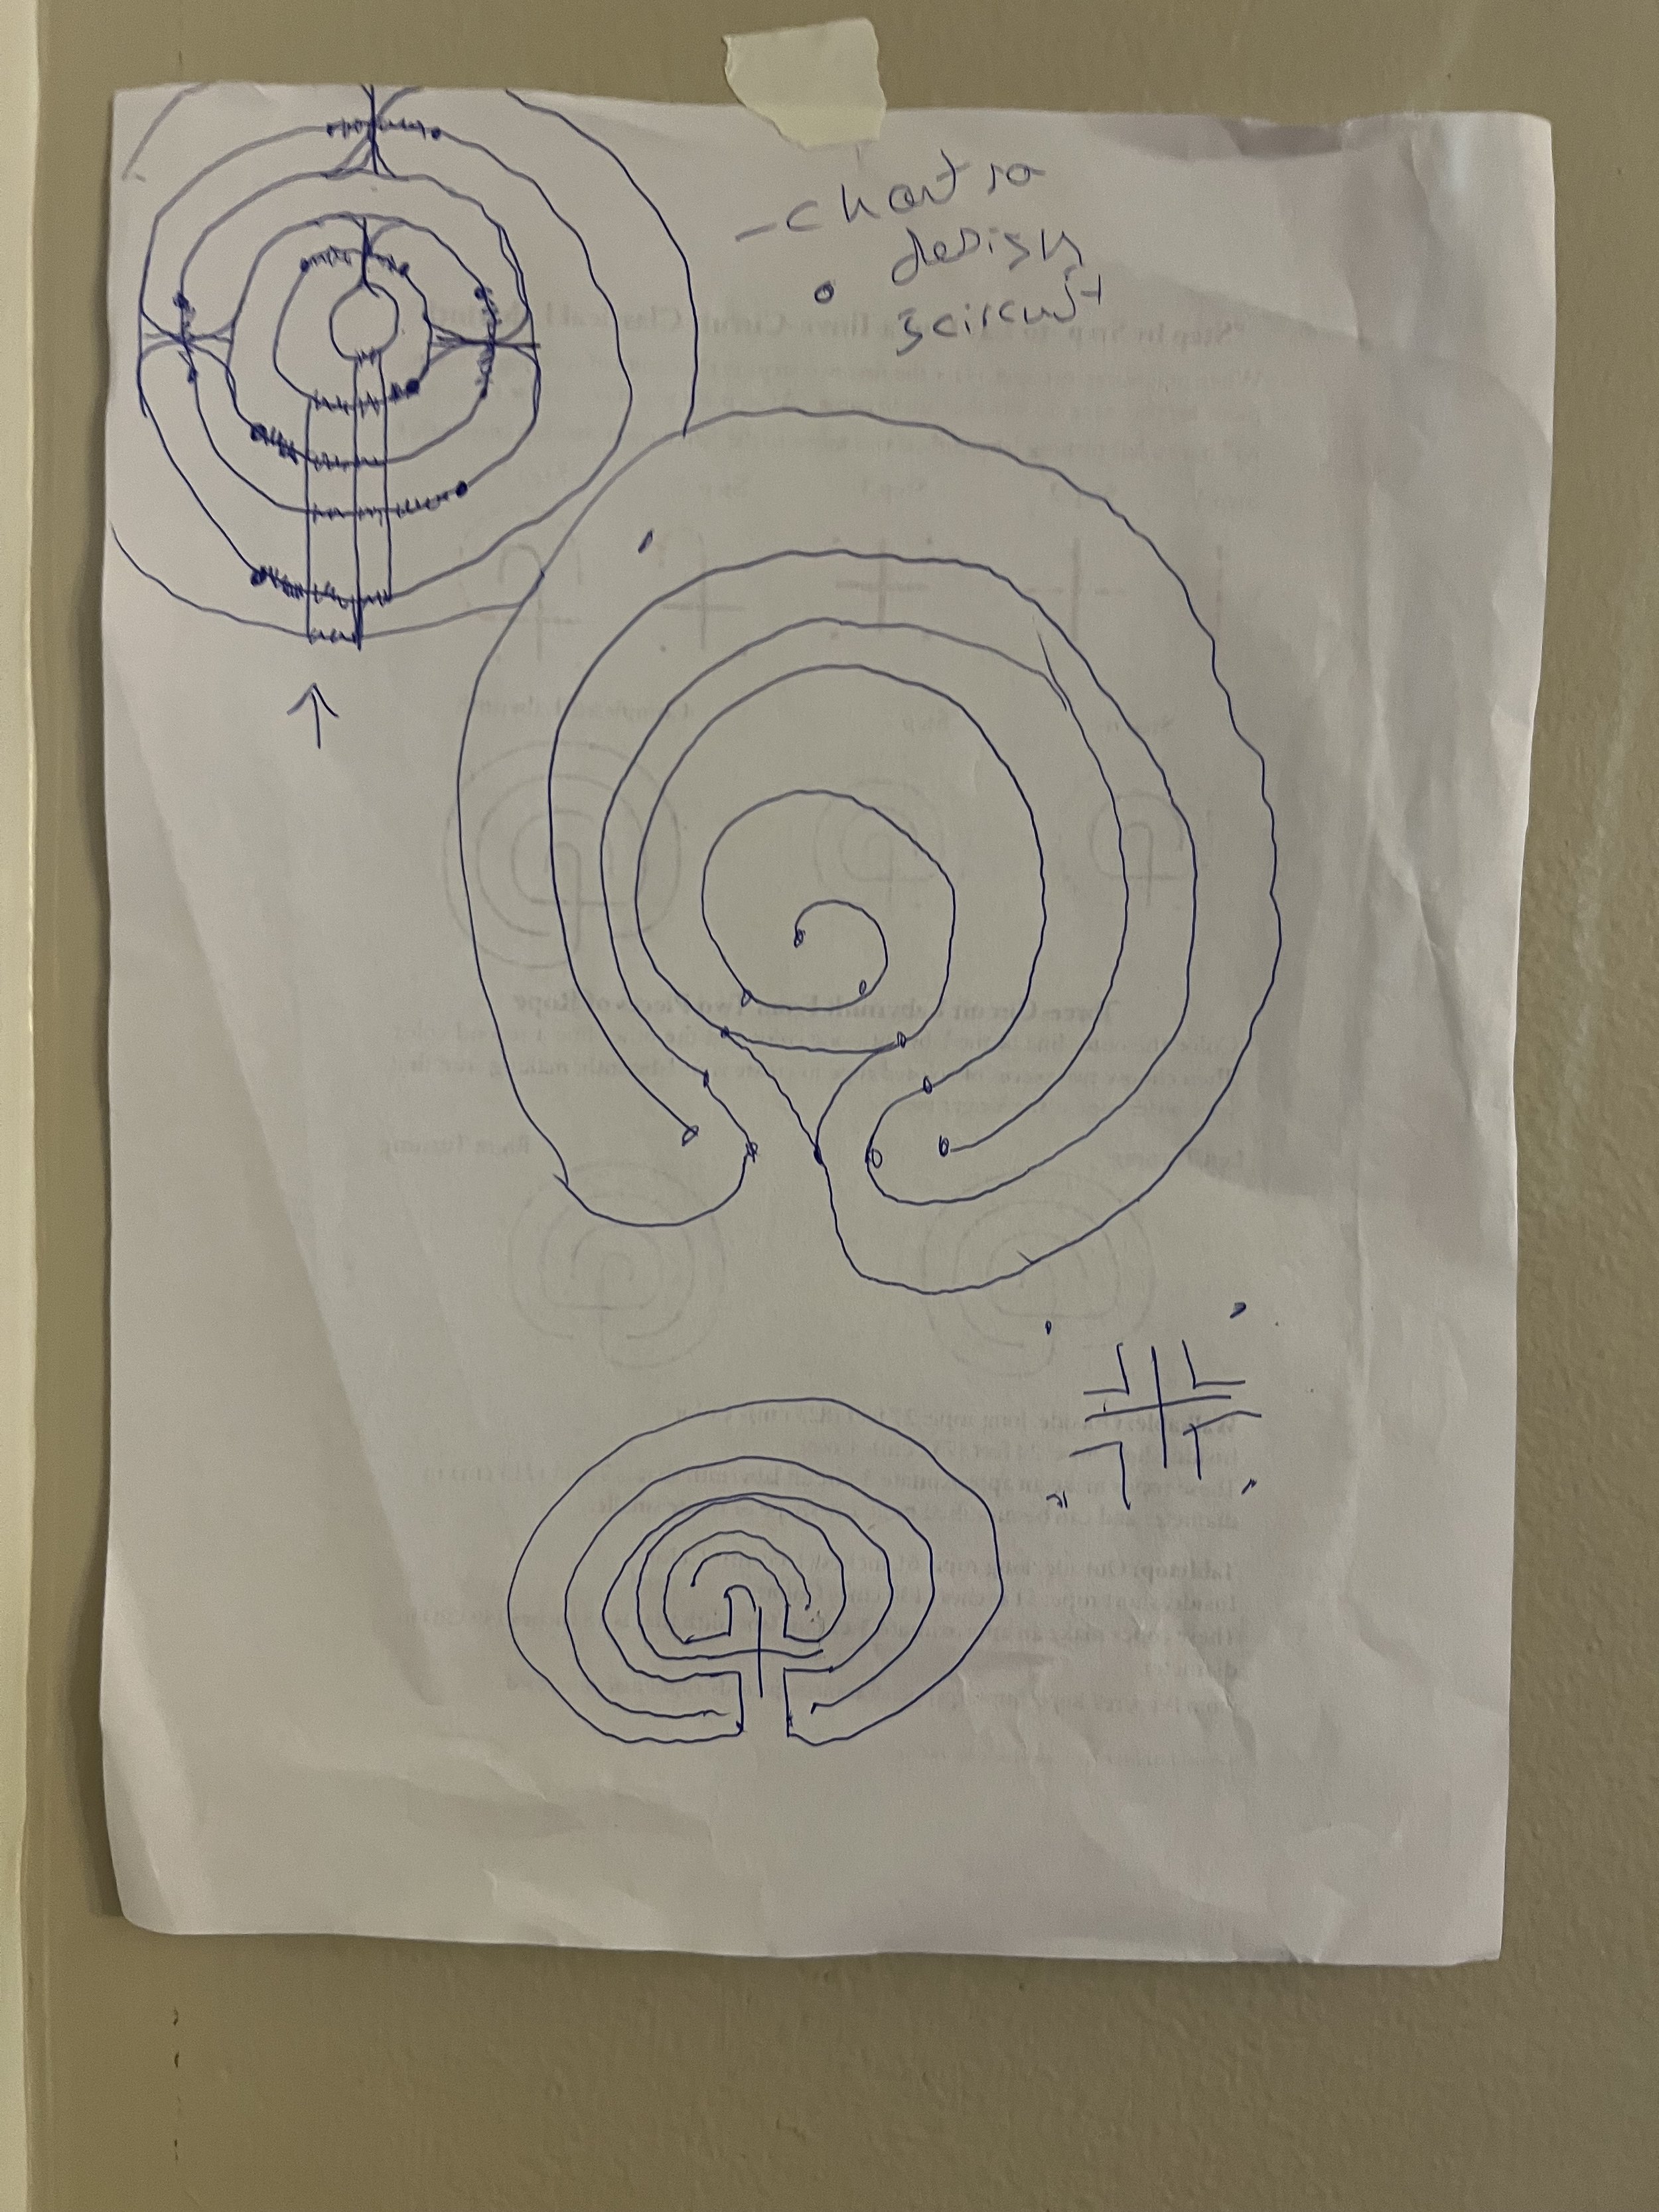
On the journey through this living labyrinth, one is engaged in a walking meditation guided by the rhythm of the winding path. A labyrinth has a fixed path, a deliberate design that allows your mind to wander freely, unburdened by the fear of being lost in a maze. On this path, one is immersed in nature's diverse colors, textures, smells, sounds, and movements, each element enhancing the experience and making every meditative walk unique.
The path culminates at another limestone marker adorned with rudimentary carvings representing the ecosystem's historical biodiversity that reappear when ruminants are reintroduced to the land. The inscription echoes, "What might seem like the endpoint...may also be the beginning." This mantra provokes contemplation on the cyclical nature of existence, where endpoints can transform into starting points. It encourages us to reconsider our landscape policies and redefine the Anthropocene Epoch as the age in which humanity falls in step with natural systems.
Surrounding this internal limestone marker are four native tree stumps, representing the four stomachs of the ruminant's digestive system. They also serve as seats for reflection to digest how small acts impact extreme climate and biodiversity.
"Echoes of Existence" is a tribute to the enduring spirit of nature and a reminder of our responsibility to care for it. Inspired by wisdom from ancient Greek philosophy, this living labyrinth depicts all life as a complex journey of constant transformation of relationships and the knowledge that what appears to be an endpoint can also be a beginning. It invites participation and engagement in a dialogue with the land embracing life's cyclical relationships. It is not just an invitation to observe but a call to action-to think, to act, to regenerate.
links to other Living Labyrinth blog posts.
Artist in Residency at Indiana University- Living the Dream Installation.
IU- How do you draw a labyrinth?
IU- What kind of Labyrinth should I make? What is my site-specific message?
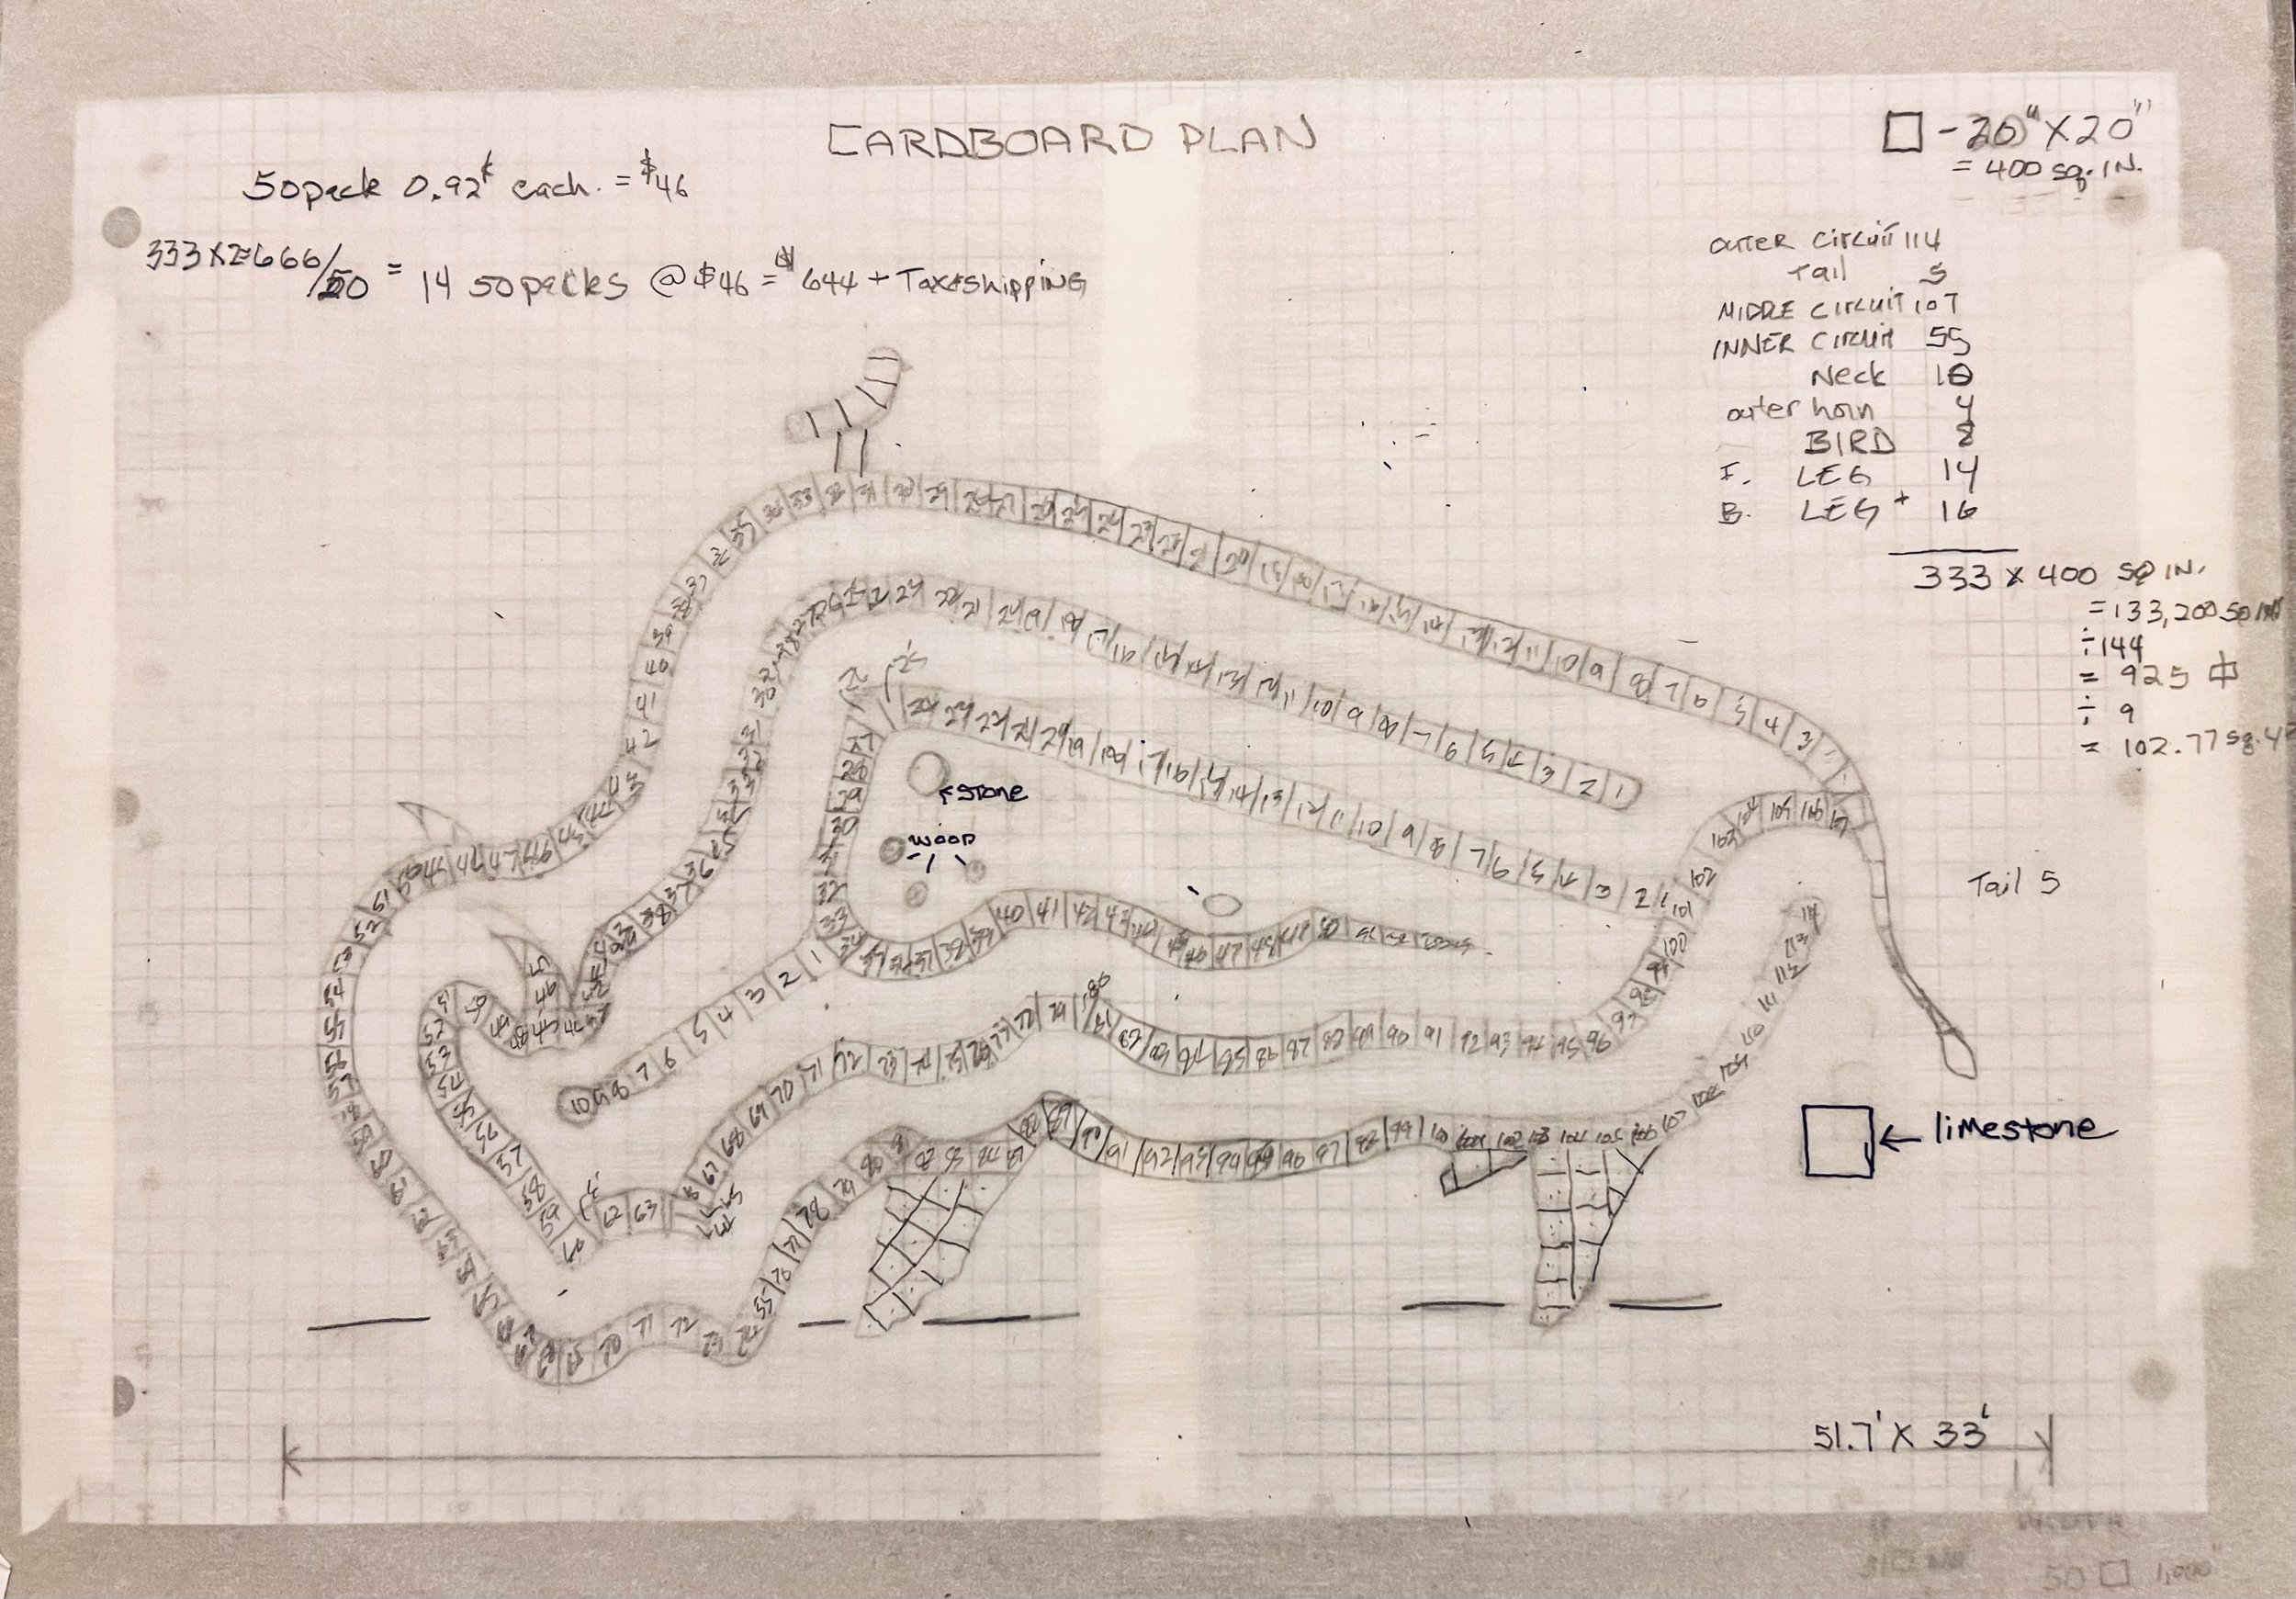
IU- How do you build a labyrinth from 8’ X10” to 83’ X 54’?
IU- Natural Systems - digestive system.